

My craft desk was really driving me nuts. When we put the desk together, we bought cheap, brown cube-storage shelves to use as the legs of the table. We used some similar to these Kallax IKEA shelves and a flat-paneled door slab. Then, we secured the door slab to the shelving unit by drilling screws from the underside of the shelving unit into the door slab. We measured the door slab and top of the shelving unit and found screws that would work. I didn’t want the screws to come out the top of the work space, so we made sure that the screws were shorter than the entire height of the shelving unit and the door.
Eventually we were going to paint the shelves white. Because, at the time, we could only find brown cube-storage shelves. I really wanted the space to be white and fresh, but I thought I could live with the brown for a few months. Well “eventually” turned into three years, and I was so ready for my space to be much more cheery.
I wanted to paint the cube-storage shelving white, but that would entail taking the entire desk apart. I tried to paint the desk white without taking the entire thing apart. I think it was safe to say that that idea didn’t work. I had paint all over the place. And I also missed a ton of places that I couldn’t reach. I probably should have prefaced by saying that I am a horrible painter. I would have spray painted the entire thing if I had enough plastic to cover everything else in the room. So, long story short, the paint didn’t work out too well.
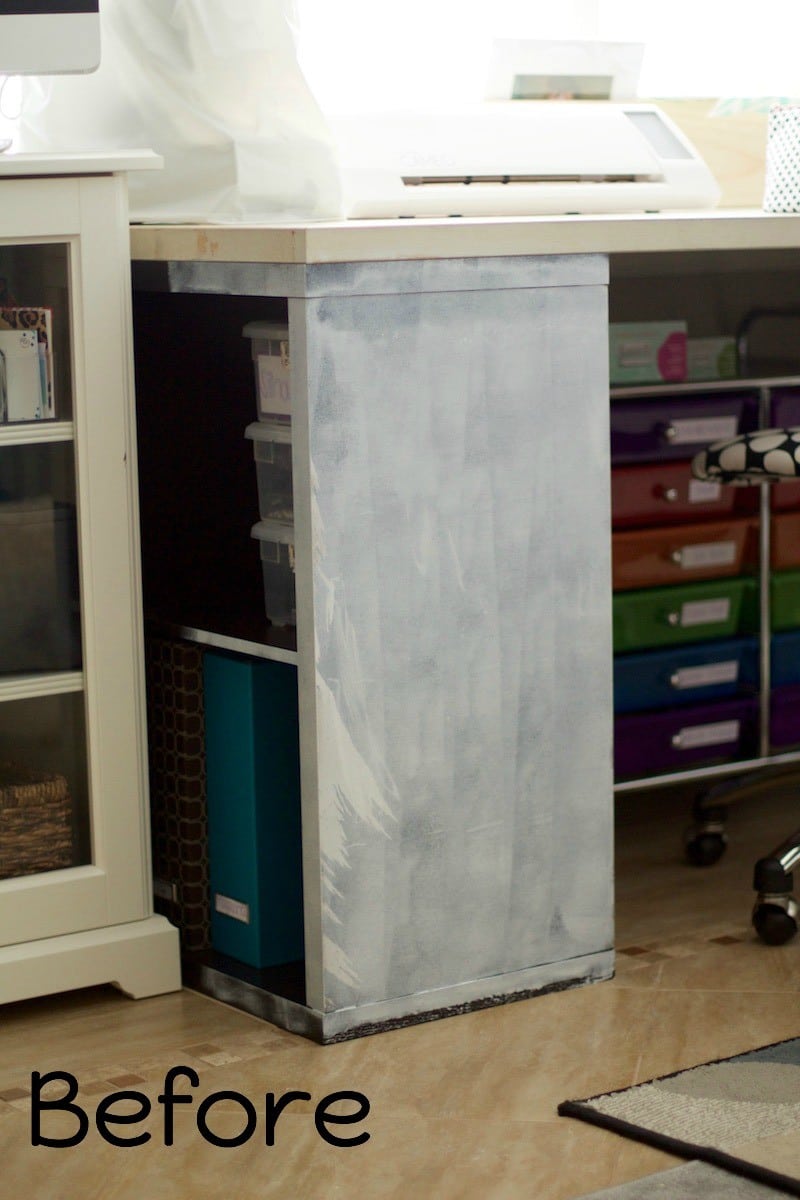
I thought about adding some shelf liner to the outside of the shelves. I tested out using some shelving liner I found at The Container Store on one side of the desk. Within a few weeks, the shelving liner started to peel and fall off. It also didn’t help that the kids thought they could color on the desk, so it started to get discolored quickly. That wasn’t going to work.
Then, I thought about adding paper to the desk to give it some color. But how would I make it stick to the desk?? My Xyron Creative Station would totally work!
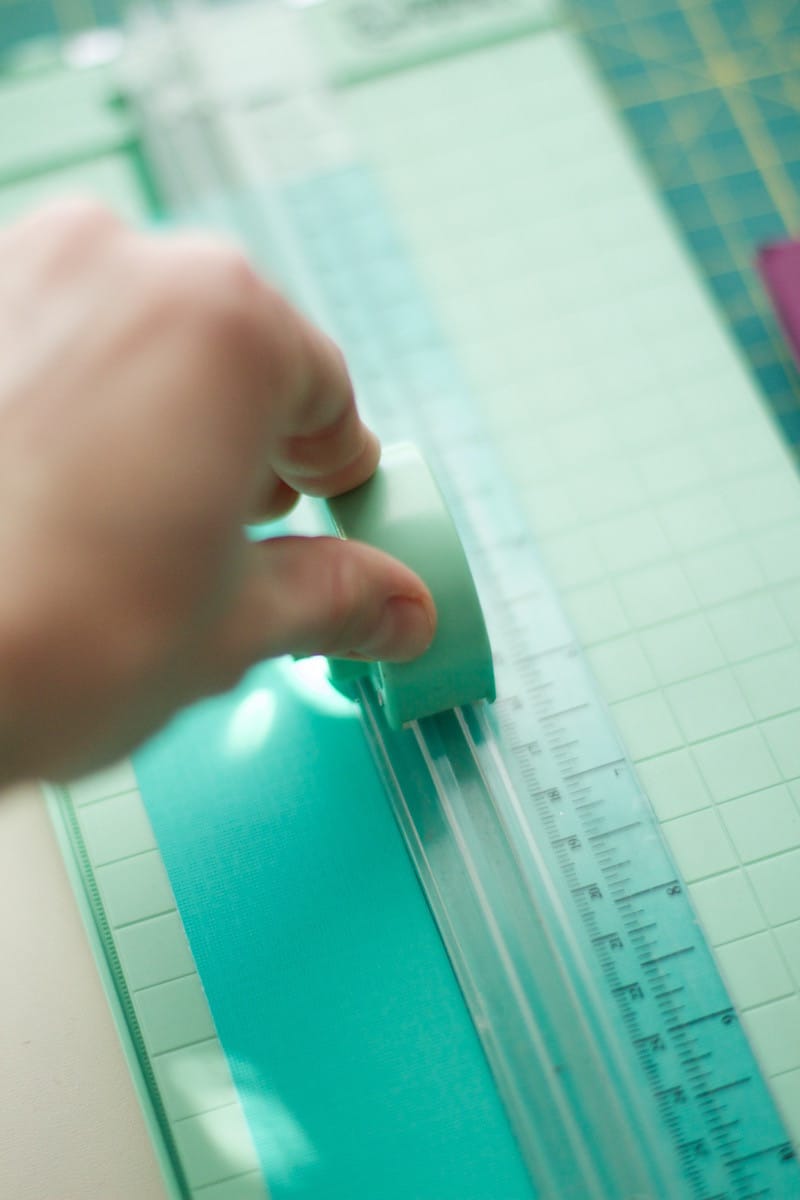
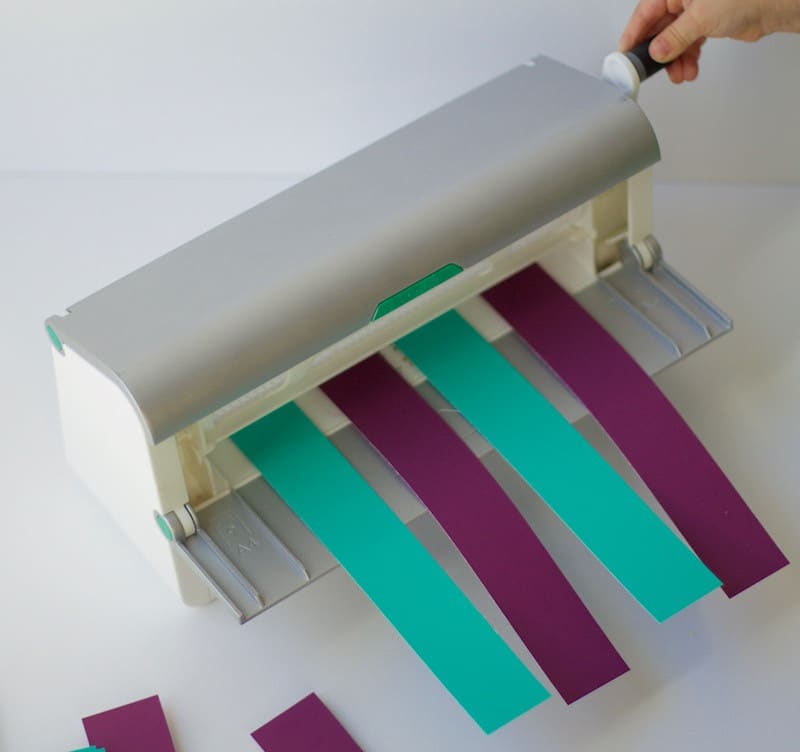
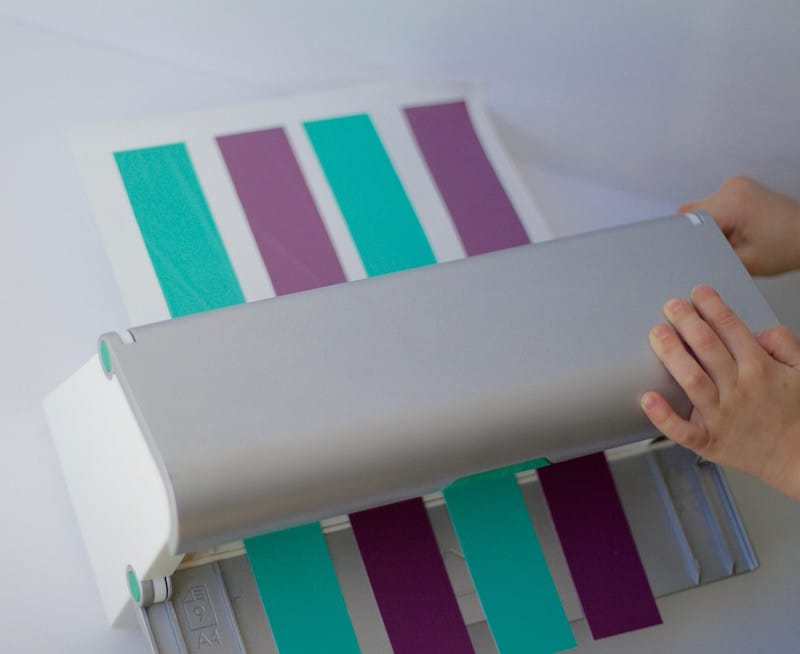
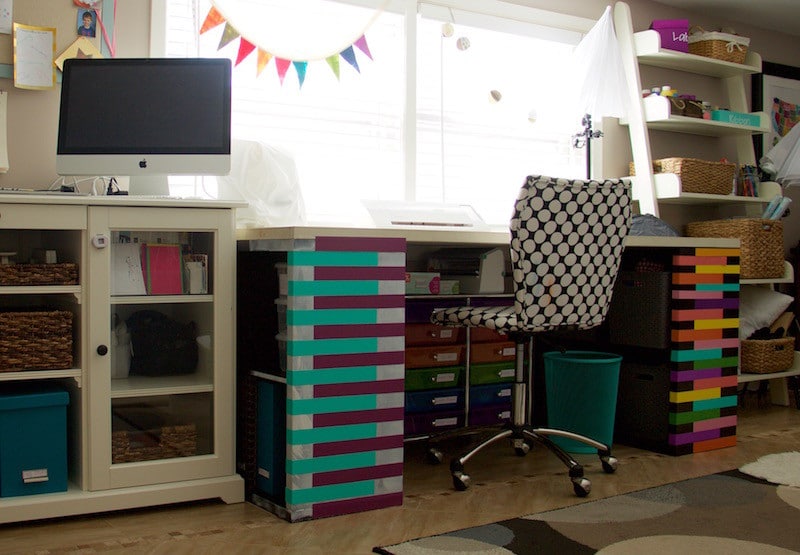
I found some paper that was incredibly sturdy and I thought would look perfect on the desk. I cut all the paper into equal-size strips. I ran each strip of paper through my Creative Station to turn them into a sticker using the permanent sticker refill. Then I attached each piece onto the desk to create a fun pattern. I started at the edge of the shelving unit and moved the sticker toward the center of the shelving unit. I switched off by alternating sides of where I would start with the paper strip. One time I would start on the left, the next time I would start on the right.
To make sure that all the strips were straight, I started at the top, using the bottom of the flat-paneled door as my level. I put the first strip onto the shelving unit and made sure that the strip was straight. The second strip, I made sure it was aligned with the first. Then I repeated this the entire way down the shelving unit.
When I finished putting the strips on the entire shelving unit, I was left with a rather interesting looking desk. Initially, I decided to go with a bunch of random colors. But as I got to putting the colors together, I realized I would prefer to use teal and purple, since those are the colors of my office. I found some great teal and purple paper from DSWV.
The entire project took me about twenty-minutes to complete, from cutting the paper, to creating stickers, to sticking the paper onto desk! Seeing as this was super easy, my mind is racing with all the different pieces of furniture I could decorate using paper and my Creative Station.

Materials:
- Color Paper
- Xyron Creative Station
- Paper Cutter
Tutorial:
- Cut paper into long strips. I cut the paper the width of the arm on my paper cutter to ensure everything was the same size.
- Run the strips of paper through the Xyron Creative Station.
- Peel the strips of paper off of the sticker paper.
- Place strip of paper on desired location on furniture.
- Press paper to ensure it sticks.
- Repeat until area is completely covered with paper.


")


