

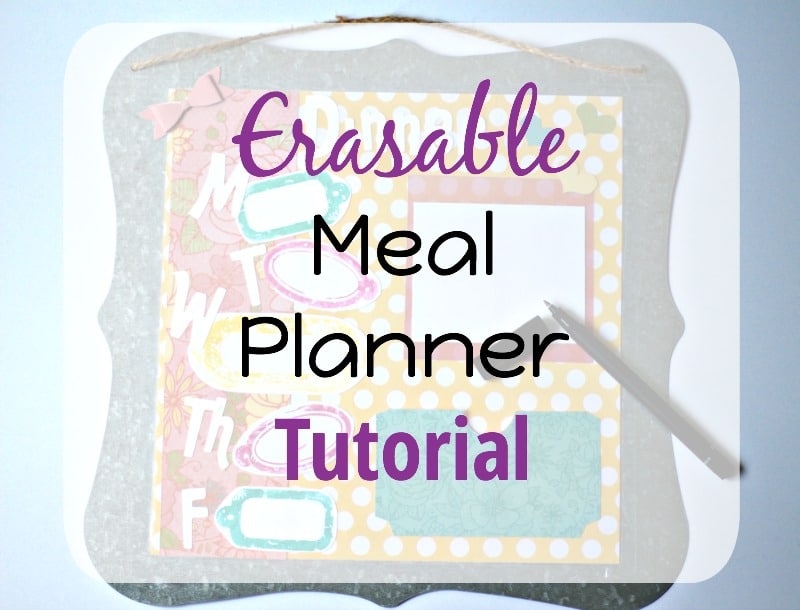
I am so excited to share this easy erasable meal planner tutorial with you today! Meal planning is the one task I try to do every Sunday, along with going to the grocery store. I really try to make sure that I get myself organized for the week ahead, and when I meal plan, I don’t really have to think about what to make for dinner… I just actually have to make dinner!
I really wanted something a little more inspiring to record my meal planning for the spring and summer months, because my motivation to actually make anything goes way down.
So, I decided to create an erasable meal planner using Xyron and Deep Red Stamp products that would totally fit in my kitchen!
And we have a special GIVEAWAY for one lucky reader on EACH of the blogs in this blog hop!! (Click here to see the entire blog hop projects!) We are giving away $25.00 gift card to Deep Red Stamps! Just comment below for a chance to win, then check out the rest of the blogs in the blog hop for their giveaways too! That’s a lot of stamps you can get for all those $25.00 gift cards!
Materials
- Xyron 9″ Creative Station with permanent adhesive refills AND two-sided laminate refills
- Grunge Tag Rubber Stamps from Deep Red Stamps
- Teresa Collins Mega Runner
- Scissors
- Paper Cutter
- Paper (I used DCWV paper for this project)
- Water Colors
- Galvanized Plaque Similar To This One
- Silhouette Cameo

Tutorial
1. Decide on the colors you want to use for your meal planner. I went with yellows, greens, and pinks as they go with the decor in my kitchen.
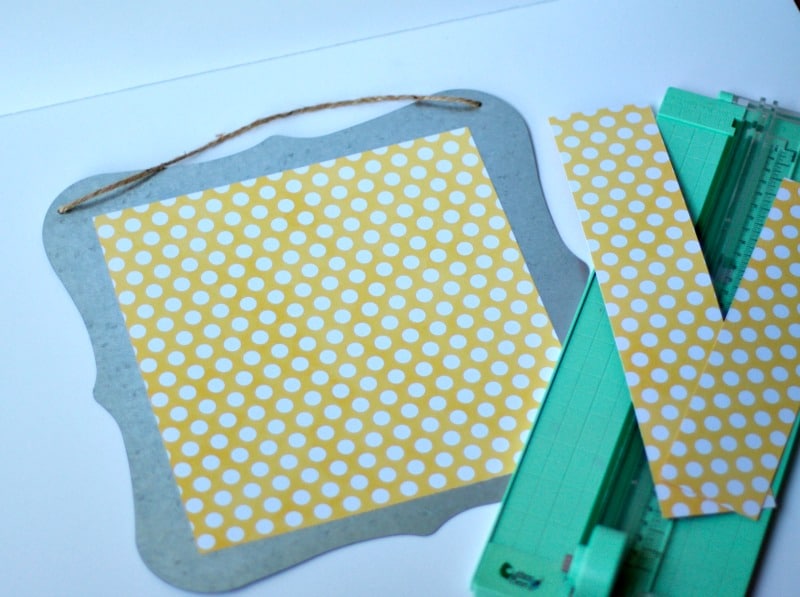
2. Take a piece of paper and cut it to the size you want to cover the galvanized plaque. I used the yellow polka-dots to act as the background of my meal planner.
3. Using your Deep Red Stamps and the water colors, paint the stamps to the colors of your choosing. I went with yellow, teal, and deep pink. I wanted to make the tags look smudged, so after I quickly painted on the water color and stamped it on the paper, I flapped the paper around.
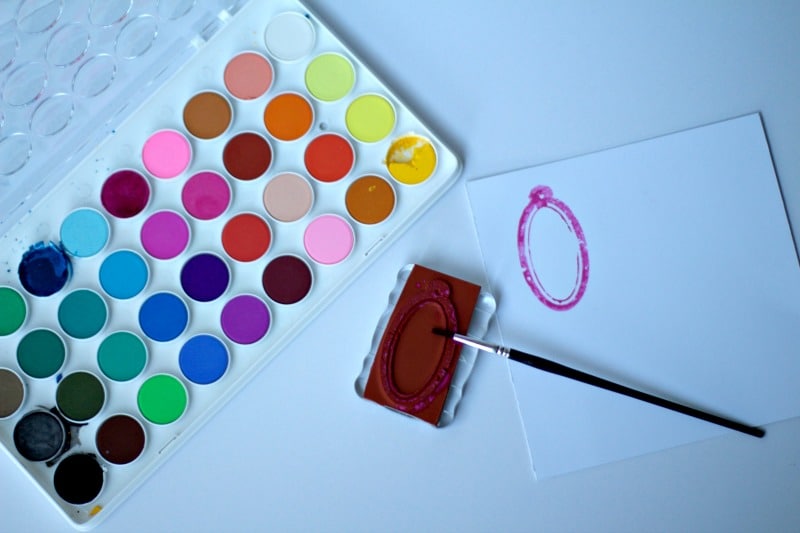
4. I created a total of five tags using the water colors and the stamps.
5. Once the water color was dry, I cut out each tag.
6. Then I cut out letters using my Silhouette Cameo. I cut out the letters in white paper so they would stand out against the colorful background I had chosen. I cut out “M”, “T”, “W”, “Th”, and “F”. I also cut out the word “Dinner”.
7. I removed the letters from the Silhouette cutting mat and laid them on my paper.
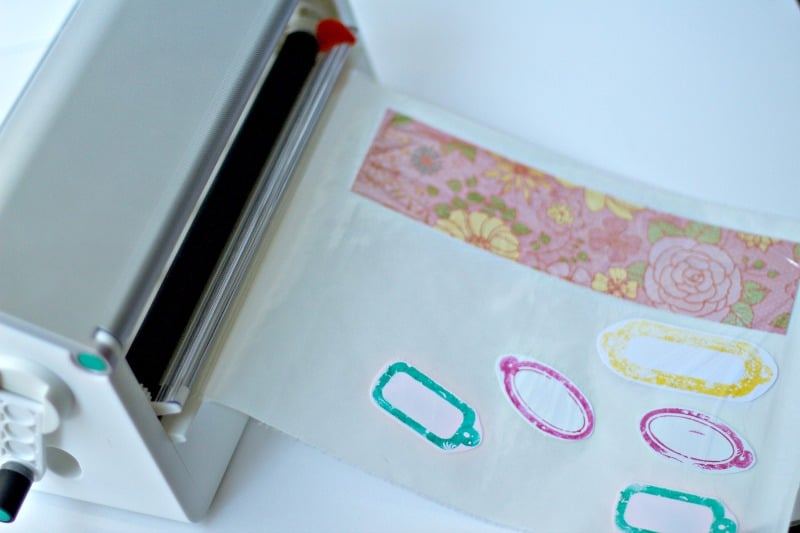
8. I added a stripe of floral paper to the left-hand side of the paper, which is where I plan to put the tags.
9. I cut out a pocket from my DCWV paper stack, along with some embellishment hearts and a bow. And, I cut out another piece of paper to use as a notes section on my meal planner.
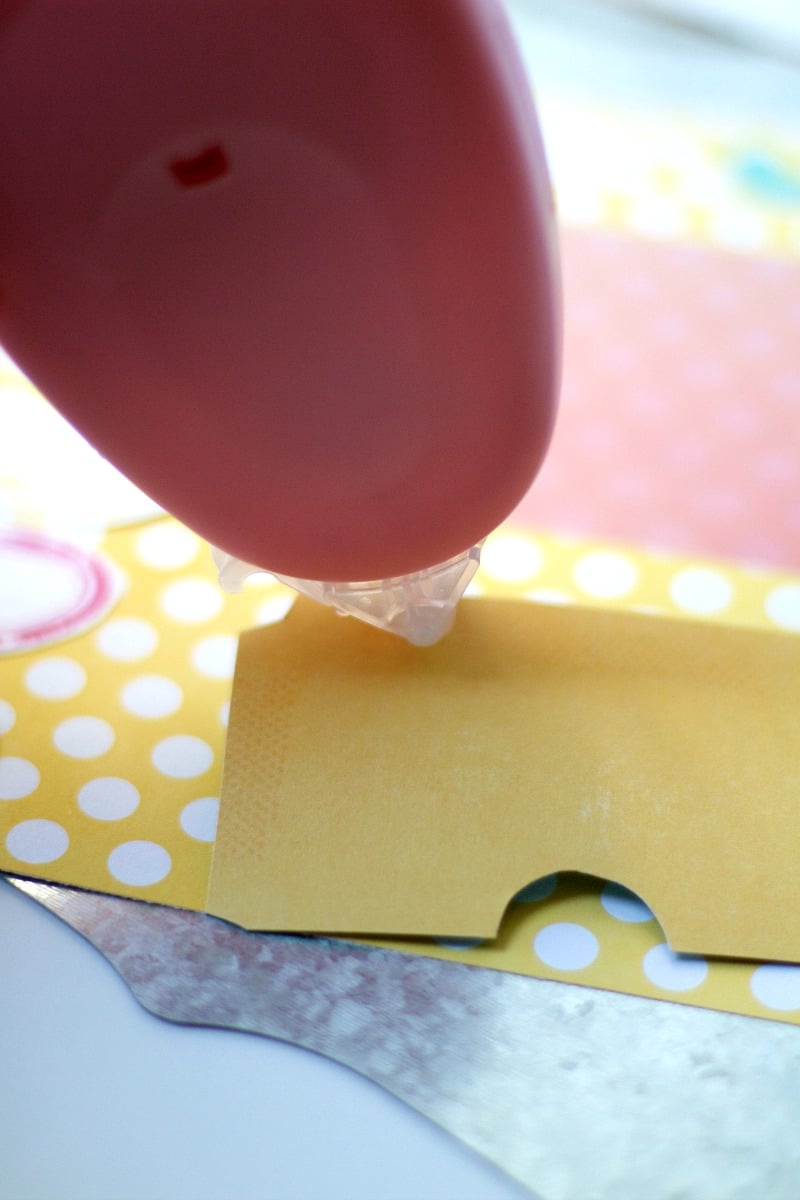
10. I laid everything out on the polka-dot paper. When I was happy with where everything was placed, I ran everything except the pocket and the paper bow through the Xyron Creative Station with the permanent adhesive refill.
11. I put the floral paper on the left-hand side of the polka-dot paper.
12. I added the word “Dinner” to the top of the meal planner.
13. I put all five tags over the floral paper, then I added a letter next to each tag to represent a day of the week.
14. I put on the paper to use as a note section for the meal planner, and then I added some embellishment hearts to the corner to give the meal planner some sparkle.
15. Using the Teresa Collins Mega Runner, I rolled the three ends of the pocket and placed it under the notes section.
16. Then, I ran the entire meal planner through the Xyron Creative Station with the two-sided laminate.
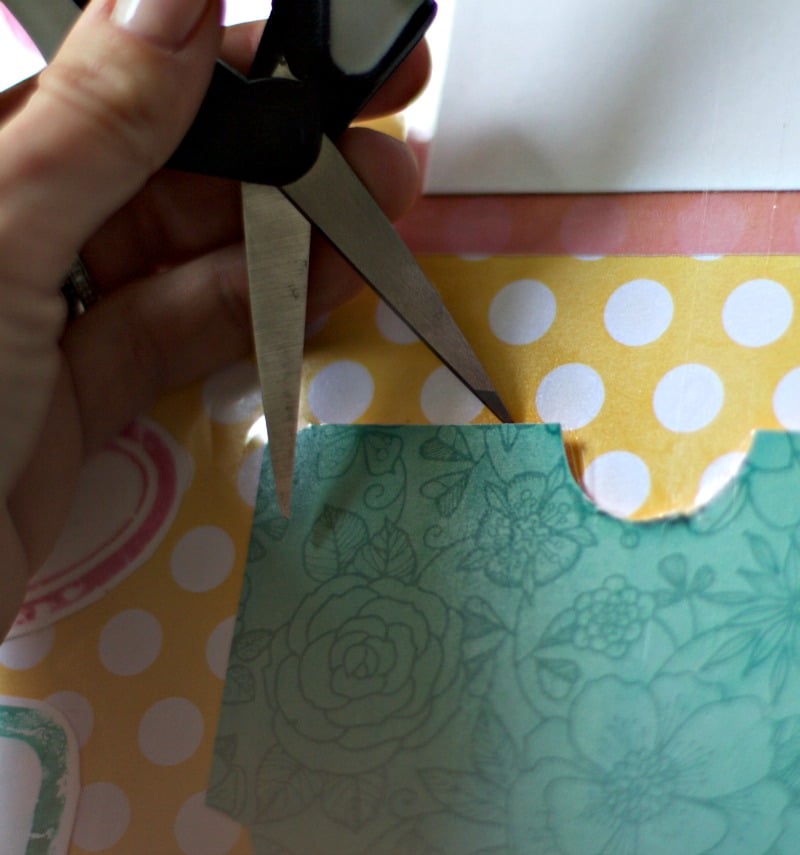
17. Taking my scissors, I sliced the top part of the pocket with one end of the scissors. I wanted to create an opening where I could store things like coupons.
18. I attached the meal planner to the galvanized plaque using the Teresa Collins Mega Runner.

19. Finally, using the Teresa Collins Mega Runner, I attached the paper bow to the top corner of the meal planner.

And, I found that the best way to write on any Xyron laminated product is Lumocolor Permanent. These pens easily erase and write really clear on the laminate, which I love!
I cannot wait to use this meal planner each week when I am getting myself organized! The pocket is the perfect place for my coupons or any other small item that needs to go with my meal planner.

")


What a fantastic, creative idea. Thanks for sharing.
Thank you Gilda!
What a great idea. I love that you can erase the planner.
Thank you Cindy!
Fun project and very useful too! I love the stamps and colors you used! Great collaboration with Deep Red Stamps and Xyron products!
Thank you Denise!
What a unique idea. Great tutorial and job well done.
Thank you Dorina!
This would be fabulous to have n my kitchen!!!!
Thank you Bonnie!
Love all the inspiration…thanks for the wonderful giveaway.
Thank you Rhonda!
This is such a cool idea! I’d love to make something like this! You are super organized! I’m intrigued by the Xyron so I’m doing your hop! Loving the variety of Deep Red Stamps!
Thank you!! I love Xyron products. They are really useful for many projects, especially organizing projects! I love making stickers, labels, and laminating things to help clients stay organized!
Very cute!! Thanks for sharing it! Would avoid that terrible question I get asked each afternoon when I get home….”what’s for dinner??? LOL
Ha! That is a horrible question after a long day!! Thank you Ali!
Congrats Ali! You won the $25.00 gift card to Deep Red Stamps!
I like what you guys are usually up too. Such clever work
and reporting! Keep up the awesome works guys I’ve added you guys to my own blogroll.
Thank you!!
What a great idea! I love the colors you chose! I especially like the fact that you laminated everything so you could write and wipe for reuse. Thanks for the chance to win!
Thanks Ashley!
Congrats to the lucky winner! I just popped in to see who it was! Thanks for a fun blog hop – I really enjoyed myself! Have a great weekend!
Thank you!! You as well!
Greetings from Idaho! I’m bored to death at work so I decided to check out your blog on my iphone during lunch break.
I love the knowledge you provide here and can’t wait to take
a look when I get home. I’m amazed at how quick your blog loaded on my mobile ..
I’m not even using WIFI, just 3G .. Anyways, excellent site!
Thank you!
It’s hard to come by experienced people on this subject, however, you seem
like you know what you’re talking about! Thanks
Thank you so much for your kind words!
Thank you!