

If you’ve been reading The Organized Mama blog for a while, you know that I am totally in love with labels! I label everything. I find that it helps keep everyone in the family organized because they can find everything they need by reading a label.
Some of my labels are rather plain, such as these custom chalkboard labels I created. I keep some labels plain because they are usually switched out frequently. I change what I put in our pantry containers often, so I need labels that can work with whatever I put in them.
But, some labels I want to be decorative, because they will be out, not hidden away in the pantry. So, I always like to make sure that those labels are super pretty and go with my color scheme of the room. This way they become an accent piece, instead of an eye-sore.
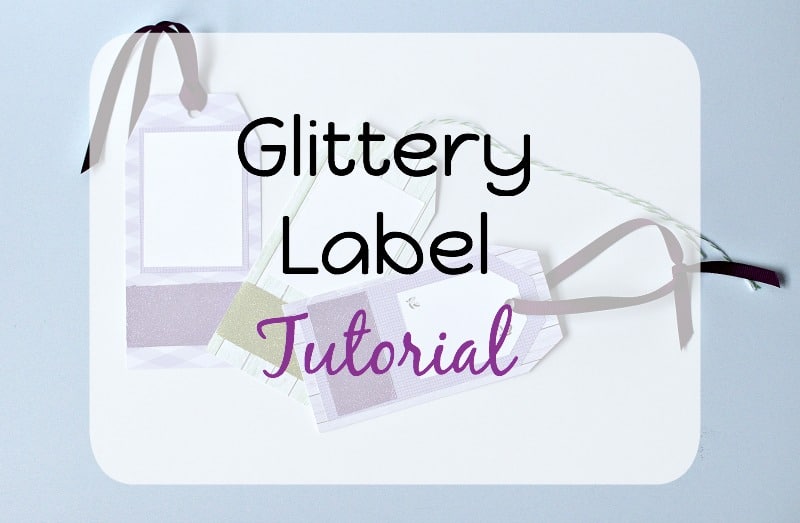
My craft room was still missing labels. I started to make my pretty labels, but somehow forgot to label my seagrass baskets! I needed something pretty and sparkly to label the bins. So, I decided to create these glittery labels to decorate my craft room by using products from My Favorite Things and Xyron in this blog hop!!

Materials:
- Tranquil Textures Paper Pack from My Favorite Things
- Paper Cutter
- Scissors
- Lavendar Microfine Glitter
- Xyron Creative Station Lite
- Lisa Johnson Design Out on a Limb Stamps
- Stamp Block
- Black Licorice Pigment Ink
- Violet Kirarina Wink Glitter Pen
- Ribbon
- Single-Hole Puncher
Tutorial:
1. Using the Tranquil Textures Paper Pack, pull out two shades of the purple paper to use to create the tags.
2. Taking one piece of paper, out out a tag shape by using your paper cutter.
3. Then, take another piece of paper and cut it a little smaller than the tag. Lay that piece of paper over the tag to make sure it looked nice.
4. Taking a white piece of paper, cut that paper to fit inside the smaller piece of paper you just cut, and place that on top of the tag.
5. Then, cut a piece of white paper to be thin and act as an accent. This is the piece of paper you will be decorating with glitter!
6. Lay out the paper to make sure you like the look before putting everything together.

7. Once everything looks pretty, run the smaller piece of purple paper and the thin accent paper through the Xyron Creative Station Lite machine using the permanent sticker insert.
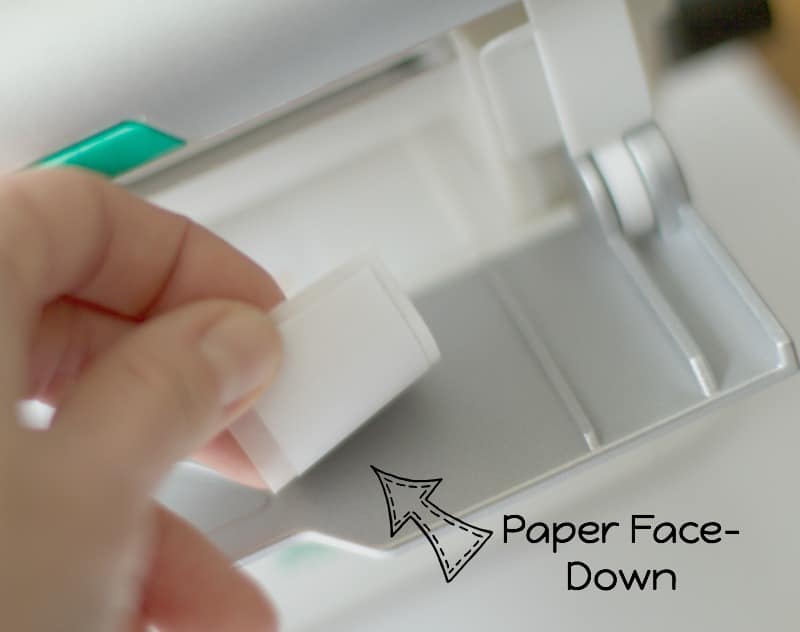
8. Run the other white paper AND the thin accent paper paper through the Xyron Creative Station Lite. When you run the thin accent paper through, make sure that you pull off the clear top off first. Then face the paper face down. You will be turning both sides of the paper into a sticker!
9. Put the small purple paper on top of the tag.
10. Put the white paper on top of the small purple paper.
11. Using your thin accent paper, cut the backing so it is small.

12. Taking your Lavendar Microfine Glitter, shake the glitter all over the thin accent paper. I like to do my glitter in a tray over a piece of computer paper. Once I am done doing the glitter, I can make the paper into a cone to put the excess glitter back into the container!

13. Take the glittery thin accent paper and put that on the bottom of the tag.
14. Using the stamps, stamp block, and ink pad, stamp some decorative pieces on the outside corners of the white paper.
15. Write label on the white part of the tag using the glitter pen.

16. Single-hole punch the tag.
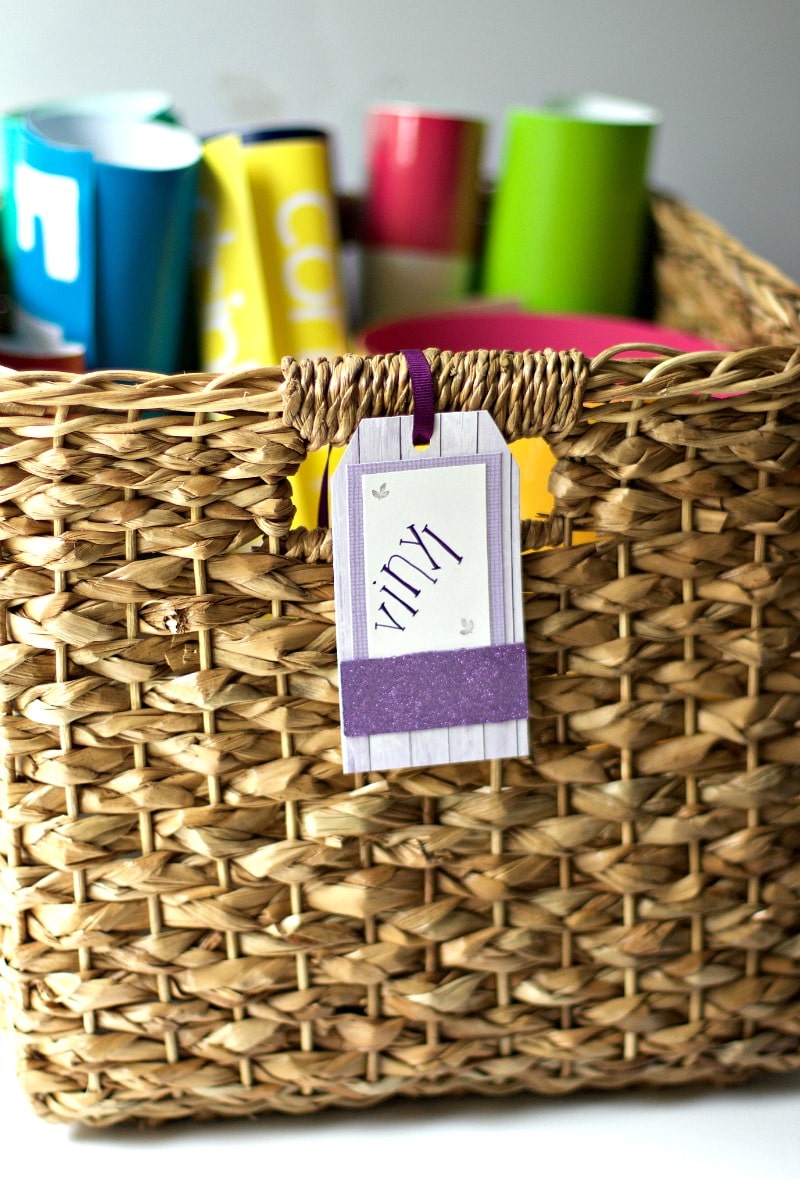
17. Add ribbon to the tag.
18. Attach tag to your basket.
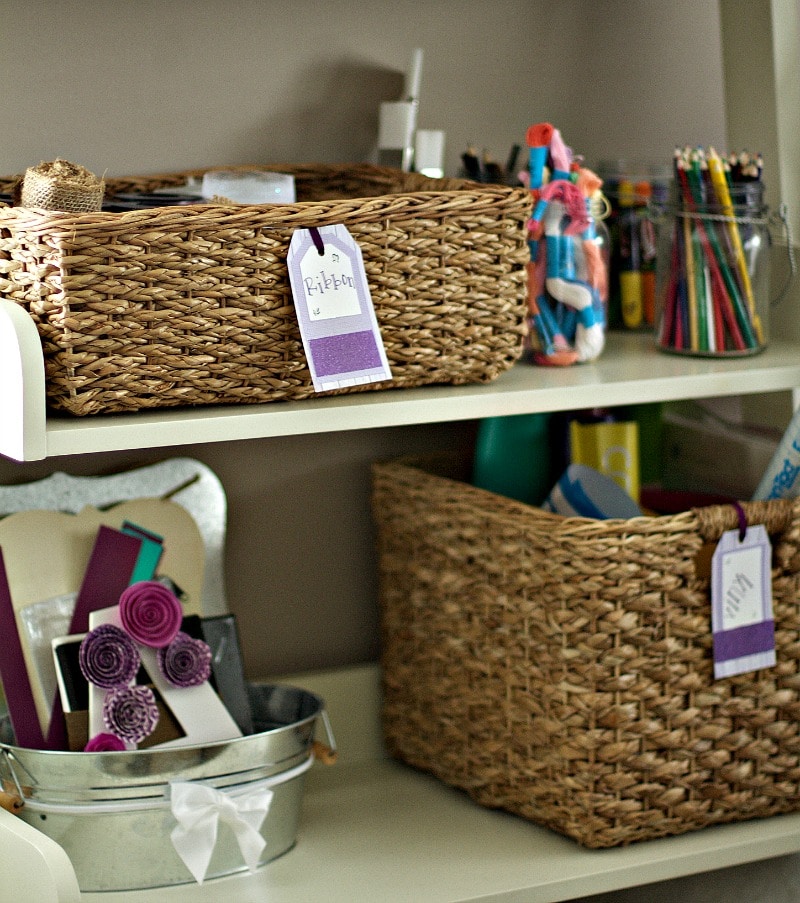
19. Repeat until your entire room is labeled with glittery labels!
Now it’s your turn to get your glitter on! Grab your supplies and cut out a tag shape. Add some paper to give it dimension. Run the paper through the Xyron Creative Station Lite to make it into stickers. Add glitter, stamps, and write the label. Then, attach the label using ribbon.
And don’t forget to check out Sharon Callis Crafts and The Papered Cottage for more amazing ideas on this blog hop with Xyron Design Team and My Favorite Things!!


")


Great idea!! Your labels are very pretty!! I’m a sucker for the color purple too!! The glitter adds that special little bit of bling that we all just love to add to everything, including our cards! Thank you for sharing this tutorial!!
So glad you like them! The glitter is such a nice pop and the colors are just my favorite!!
Terrific looking tag,
love the glitter on it.
Carla from Utah
Thank you Carla! I love using Xyron products to help keep my glitter less messy!
I love how you layered the paper and used the Xyron to make the papers into stickers to adhere them together! I did not realize Xyron would also work to adhere glitter! Very nice idea!
Sandy it is the best secret for glittering! So much less mess and the glitter really sticks well. I rarely have any pieces fall off once I shake it, like you can have when you use glue!!