

Four years ago, we did a complete remodel of our kitchen and dining room. We took out a wall, completely relocated the kitchen to the opposite wall of the room, which created a great room for kitchen and dining. I absolutely love how it turned out. But there is one spot that I just couldn’t figure out how to display things.
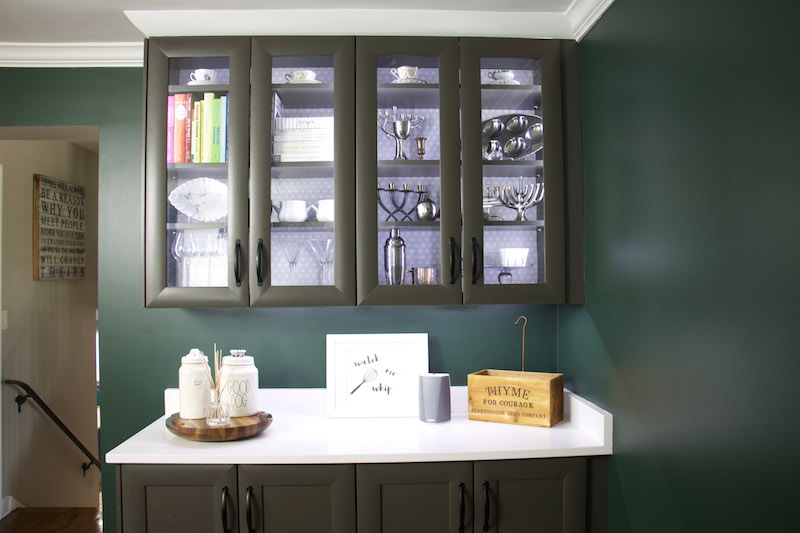
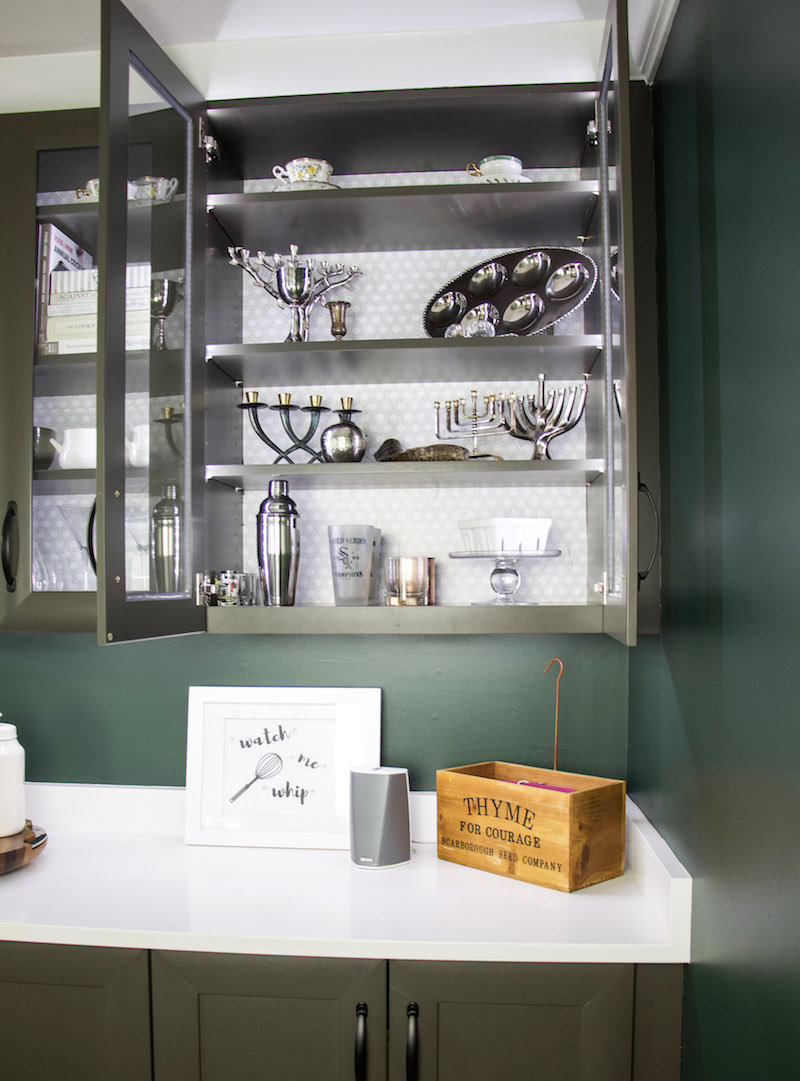
Long story short, we only have two upper cabinets. Yes, we don’t have any other upper cabinets, but we do have open shelves and a ton of drawers. (If you want to read more about our kitchen, read about it here.) Well, those upper cabinets are in a dark charcoal color near our dining room table. The cabinets are glass to showcase our things. The only problem is our things are all glass. So the cabinets look meh. Nothing really pops because all the colors are so dark inside the cabinets and the glass items aren’t really helping.
So I decided that we are going to add some removable liner to the back of the cabinet so things would actually pop in that cabinet. I thought it would look good, but I had not idea the transformation that it would take to update kitchen cabinets this way.
How To Update Kitchen Cabinets
This post is sponsored by The Duck Brand. All thoughts and opinions are my own. Some links may contain affiliates.
Now when it comes to updating kitchen cabinets, you have to start by finding just the right liner. I am using the Duck Brand Easy Liner for this project. The reason being is that shelf liners don’t peel off the wood since they are removable. And they are rather easy to install. That is why I think it is such an easy transformation using drawer liner as backing for kitchen cabinets. Things totally pop when you just add the liner!
Step One
Start by removing everything from the cabinet. Like you will have to take out the shelves and possibly pins that hold the shelves so you can get the liner smooth on the back of your cabinets. You will need a totally smooth space. So make sure to clean the entire cabinet as well since it can get rather dusty. Make sure that the cabinet is completely dry before moving on.
Step Two
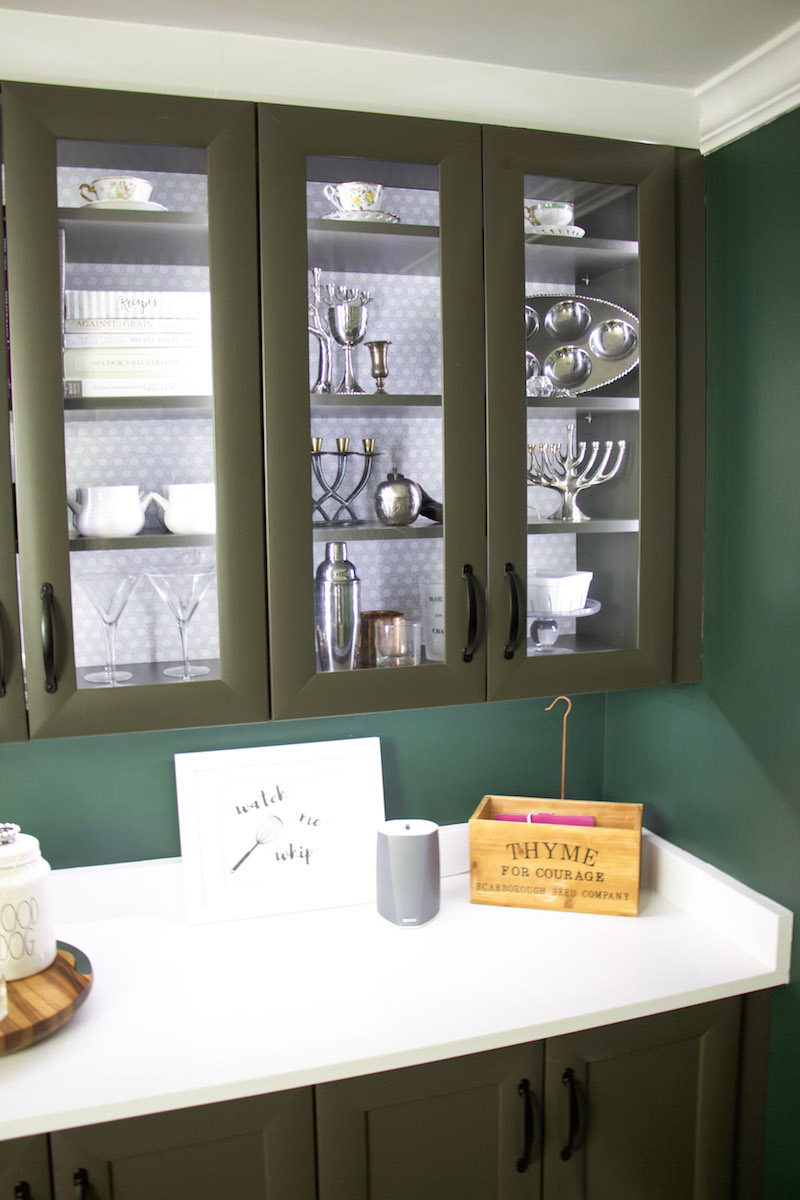
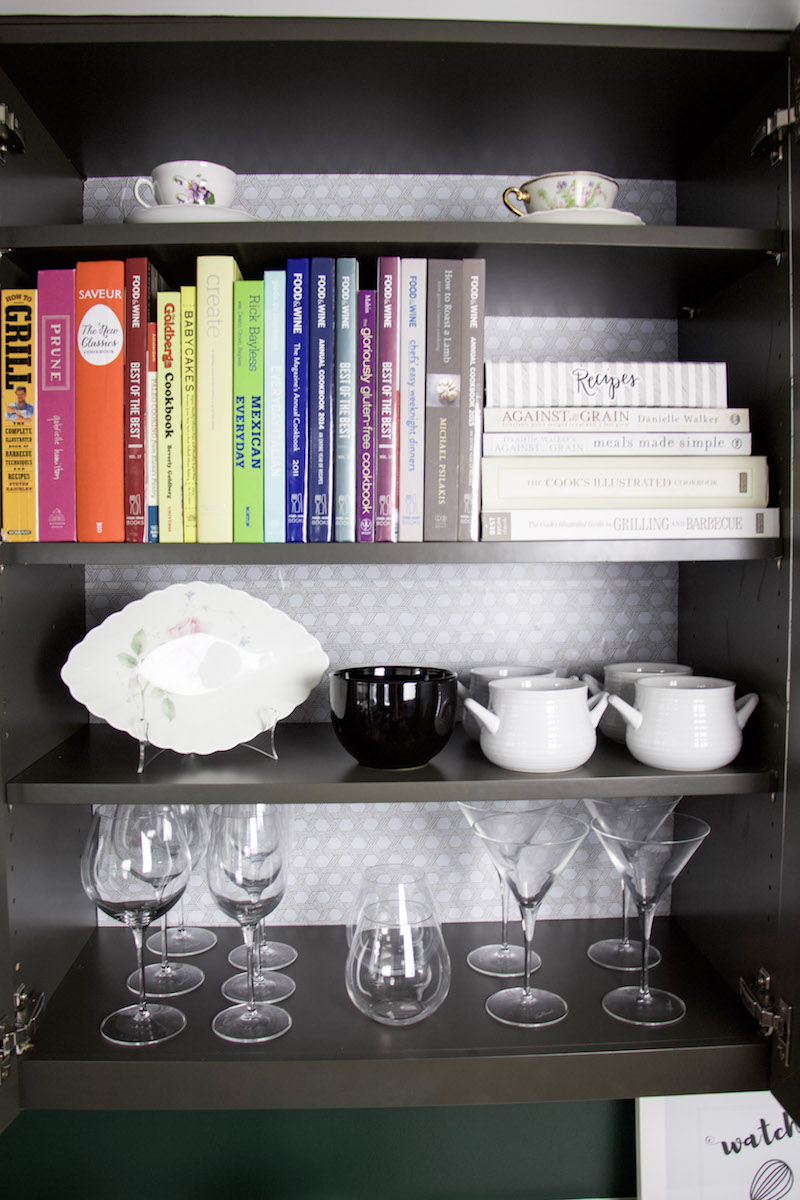
Once the cabinet is totally dry from the cleaning spray, you will need to grab your Easy Liner. I am using the Basket Weave Easy Liner. I wanted something that was white with a pattern to make our glass items pop inside the kitchen cabinet.
Step Three
Next you have to measure the backing of your kitchen cabinet and determine if you have to place the adhesive up and down or across. For me, I decided to do two sheets across because matching up the pattern on the horizontal was easier than on the vertical. Plus, if it didn’t match up perfectly, I could easily adjust one of the shelves to cover that mistake!
Step Four
After you measure, it is time to cut the adhesive. I like using the lines on the back of the Easy Liner to cut straight lines. You can also use a flat edge like a yard stick to cut across as well.
Step Five
Adhere the sheets to the back of the cabinet. Sounds easy enough, right?? Well just make sure you cut the right size and try to match up the Easy Liner as best as you can. I also made sure to use a smoothing tool to help make sure I got out all the bubbles. I started to adhere by removing only a small part of one edge, keeping the backing on the majority of the Easy Liner. Once that edge was lined up, I would roll out a little bit of the liner off the paper and smooth using the tool. I repeated this for the entire sheet of liner. Then I did it again for the top half of the kitchen cabinet.
The reason you want to go slow is to make sure you don’t get any bubbles. Those bubbles don’t look great, especially if they are on the back of the kitchen cabinet. So make sure you smooth them out as you go. If this is your first time using liner, then I would suggest doing this with another person. Having an extra set of hands can be super helpful!

Step Six
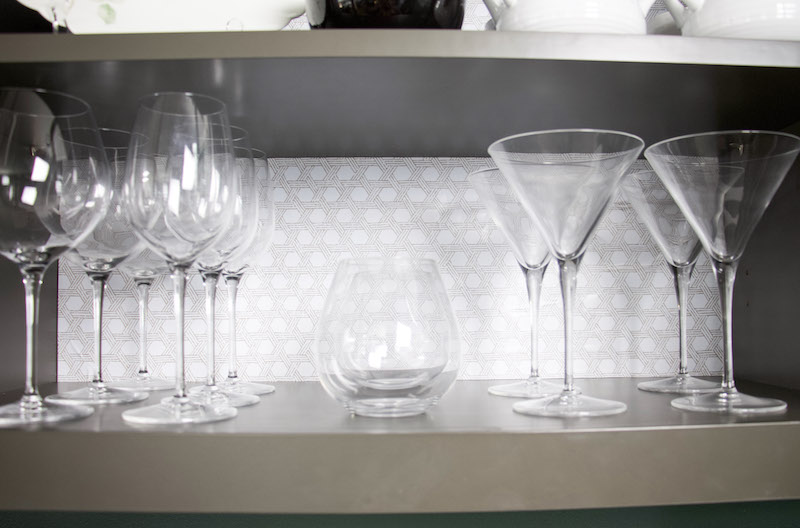
Now that the backing is up, it is time to put the shelves back in, along with all the items that go on the shelves! This is my favorite part. I get really excited when I can add everything back and make it look pretty and tidy. For my cabinets, I decided to start putting things back on the top shelf. These were my grandmother and great grandmother’s tea cups. Then I put the cookbooks on the shelf. I slowly added other items that we use and I wanted to display. This is a great time to declutter your kitchen cabinets as well. Since everything is out, take a few minutes to determine if you really need to keep everything that was in that cabinet to begin with. We originally had a lot of wine glasses we got from our wedding that we decided to sell since we were not using them at all and they were simply collecting dust! So why keep something if we aren’t using it?
Now that you know how to update kitchen cabinets, are you going to try? You just need to get Easy Liner in a fun pattern. Clear everything out of the cabinets. Measure then cut the liner. Adhere the liner to the back of the cabinets, making sure to match the pattern, or use a shelf to cover that up! Then put the shelves back and declutter your items before putting everything back into the cabinet. And you just updated the entire cabinet the easy way! It is the perfect budget-friendly way to update your kitchen cabinets.


")


