

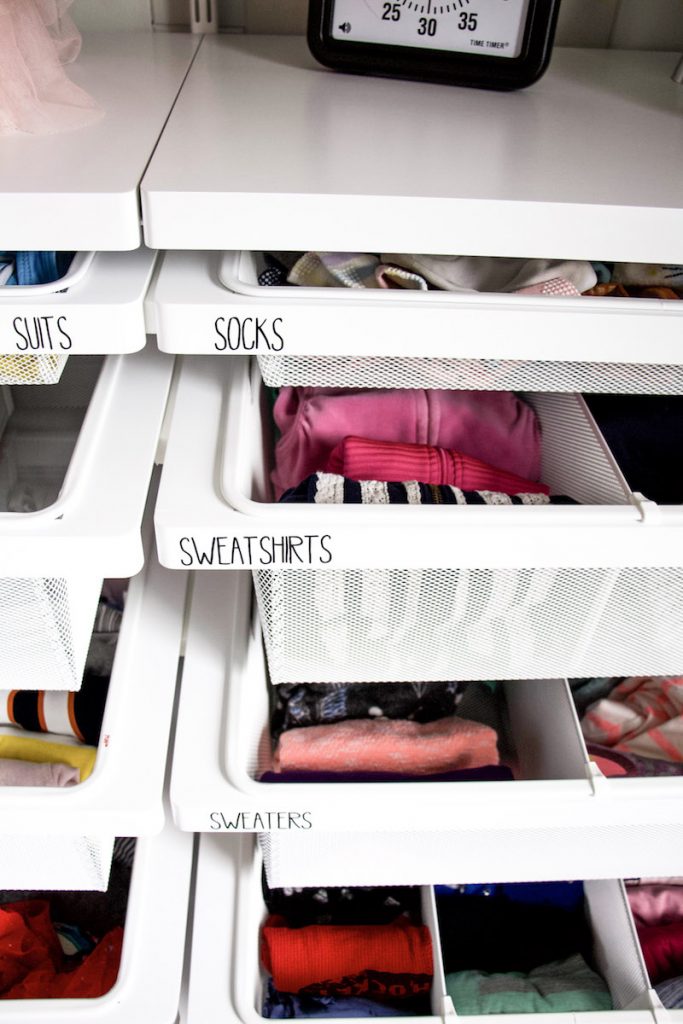
I truly believe that every organizing project benefits from labeling. This could be labeling the drawers, drawer dividers, bins, or clips for bins.
Because when things are clearly labeled, it makes maintaining the organizing much easier for everyone in the family. And when we keep the organizing in tact, we are more likely to never have to do a major organizing overhaul again!
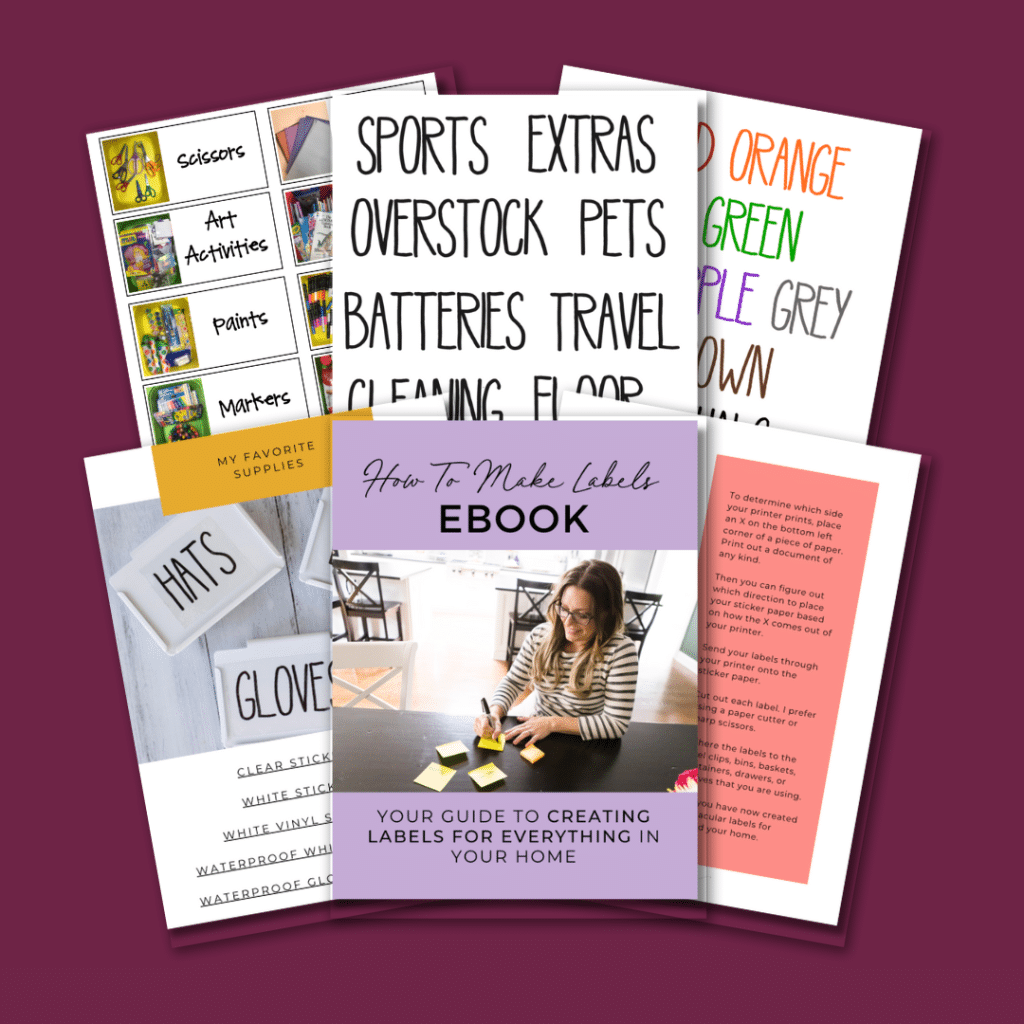
Learn how to make labels for organizing everything in your home!
Some links may contain affiliates.
How To Make Labels With Stickers
The tutorials below are showcasing how to make labels with stickers. There are many types of sticker paper and machines to help you create sticker labels.

Printable Sticker Labels
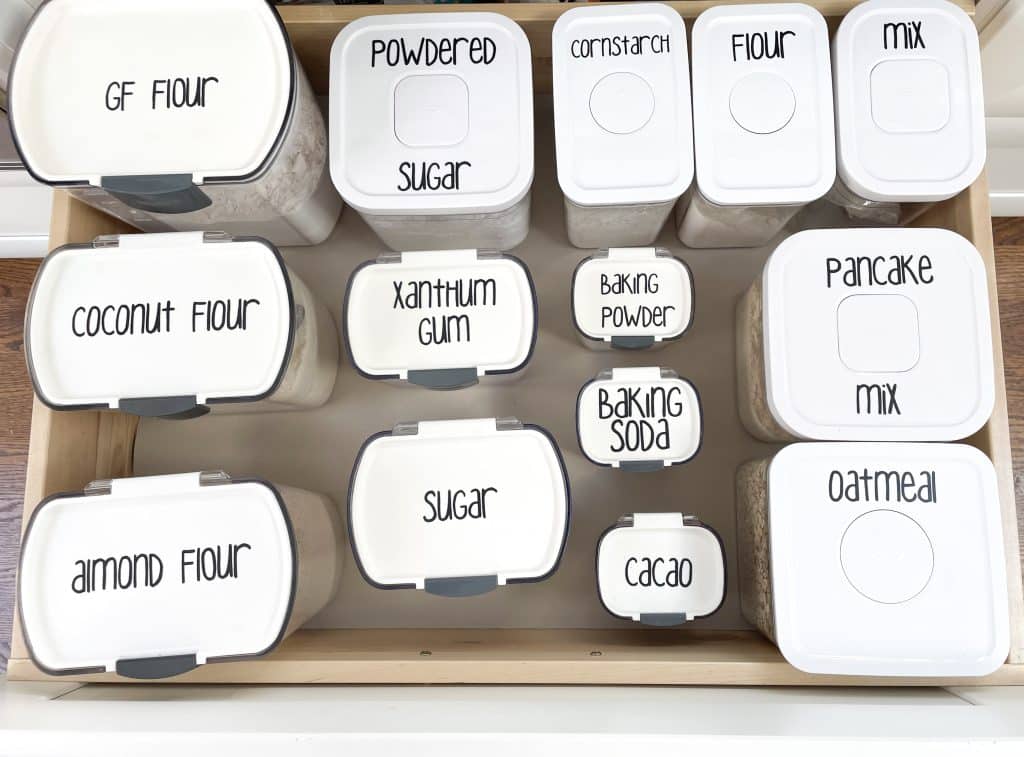
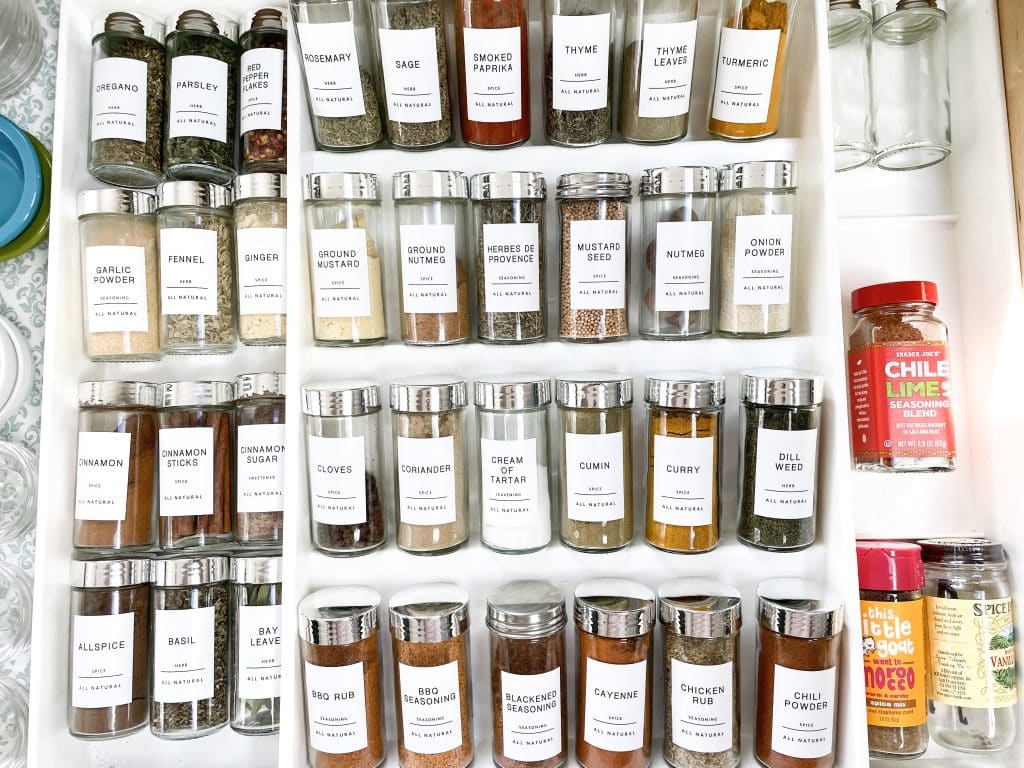
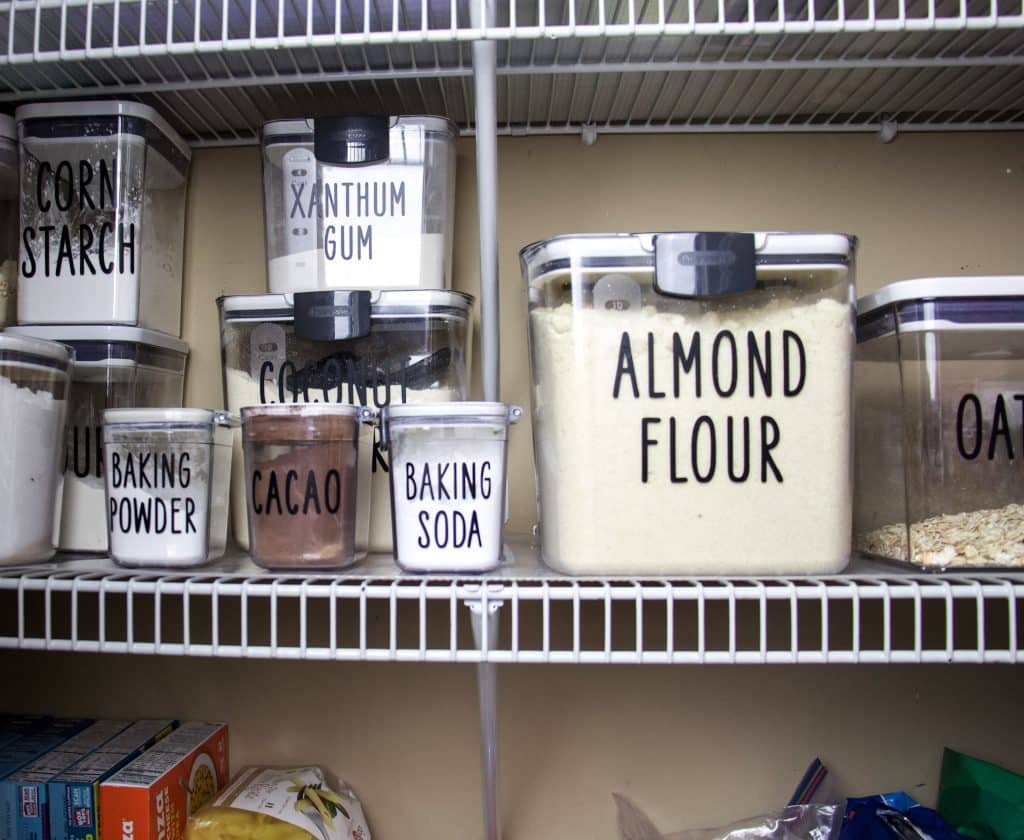
Printable sticker labels are labels that you can print out on sticker paper. I have found these types of labels the most affordable “fancy” labels. When labeling with these types of sticker labels, I have found that labeling jars and canisters you don’t change is the perfect option.
I have these types of labels on all my baking jars. To create printable sticker labels, start with your sticker paper of choice.
I have found that both the white sticker paper and the clear sticker paper work well in ink jet printers.
My printable label pack includes 90 labels for all areas of your house. These labels are sized for the sticker paper I shared. Print out the label pack onto the sticker paper. Cut out the labels. Adhere to the bin, canister, or clip. You can also get my free pantry labels and follow this exact same method to create your own sticker labels for all your baking items.

Sticker Labels With Xyron Creative Station
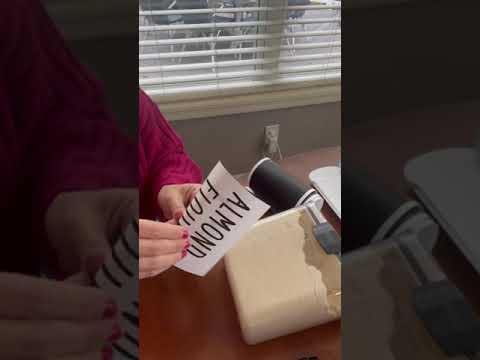
Whenever I would be on an organizing project and didn’t have time to make vinyl labels, I would use my Xyron Creative Station to make sticker labels.
Because the Creative Station can turn anything into a sticker, it was the perfect option for adding a unique label to clients’ homes.
To create the labels, you can write out the label on paper. Then cut the label to size.
Place the label in the Creative Station and turn the crank. Once the paper is through the machine, rub the plastic covering the label before you peel it away.
I found it works better that way. Then peel off your new sticker label and adhere to any bin, container, or clip!

How To Make Labels With Cutting Machines
These next tutorials are all about using cutting machines to create labels. These are typically like the Cricut and Silhouette machines. They can cut vinyl, stickers, and more!

Vinyl Labels With Cricut Joy
The Cricut Joy is my new favorite label maker. You can make vinyl labels from your phone! Download the Cricut Design Studio app.
Create a new project. Select “text” and type out the label you want to make. Adjust the sizing of the font. Select the “make it” button on the top right corner of the screen.
If you are using vinyl, you do not need a mat. Make sure the sizing is to your liking based on the dimensions in the preview.
Hit the “next” button and sync your Cricut Joy to your phone.
Place the vinyl into the machine when it tells you. And watch as the tiny machine transforms your text into vinyl labels.
Cut the extra vinyl to use on another project. Remove the outside vinyl from your text. Use the transfer tape to add the label onto your canister, bin, or basket!
The clip below shows the process using the Cricut Joy.
Silhouette Window Cling
Using the Silhouette Cameo Cutting Machine, we are going to break down how to create window cling labels.
The Silhouette Window Cling is a great way to create custom labels that can easily be removed. I created an entire video walking you through the process below. This is the tutorial using Silhouette Studio.
Open Silhouette Studio on your computer. Then open a new document.
Since we are using Silhouette window cling, make sure you set up your document with the window cling dimensions. AND make sure you turn on the printing edges so you can make sure your labels will print off perfectly!
Click the text button to create text. Then add in the words you want on the labels. Easy peasy!
Change the font and colors on the words if you want. For this project, I decided to do colorful since the beads are rather colorful.
Once you are happy with the words and they are inside the printing boarder, you get to print the labels out onto your printer.
Make sure you insert the paper the correct way so it prints on the window cling and not the back. Not saying I did that or anything!!
Go back into Silhouette Studio and create a cut line around each of the words in your document. Remove the text so the Silhouette will only cut around your words.
Send the window cling through the Silhouette to cut. Then add the window cling to each item to label.

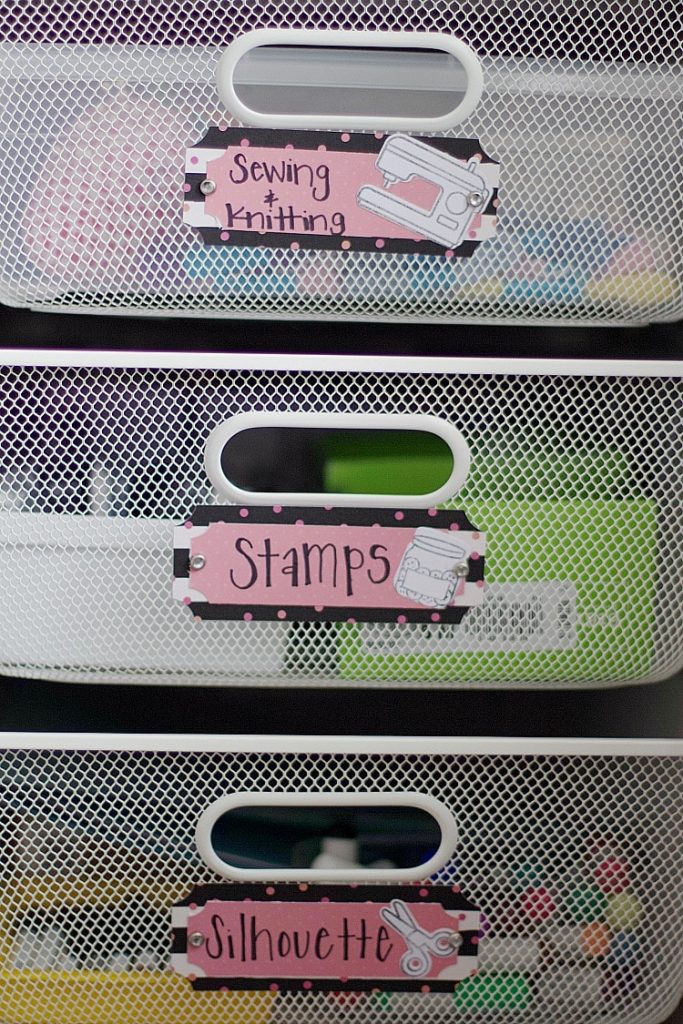
Silhouette Custom White Sticker Labels
Using the Silhouette Cameo Cutting Machine, we are going to break down how to create white sticker labels.
Open Silhouette Studio on your computer and create a new document. Set the document to the size of the paper.
Check to make sure you set the correct size otherwise you may end up creating a beautiful label sheet that doesn’t fit on the paper!!
Silhouette Brand makes many types of paper for sticker labels. These white ones are the ones I use. There is also clear sticker paper, printable gold foil, and more!
For these labels, I purchased pre-made labels.
You can make your own, but I thought it would be fun to just use labels that others had already created, to save myself some time.
Go into the store and search for labels. Look for labels you like and want to purchase. I found great ones that had fun font that could be colored in.
After you purchase the labels, go into your files and find the newly downloaded labels. Double click to add them to your document in Silhouette Studio.
Then adjust the size of the labels to fit your page. You can add color or change font. Have some fun with this design.
Once you are satisfied with how the labels look, print out the labels onto the white sticker paper. You may have to turn the document into a PDF to print, like I did. I think it prints better on my printer.
After printing, adhere the label sheets to the cut mat.
Then send through the Silhouette Cameo to cut out the outline of the labels. I had to remove the text so it would only cut the curvy labels.
Peel sticker off and apply it to a jar or canister. Then repeat until your entire house is completely labeled! Just kidding 😉

How To Make Labels With Word
Did you know you can create fancy labels using Microsoft Word?
I did this for a client who wanted a fancy font for her kitchen drawers. She didn’t like the label maker font options, so I turned to Microsoft Word.
I found return address labels work best for inside of drawers, so I purchased the Avery labels.
Then I formatted Microsoft Word to the size of the labels using the instructions that came with the labels.
Each label had its own category. I printed out the labels and added them to the drawers.
How To Make Removable Labels
All the label tutorials below break down how to create removable labels using different products.
Wine Pens
Wine pens are one of my favorite ways to label glass storage containers. Because the wine pen wipes off so easily, it works best when labeling things that you switch up frequently. For me, I use the wine pens to label our snack containers, cereal containers, and leftover foods.

Chalk Labels
I love using chalk labels in the garage or on items we change up frequently. Because they are easy to wipe off and reuse again. I have used chalk labels in pantries, garages, office spaces, and kids’ bedrooms.

Washi Tape Labels
Washi tape is fancy tape that you can write on. I have used washi tape to label client’s closets.
To create washi tape labels, find a pattern you like. Cut the washi tape to the size you want. Stick to your surface. Then use a marker to write and label.
I have found that using a Sharpie works best to create custom washi tape labels.
Post-It Labels
I love Post-It notes. And have found that using them for labels works wonders!
We typically use Post-It notes before we unpack or rearrange things in homes. But I have had clients who just wanted to keep the Post-It note labels because it was easier for everyone to see what needs to go where.
The heavy-duty Post-It notes stick the longest. But any sticky note works too!

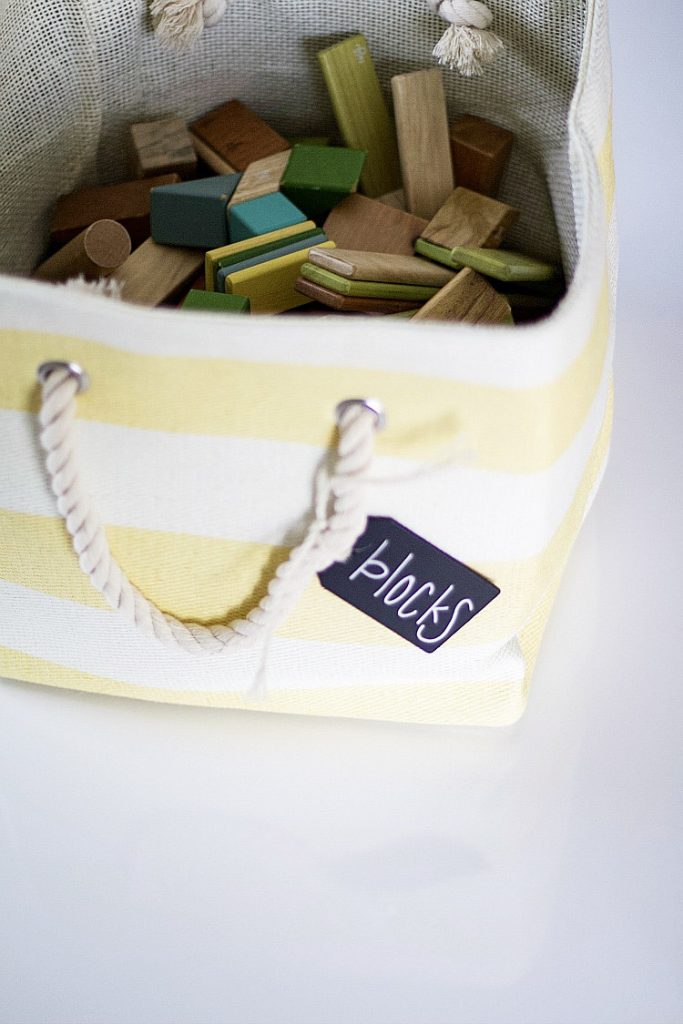
Chalkboard Labels
I use chalkboard labels for lots of things that I like to switch out. They are very useful when you have containers that you swap out semi-frequently.
I usually use chalk pens to write on my chalkboard labels. The pens stay without wiping off after you grab a container or bin.
Plus, the pens can easily be removed with water and a paper towel!

Sharpie Oil-Based Paint Markers
If you like your penmanship, these oil-based paint markers can be the perfect way to add a personal touch to your labeling.
Using them on bins or containers is an easy way to label things that you might swap out, like items in the pantry or kitchen.
The markers come in a variety of colors, so you can add a touch of color to darker containers.
To remove, I have found that using water and some elbow-grease gets it off cleanly. Lemon essential oils can get it off as well.
Ultimate Printable Labels Bundle
Ready to get every inch of your home organized? Well you need labels so things will STAY organized!
This label bundle pack is perfect to help your family keep the home organized. Simply print off the labels onto sticker paper. Then adhere the sticker labels onto bins, clips, or any other smooth surface around your home.
Click now to discover how you can transform chaos into calmness effortlessly!
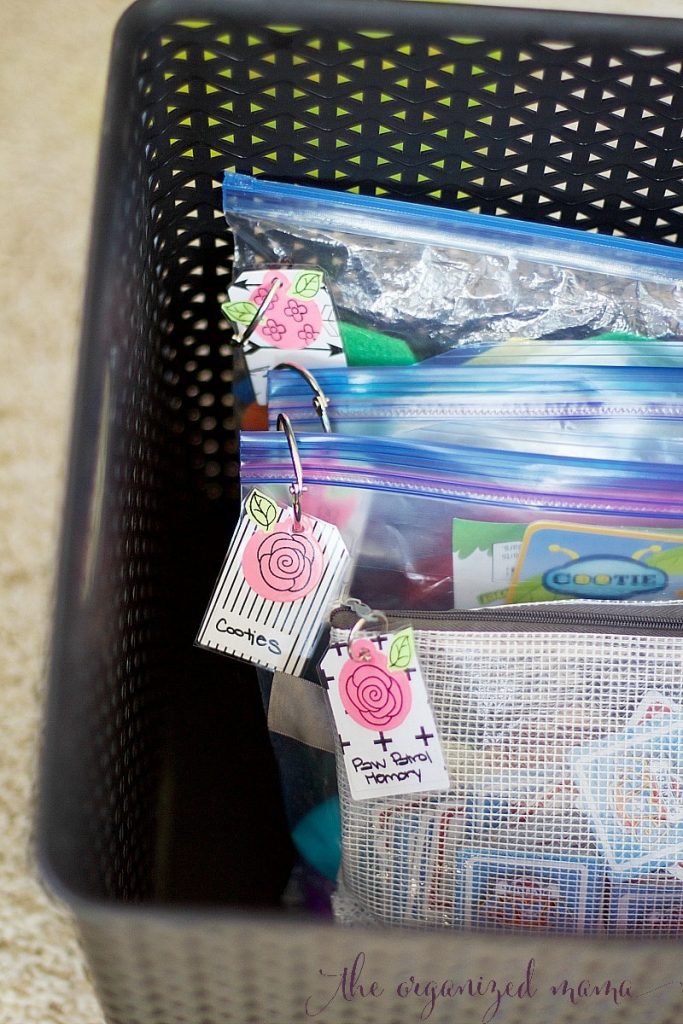
How To Make Tag Labels
The label tutorials below break down how to make tag labels for baskets or bins that aren’t always easy to add a bin clip or a sticker label.
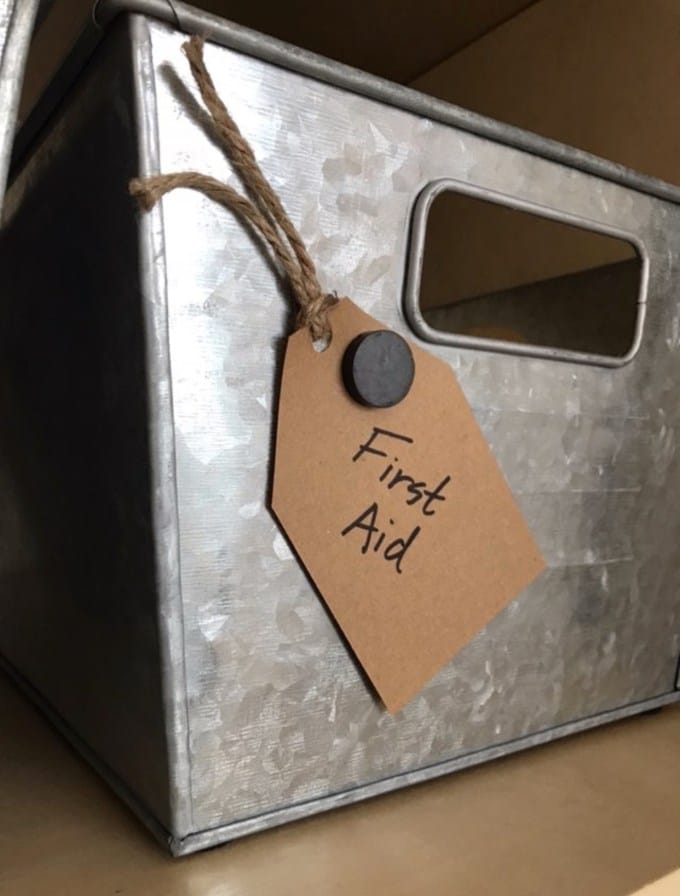
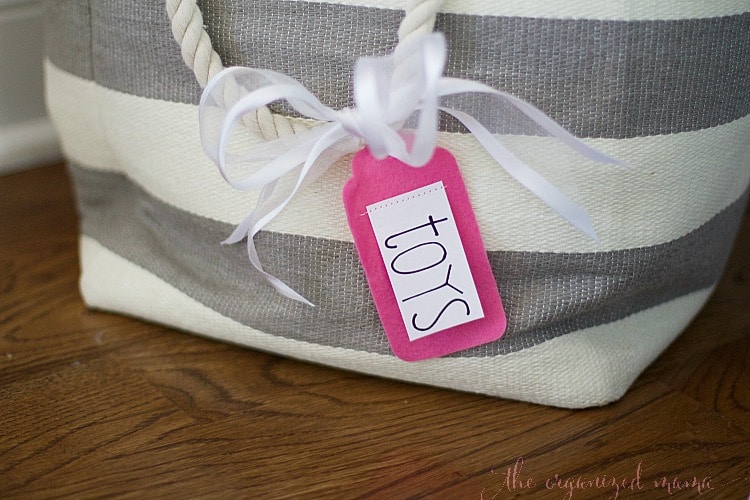
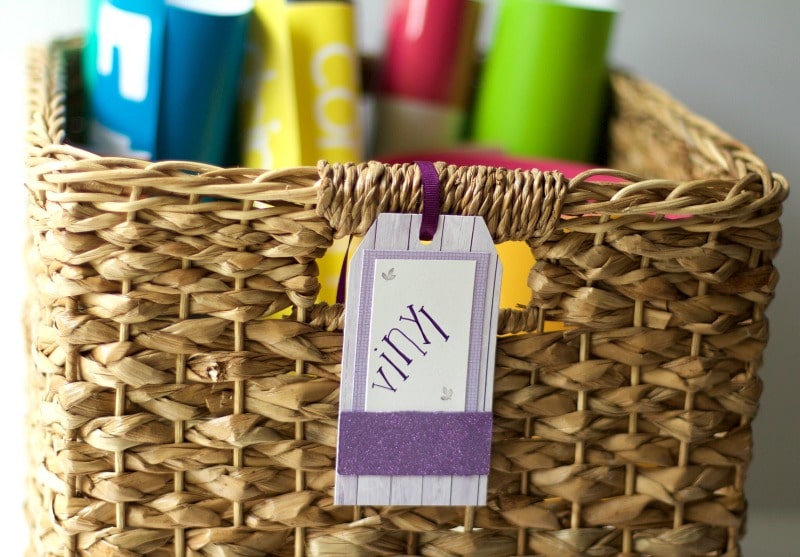
Tag Labels
Those baskets or bins that are so hard to label. You know the ones that you typically hold toys in for the kids. How are you supposed to label those?
With tag labels!
Tag labels are tags that you can attach to a basket or bin to create a label.
All you need are these tags, and a paint marker or chalk marker.
Write the type of toy that goes inside the bin or basket. Then attach the tag label to the handle of that basket or bin.
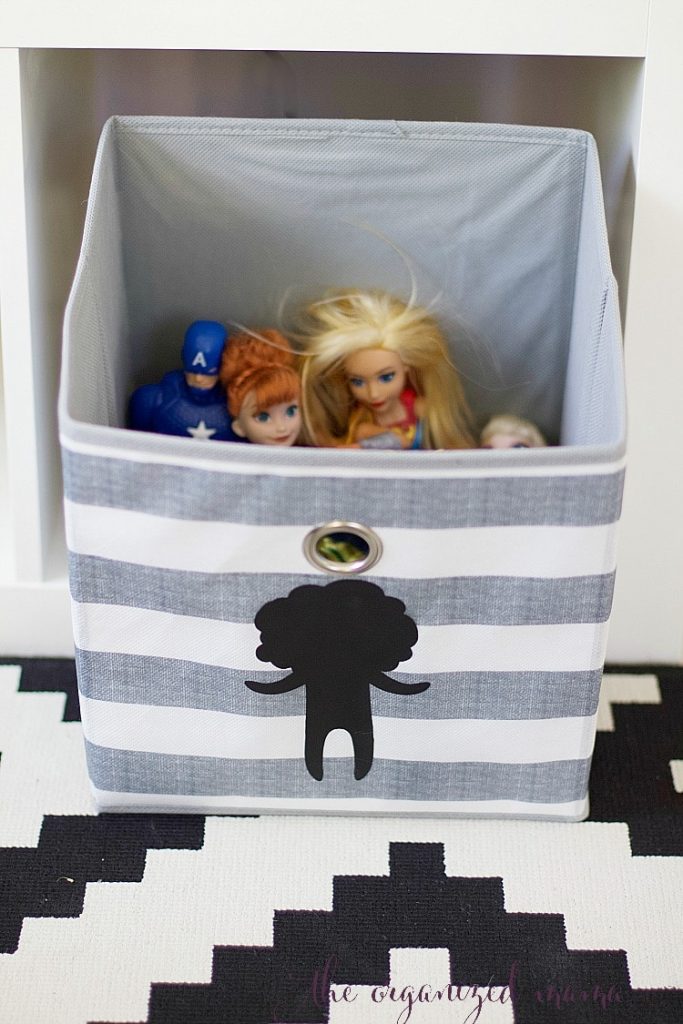
Fabric Bin Labels with Cricut
The fabric labels can use a label too! So I am breaking down how to make iron-on labels with your Cricut Cutting Machine.
Open Cricut Design Space.
Create a new project. Find an image you want to use for your picture on the fabric bin.
Weld the entire object together so you only get the outline of the item. Adjust the size to find your bin.
For my project, my doll was about 6″ tall and 3.5″ wide.
Click the “make it” button. Select Iron-On transfer material. And select the mirror button.
Place the iron-on material on the cut mat with the smooth side face down on the mat. Load the cut mat into the Cricut Maker by pushing the double-sided arrow. Then push the C button. The machine will cut out the image.
Remove the iron-on material from the cut mat. Then remove all the excess material around your design.
Follow the iron-on instructions of the iron-on material.
For this project and this material, I was able to lay the plastic on the fabric bin. Then I places a thin piece of fabric over the material.
Pressing the iron or EasyPress Machine over small sections of the iron-on material. Gently remove the fabric and plastic from the iron-on material. I had to do 1 more press of the iron over the material in a few places to make sure it was completely adhered to the fabric bin.
Fill the bin with only the items that are suppose to go inside. Teach the kids how to find what they need with the fabric bin labels!
I have an easy tutorial for how to declutter your kids toys that is perfect once all the bins are labeled!
Now you can enjoy the fact that things are easily labeled for the kids to find exactly what they need!
How To Make Picture Labels
Picture labels are labels with actual pictures of the items inside.
To create picture labels, I recommend using real items. This is more meaningful and easily connected to things for children.
So to take a good picture, get two pieces of tag board or a white background. Select a few items from the bin or basket and lay them out on the tag board.
Clean off your phone camera. Take a picture going horizontally of the items. Print each picture.
Laminate the pictures. Use a hole-punch to make a hole in the picture. Add a ring clip to the hole and the bin. Repeat for all your picture labels.
Now if you don’t want to do all those steps, I do have picture labels you can print and laminate.
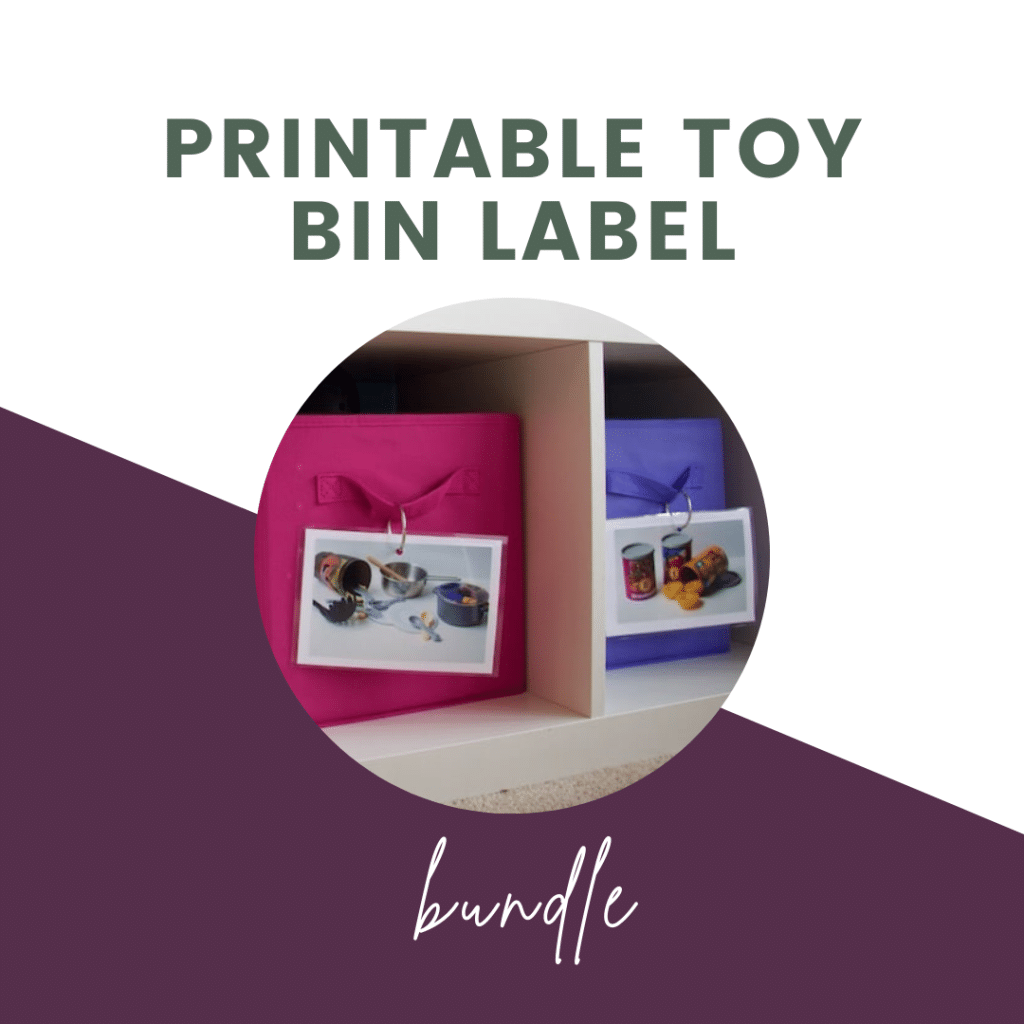
Printable Toy Bin Labels Bundle Pack
Keeping toys organized can be tricky, but these toy bin labels are perfect place to start!
Included in this label pack are over 90+ labels for every toy category you may have. Use the labels that work for your toys and keep things organized.
How To Make Labels For Bins + Shelves
The tutorials below are helpful for adding labels to wire shelves or bins that need to be labeled but may not work for traditional labels.
Wire Shelf Labels
If you have wire shelves, then deciding on a way to label them can be tricky. Which is why wire shelf labels are perfect for giving each shelf a category.
You can even add the labels to different parts of the wire shelving to keep groups of things together.
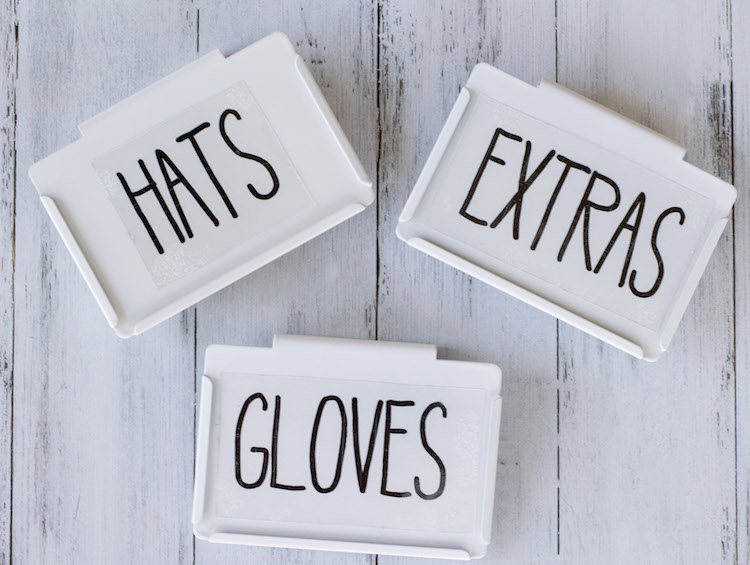
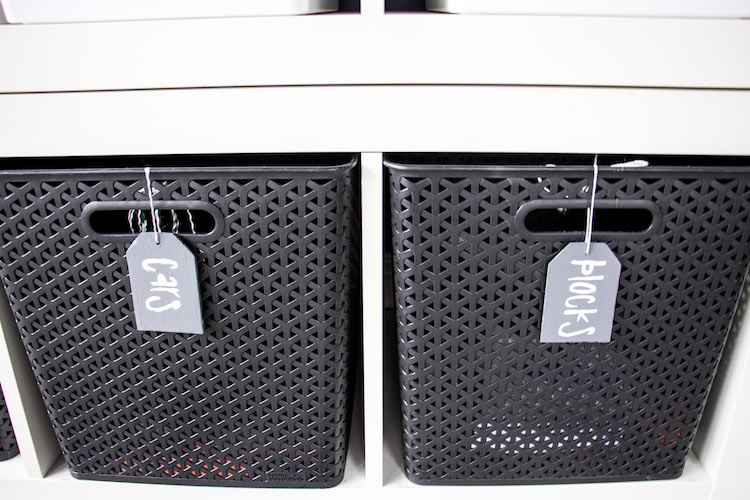
Bin Clip Labels
Bin clips are those clips that go over your bin or basket as a different way to label.
They work well for items in your linen closet or pantry.
To use the bin clips, you can write on the clip or you can print out a card and insert it into the clip. This way you can have consistent labels!
How To Make Labels With Label Makers
I love label makers for labeling.
I once had a client’s daughter take the label maker and label ever shelf, drawer, and closet in her room. It was amazing. Because she could create labels that worked for her. Which makes label makers super accessible when organizing.
You can use label makers for labeling everything in your house.
I have a breakdown of my favorite label makers and how I use them.
How To Make Crafty Labels
All the labels listed below are crafty label tutorials. These include using a die cut machine, adhesive tape, specialty pens, and more. These are probably some of my favorite labels because they are so unique.
Die Cut Labels
If you are super crafty, or like to put your own special touch on labels, then using your die cut machine to cut out labels is a fun and easy way to get organized.
Using your die cut machine, create a design and cut it out. Then add writing to the label. Stick the label to the bin or basket using a sticker maker machine.

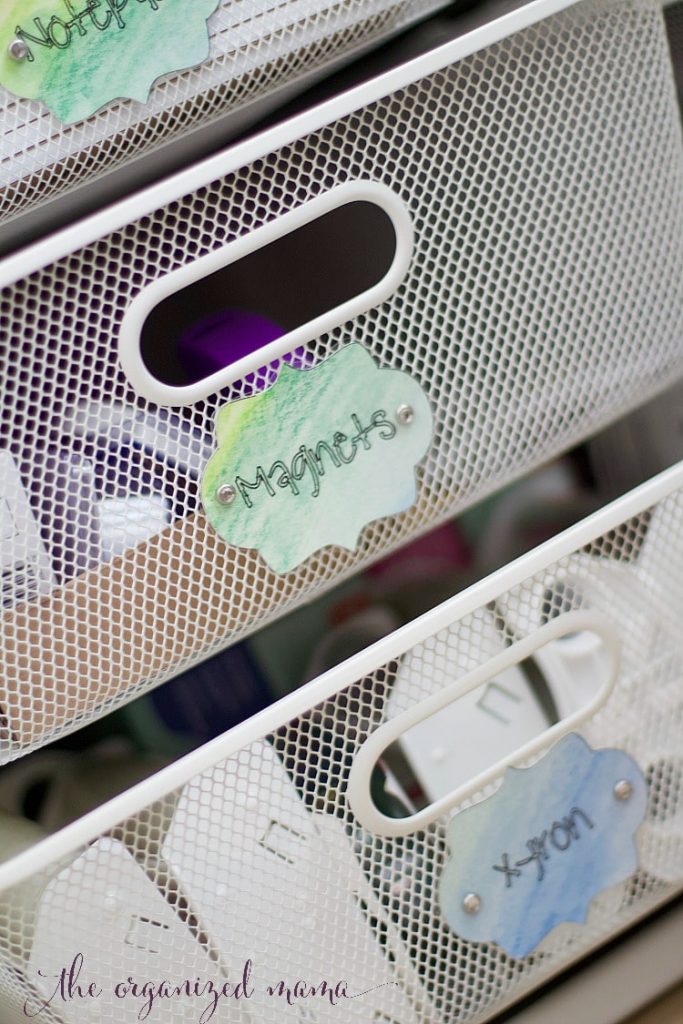
Water Color Labels Tutorial
Using the watercolor pencils, color over a piece of watercolor paper. To create the rainbow effect, start with red by coloring a small part of the paper. Then move to orange, etc. until the entire paper is covered.
Wet your paintbrush and paint over the paper to create a watercolor effect.
Once the paper is dry, cut out the labels. I used my Cricut Maker but die cuts or by hand works as well!
Write on the labels using a dark marker.
Run each label through the Xyron Creative Station Lite with laminate refill.
Cut out each label leaving a small amount of room around the outside of the label.
Using a small hole punch, punch on each side of the label.
Attach each label to the bin using the brad by placing it in the hole punch.
Finish organizing your craft supplies by keeping like items contained. Most of my drawers have boxes as organizers because they are the perfect size for my supplies and I don’t care if they get gross from my supplies!
Basket Labels Tutorial
Materials:
- Wooden Tags
- Paint Brushes
- Americana Decor Chalky Finish Paint in Relic
- Americana Decor Chalky Finish Paint in Everlasting White
- Twine or Ribbon
- Pencil
Paint the wooden tags on each side. I used Relic paint to get a grey color. I used a big paintbrush to cover the tags and painted them on a tray.
When tags are dry, write the word you want on the label using a pencil. Trace over the pencil using the Chalky Finish paint in Everlasting White. I used a small paintbrush.
Repeat for each of the tags. Once paint is dry, string twine or ribbon through the tags and tie them to the basket.
This is probably one of the easiest ways to make basket labels. Because you can completely customize these labels, it is perfect for adding to any type of basket!
Hand Lettered Labels Tutorial
Cut cardstock paper to the size you need for the labels. Write the label on the cardstock using your Tombow Dual Sided Pens.
Adhere labels to bins using Tombow adhesives. Repeat until your entire home is labeled!
Pro Tip: use your computer to get a template to trace.
Using a program on your computer (I love using Canva), create a template for your labels. You can also do this via Excel, Word, or any other computer program you enjoy using.
Find a hand lettered font in your computer program. Write the word for the label in the computer program. Print out the labels. Cut out the labels so they are the exact size you need.
Adhere the label to the bin using your Tombow adhesive. Since hand lettered labels are all the rage, you can get that look easily!!
I love using my Tombow pens to create custom, hand lettered labels. But if you don’t like the look of your handwriting, creating labels on the computer is an easy way to get the look without using your own writing!

Custom Labels with Spellbinders Platinum Die Cut Machine
Materials:
- Spellbinders Platinum Die Cutting Machine
- Spellbinders Nestabilities Label 33
- Xyron Creative Station With Permanent Refill
- Paper: White and Bright Colors
- TomBow Dual Sided Pens
Cut out the labels using the Spellbinders Die Cutting Machine.
Create a “sandwich” with the blocks, paper, die cut, then top block. Run through the machine. Repeat this process for however many labels you need.
Run the white paper through the Xyron Creative Station with permanent refill.
Adhere the white paper to the colored paper labels.
Using the TomBow Dual Sided Pens, write on the white label. I used the same color pen as background paper.
Run the label through the Xyron Creative Station again.
Adhere the label to the bin.
Repeat until all bins are labeled.
I love these labels because they are simple, yet unique. Plus they are the perfect custom sticker label since the die cut comes in a variety of sizes. You can create larger labels using the largest size. Or small labels using the smallest die cut.
Other Ways To Label Your Home
There are so many other ways to label your home. So I am sharing ways you can also label your home in other ways!
Name Bubbles
I have always been a huge fan of Name Bubbles. They have many different types of labels, which is why I love their products. I typically use the write-on labels for labeling things such that go in the fridge or freezer. I will write down what date that I made the leftovers. Also I will use the write-on labels for labeling things in the freezer. This helps keep my food organized since I am not holding onto things that have long expired.

Love It Labels
One of my former organizing assistants started Love It Label during the pandemic. And they are incredible for labeling everything in your home. These labels are perfect for helping you label kids clothing, backpacks, and other items that leave the home…and you hope they make it back!
File Folder Labels
Now these labels are just for the file folders you have to store those paper documents you keep. And labeling them may sound obvious, but I have worked with countless clients who never labeled any of their filing documents. To label file folders, think of categories. Then group the documents together based on the category. Add a label to the filing folder. Or you can get pre- made filing labels in the Paper Clutter Plan Workbook.
Label Binder Clips
When it comes to paper clutter, I either try to get it electronically, or store it in a binder or magazine holder. If I do store something in a binder, it is meant to be used as a storage system, not a filing system. For example, I keep all of our holiday cards in a binder. This is a way to store and organize what I give as gifts, people’s addresses, and other items that go along with the holidays.
Stickers
I have used stickers to label bins, such as our giant family bins and gift wrapping station. I have bought packets of stickers to add to any bin. Typically, I use stickers for bins or containers that don’t change what it is holding. Because stickers can be so hard to get off, make sure that you are good with what you decide to store in the container that you are labeling with sticker!
Foil Labels
I use foil labels when I create pantry and play room systems for my clients. I like these labels because they can be customized to however you want, while still giving glass jars or clean bins some personality! The foil adds a touch of class to any area of the home.
BONUS
Because I love labels, I made sure to add an entire chapter into my book, Home Sweet Organized Home.
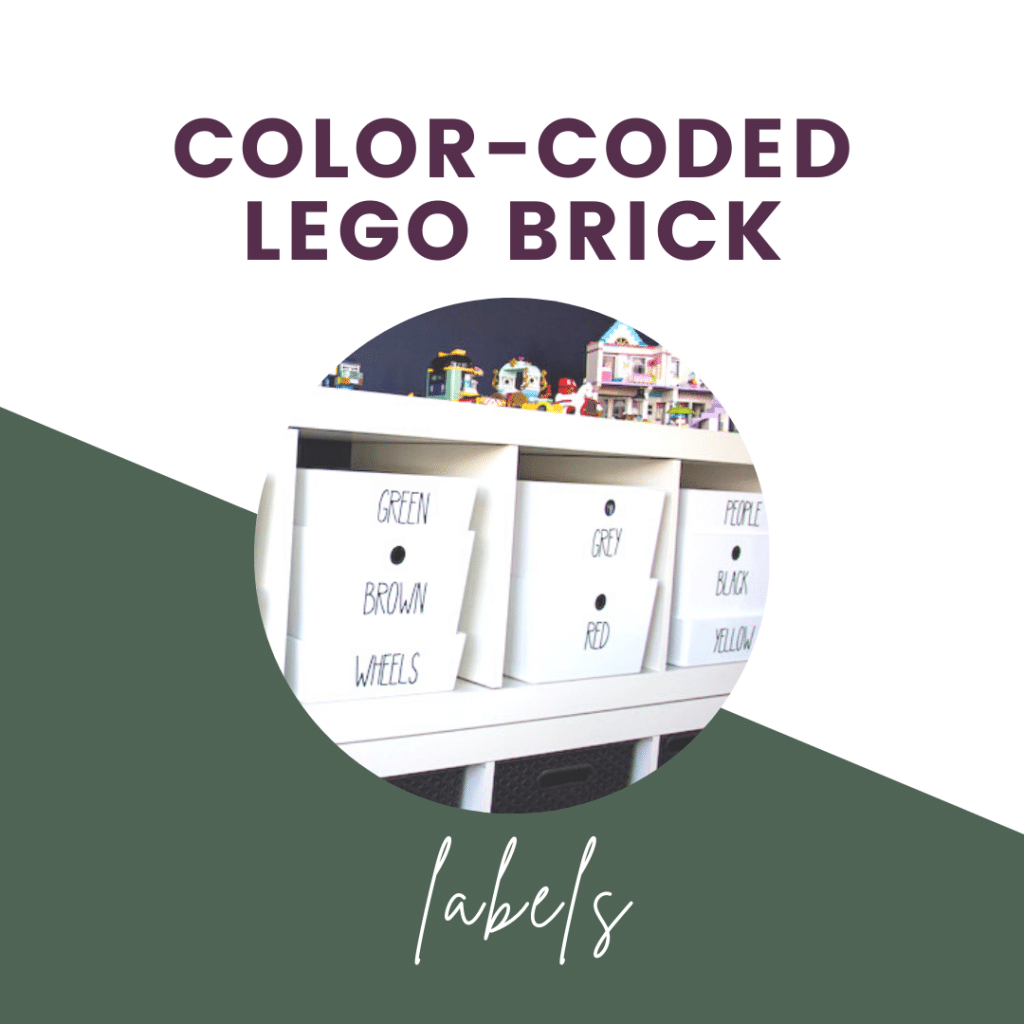
Color-Coded Labels For Lego Storage
Keep the Lego bricks organized with these decorative labels!
Included in this label pack, you will get all the colored labels along with other categories to help keep your Lego bricks organized.

")


