

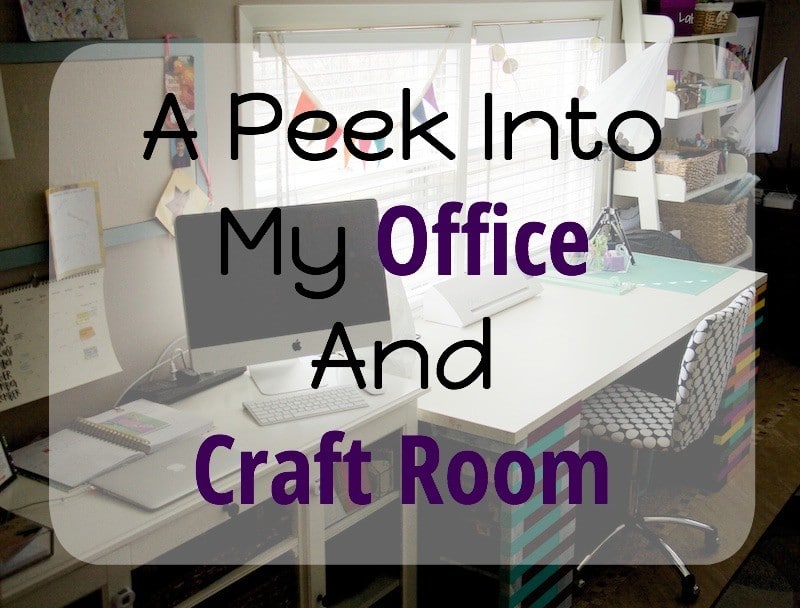
My office and craft room are located in a room that is right off of the garage. It is a decent sized room, and in a typically 1950’s house, this room would be considered the family room. But, we have a basement that is serving that purpose, so this was just an extra room in our house.
Now, I do not get this entire room solely as my craft room. Although that would be the best thing ever! I have to share this room with my husband, as it also serves as his office. AND this room also serves as our mud room. So we put in built-in cubbies to use as our mud room area a while ago to keep our jackets/hats/bags/shoes/etc. organized.
AND, this room is also the place where my kids can create and do projects. I keep the kids projects organized by using clipboards attached to the walls to hang up their artwork, and to keep artwork they created at school from piling up in the car. I keep all their crafts organized by using bins that go under their art table.
Holy moly, we got a lot of stuff going on in this one room. So with that much stuff all jammed into one room, I needed to be incredibly thoughtful about where and how I set up this space.
I decided to zone each of the areas I needed to create a cohesive space. I started with the mud room. Since the cubbies were built-in, that is the space they needed to stay. So I worked around the cubbies to create space for my husband, kids, and myself. Since my craft table is so long, I decided to put that on the long wall. Then, I put my desk and craft supply shelves on either side of my craft table. My kids’ art table went on the short wall near the garage door, which left my husband’s desk to go on the remaining wall.
Once all the furniture was put away, it was time to set up my craft and office area. I started by taking everything out and spreading it all over the floor. I love working with clean, empty surfaces when I start any organizing projects.
The majority of my crafting supplies were organized, but they were not put in the best location to use them. So, when I emptied all the furniture, I made sure to keep my bins and containers holding my crafting supplies together. This way, my focus is on setting up a craft area that allows me to be creative without worrying about finding things.
I also tried to keep craft supplies together and office supplies together. I did this so I could semi-categorize the items to make putting them away easier.
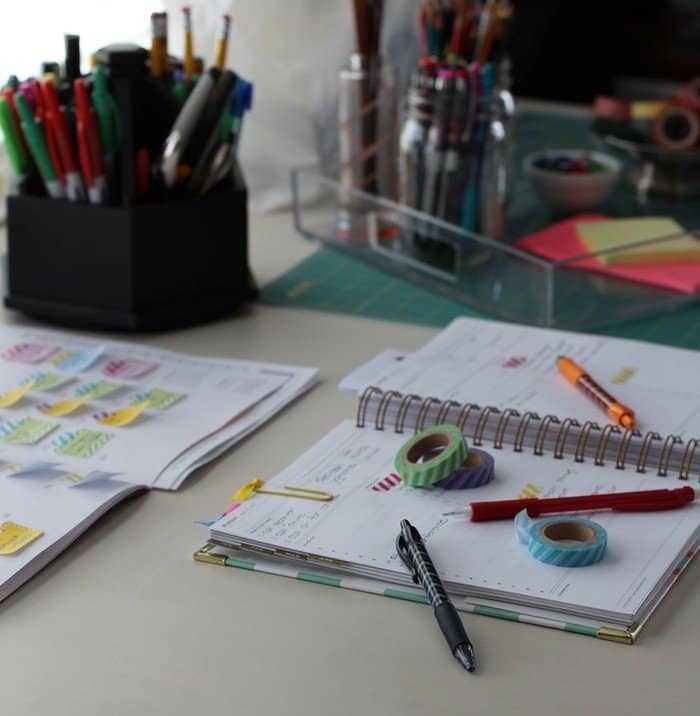
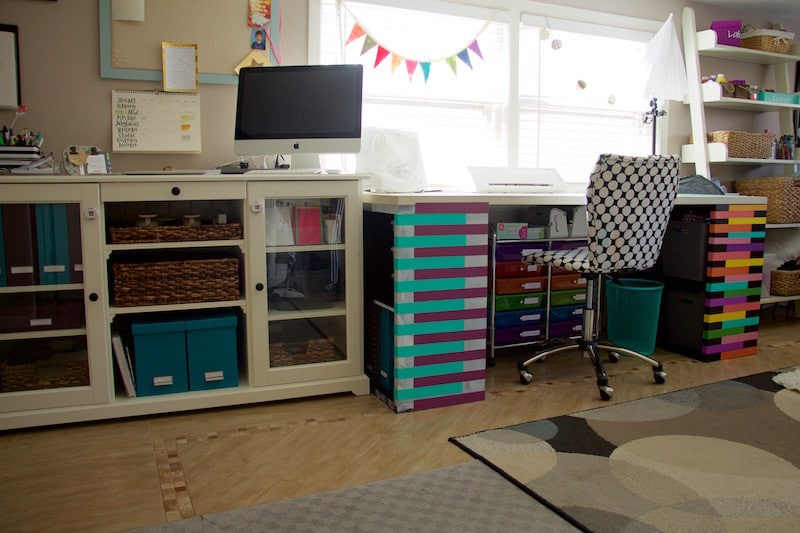
I decided to start setting up my desk first. I had to keep my desktop computer on my desk because I really didn’t want to move it. I played around with where the computer would sit. Then, I set up the rest of my desk area. I wanted to have pencils, planners, and my laptop computer be on top of my desk. Everything else could be stored in my desk shelves.
I follow these helpful office organization tips whenever I am setting up an office area, along with following these styling tips for creating a functional, yet beautiful office area. I always use magazine holders to keep my documents organized in an office area. You can read more about setting up files and getting ready for tax season here. Using an old box, I created some drawer storage that you can check out here.
I kept the baskets that I had used before to keep things organized in the same location, but decided to change out what I stored in them. I was using one as a “catch-all” type of basket. This wasn’t working for me, so I changed that to hold my Post-It notes and notepads. One basket holds my stickers, because it is so much easier to pull out a sticker basket when the kids want to play, rather than keeping them in a shoe box or other type of bin.
Once my desk was set up, I stood at my craft table. I shared how I did a quick and easy update here because I needed to change up the look of the space. Then, I thought about what I need to have on top of my table that I use all the time. I love having a totally empty craft table. I feel like having a blank canvas helps me visualize things that I want to create. So, I wanted to keep the table rather clear of any unnecessary items. I only wanted to keep things that I use all the time, for almost every project I do. Things like scissors, tape, pencils, seam rippers, etc. I found those things as they were scattered on the floor and put them on my table. Then, I found a small acrylic tray similar to this one to use as my caddie for the supplies. I stored the supplies in empty mason jars. This way, if I need a clear surface, I can take the caddie and set it somewhere else so my table is clear.

My husband made my craft table by using a no panel, slab door and some IKEA Kallax cubes. I like to keep clear shoe boxes with supplies under my table. So, I have some storage under my craft table. I also have a shelf ladder that I use to hold my craft supplies, along with a rolling cart that I store under my desk.
Looking at my supplies that were spread all over the floor, I decided to start putting away things in the rolling cart. Stamps, stamp pads, embellishments, sticker makers, and hot glue guns were going to be stored in the cart. All my stamps were sorted into categories so I could find them quickly. I stored my sticker makers and embellishments in the cart as well, along with my hot glue guns.
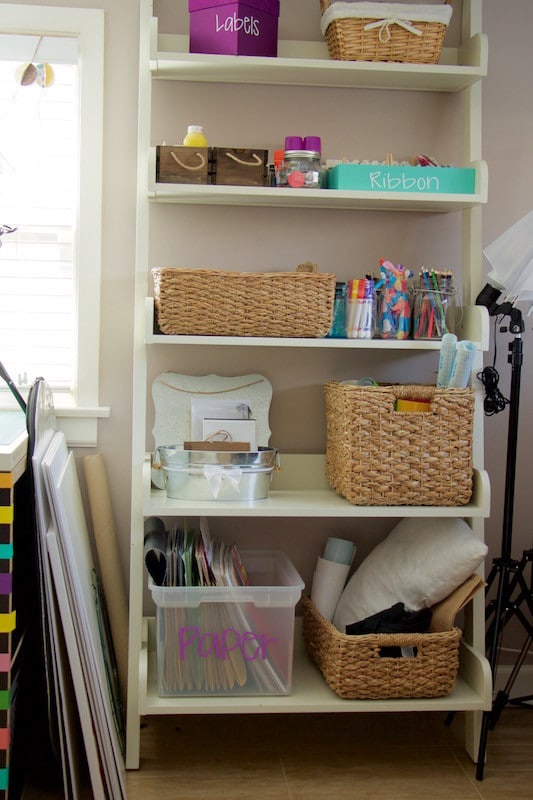
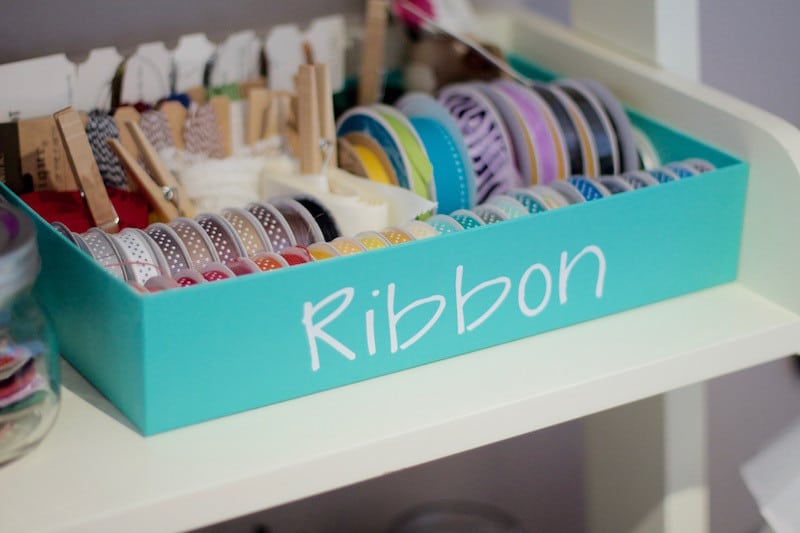
Then, I put away my ribbons, labels, colored pencils, drawing pencils, markers, and other supplies on my shelving ladder. Then, I put my sewing supplies, Silhouette supplies, and staple gun under my desk in shoe boxes. I purchased some more magazine holders to hold my magazines and files. I stored the magazine holders in another cube under my desk. I stored some extra books and my old planners in two different cubes. The other four cubes I decided would store my fabric.
I use to keep my fabric in a file folder container, but I decided that my collection was just growing and the container wasn’t holding everything. So, I ran to Target to grab baskets to hold my fabric. I broke up my fabric into three categories: felt, cotton, indoor/outdoor, and fabric supplies (this is for things like batting). Then, I put the baskets in the four remaining cubes.
Now, all my crafting and office supplies are put away, but there was one more project I needed to complete in order to actually finish organizing my craft room. I needed to create labels for all the bins, containers, and drawers. I got out my Silhouette Cameo and Xyron Creative Station to create some labels. I shared how I create labels by using these products and more.
Once everything was labeled, I feel that the craft and office area is complete. I did add some fun prints to the walls using clipboards, and added a bulletin board to use as my inspiration wall. And, I love hanging different projects I have completed on the windows. I shared how I made this paper garland. Now that the space is clear and everything has a “home”, I am ready to get creative and start making more fun projects in my clean and organized space!


")


Hi Jessica, nice work as well as nice post too. It’s such a wonderful experience to learn about “How to Set Up a Craft Room” & I like when you mention, “you follow office organization tips” whenever you sits on office area.
I would also like to follow it…!
Thank you Alina! I”m glad you enjoyed the tips!!