

This year I am so lucky to be joining a bunch of bloggers in their kids’ Christmas tour blog hop!! Obviously, I am the token Jew (insert laughing face emoji), so I got to create a kids’ Hanukkah tour!! And with that tour, I am sharing a really easy tutorial for creating a Lego Hanukkah menorah.
For those of you who don’t know, a menorah is the candle holder that we use for Hanukkah. Each night, we light the tall candle, or Shamash, along with candles that represents each of the 8 nights of Hanukkah. One candle for each of the nights that are lite right to left to commemorate a miracle that happened once a temple was destroyed. The Jews found oil that was only enough to last one night, but ended up lasting eight…hence the eight candles on the menorah. So let’s go take a peek into our Hanukkah tour!
How To Make A Lego Hanukkah Menorah + Hanukkah Decor
Some links may contain affiliate links.
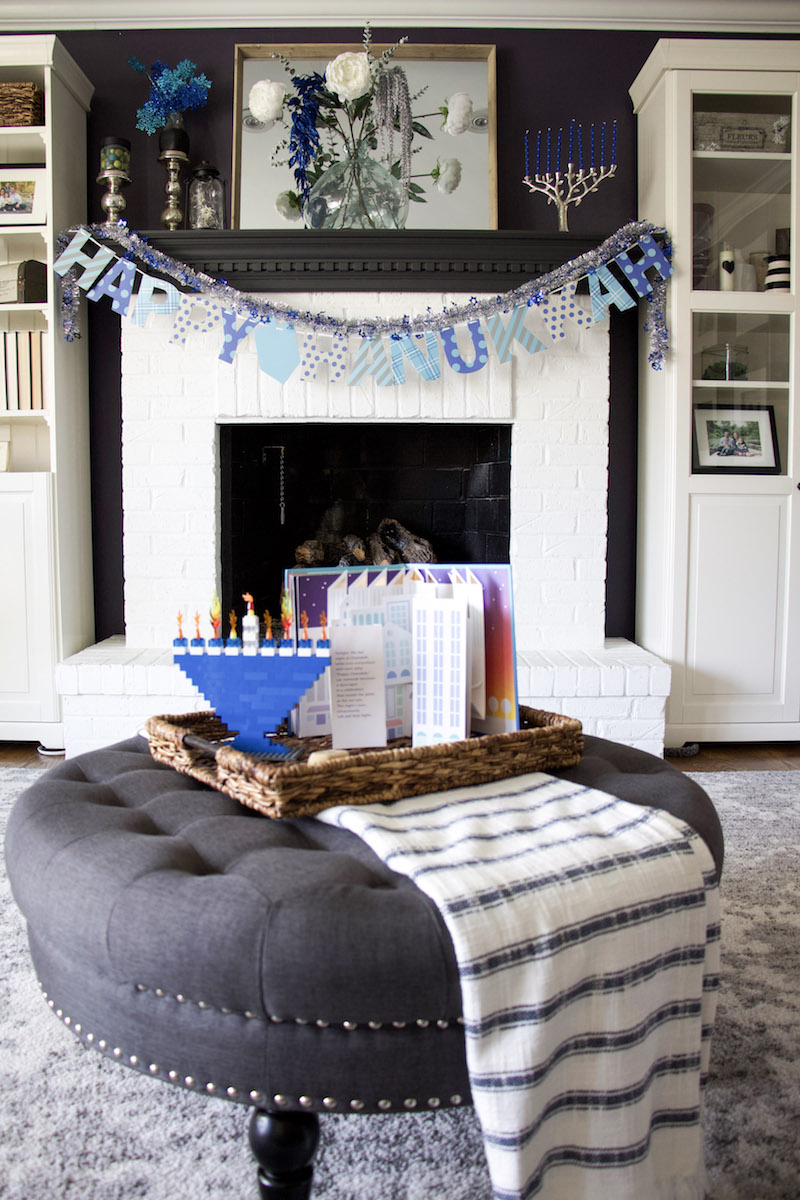
The biggest thing when it comes to decorating for Hanukkah is that there really isn’t anything massive we get to decorate. The focus is on the Hanukkah menorah. So finding decorations can be tricky because almost everything is either a sign or a menorah. I typically just look for sparkly blue and silver things and try to make them work!! I will walk down the aisles at craft stores looking for things that are silver and blue and will figure out a way to incorporate them into our mantel.

Since we don’t go super wild with the decorations, I like to keep the family room decorated. The kids always help with adding the blue and silver decor throughout the space. The kids added the blue candles to the menorah and we added that to the mantel. We also have found blue snowflakes from Michael’s craft store to add to some vases. This totally gives the space a glittery vibe.
The banner that says Happy Hanukkah along with the garland and lights were added so that the mantel still looks kid-friendly. The banner we have is no longer available, but this one from Etsy is just as adorable!! We also added a wooden sign we made using Elmer’s glue to the entryway.
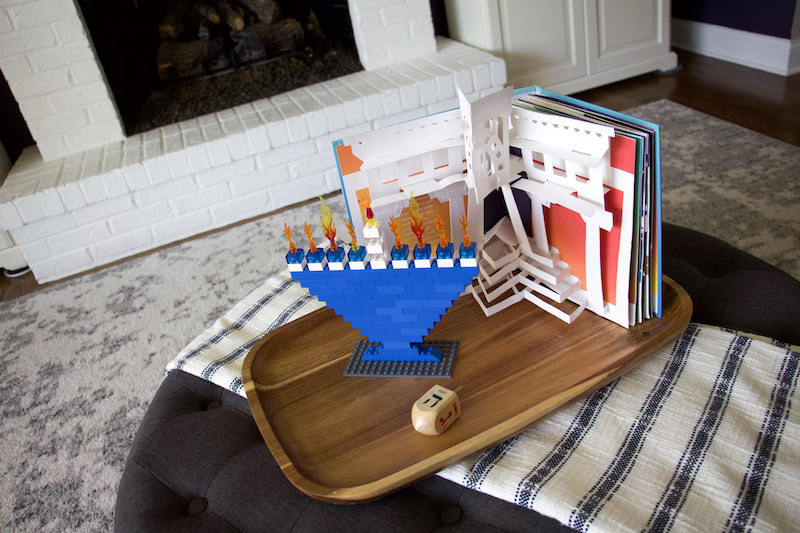
Then we made a menorah out of Legos. This is truly the best kid-friendly way to decorate!! Below is the full tutorial to create this adorable Lego Hanukkah menorah.

Base of Lego Menorah
I started with a flat piece as a base. Then I built up the Hanukkah menorah on that base.
I used 2 2×4-brick pieces, along with 2 rounded bricks to create the bottom of the menorah.
Then I placed a 2×4-brick and a 2×2-brick on top.
Finally I placed a 4-brick to create the base.
Lego Menorah
To create the menorah, I used all blue bricks, and I tried to get all the same hue of blue. This was surprisingly easy to do since my son loves any Lego set with blue bricks in them!
I added an 2×8-brick on top of the base.
Then I gradually added four extra bricks to each layer of the menorah.
I stopped when I got to 26 studs (the bumps on the Legos. And, yes, I did look up the actual name of them).
I did use the flat blue pieces to add an extra layer to the top of the menorah.

Flames Of Menorah
To create the candles, I used the flames from the Legos. So I built up white and clear blue using 2×2 bricks. Then I added flames to the cone Lego bricks in a clear orange.
For the middle candle, I used white and clear 2×2-bricks to create a tall candle. Then I added the flame.

My kids are absolutely obsessed with this menorah, as am I!
So go grab that giant bin of Legos and get cracking on this Lego menorah!! And, while you are constructing that menorah, try reading some of my favorite Hanukkah books:
The Latke Who Wouldn’t Stop Screaming by Lemony Snicket
Hershel and The Hanukkah Goblins by Eric Kimmel
Chanukah Lights (Pop Up Book) By Michael Rosen
Want more Hanukkah decor?? Check out these posts with tons of Hanukkah inspiration.
How To Create A Happy Hanukkah Rustic Wood Sign
Free Printable Hanukkah Gift Tags
DIY Hanukkah Decorations From Dollar Store
Now, check out these incredible bloggers and their Christmas decor!! They are seriously is amazing!!
Two Twenty One / Modern Glam / DIY Decor Mom / At Charlotte’s House

The Lily Pad Cottage / House by Hoff / Organized Mama / Kaleidoscope Living

C.R.A.F.T. / Lemon Thistle / Kate Decorates / Love and Renovations / Inspiration for Moms


")


I love your Lego menorah. So creative! I didn’t even know Legos made flames!!! Very cool!
Thank you Laura!! Yes we had so many because my son loves the race cars with the flames!! Ha!
This is such a fun idea!!! I’ll bet your kids love it! xo
Thank you!
Oh my goodness, how fun! I LOVE this idea so much!
Thanks so much!!
What a fun idea! Love it!
thank you!!
Looks very similar to the LEGO menorah jbrick put out last year. They put out two new menorahs this year. Always some cool Jewish-themed LEGO for all year round. Check em out! PS, it’s real Lego brand, not the fake stuff.
I saw those! This one is made with real Legos, not Duplos, from pieces I had around the house!