

Back in 2015, I decided to turn our IKEA toy storage shelves into a bench. I decided to do this because we needed a spot to sit in the playroom but I didn’t want to add any additional furniture because the room wasn’t that big. So I created a bench out of IKEA Kallax shelves, wood, and a foam mattress pad. You can read about that here.
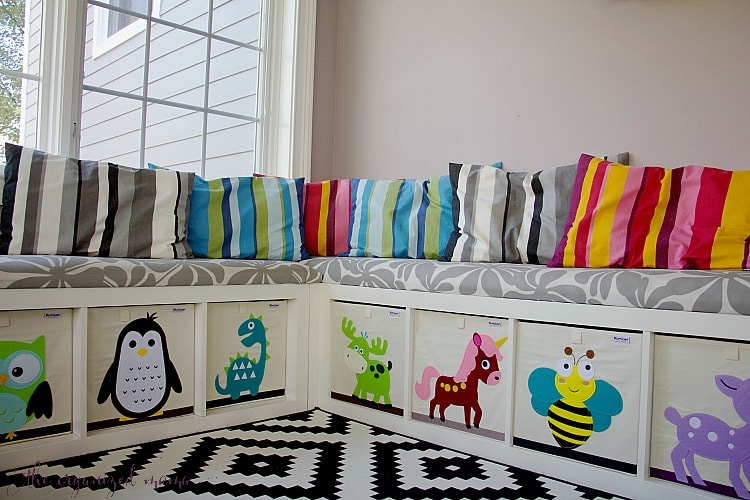
I loved the bench because we were able to sit and play in the play room. We had a comfy spot to play and pillows that acted as a backing to the bench worked really well for us.
Then we did a massive renovation on our first floor of our house. And we were able to create a play room for the kids where the benches worked really well in the space.
Well fast forward to today, and I wanted to do a check in post to see how the toy storage bench was holding up. Because some things have totally changed, while other things are the same!
How It Started
When the kids were babies, I wanted to find a way to store their toys so they could get them. I couldn’t have a large bookshelf because we didn’t have the wall space. See our playroom was a sunroom with a door to the outside on one side. Two walls of windows. And an opening into the dining room. So there wasn’t really wall space to add any large bookcase or storage unit. Or even seating options available in the playroom.
So I went with shelving from IKEA. I turned the single Kallax bookshelf on its side. And added bins the kids could pull out with their toys inside. It worked so well because we could put the bins with the kids’ toys inside the shevles on the Kallax. I found bins that worked perfectly. And I labeled it all to make sure everyone knew what should go where.
But Ben and I got sick of sitting on the floor, so I decided to make the bookshelves act as benches. We needed something to sit on but couldn’t add furniture to the room.
I took the measurements of the benches and upholstered a cushion to create a toy storage bench. You can read the tutorial here.
And that entire toy storage bench solution was amazing. But then we got into Lego building.
How It Is Going
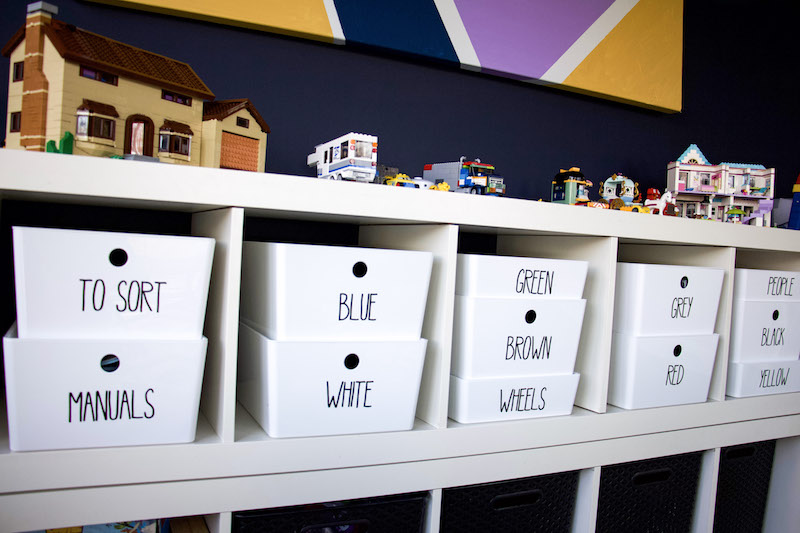
And with the Lego building came lots of Lego creations. So we needed another way to store the Lego creations. The Lego creations started to take over the entire room. So we tried moving them into my son’s bedroom on his shelves. And while that worked for a while, he wanted to play with the Lego creations with the Lego bricks. Which meant that we needed another solution.
Which is when we decided to take apart the toy storage benches.
Instead of getting new shelving, we just stacked the single IKEA Kallax shelves onto each other to create a bigger shelving system. But they were two separate shelving units so when we stacked them on top of each other, the slid.
To hold the shelves together I added 3M velcro onto both ends. This has stopped sliding of the two separate shelves.
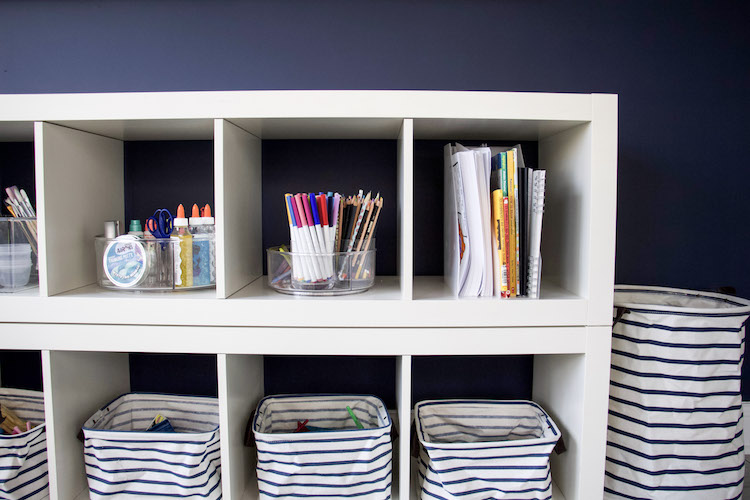
Now the IKEA Kallax shelves hold our Lego bricks, Lego creations, and bins for toys.
The bins for the toys isn’t a drastic change from how we had the toy storage bench. But stacking them on top of each other is a big change.

My Thoughts On The Playroom
While I do love the toy storage bench I created, I think the room has worked really nicely for how the kids play with their toys now. Since they are more into artwork, we have an art cart and large table for them to create at. On that same table, we have room to build Lego creations. Then the creations can be stored on the top of the IKEA Kallax shelves or in a drawer system that is next to the shelves. But the kids aren’t playing with the same types of toys they were playing with when they were younger. The toys they are playing with are a lot bigger or have smaller parts. And because of that, we needed to change up the way the room worked.
So we had to rework the space. But we didn’t have to buy anything new. We just used the IKEA Kallax shelves to stack on top of each other. We already had a table and chairs. And the art cart was all set up for the space. Nothing new. Just reconfigured how the space was to work for the kids. Which, I think, is the best way to use your furniture!
Now the kids can use the space in a different way, we have had to get creative in how the space is set up. By taking a step back to evaluate how the kids used the space helped in the current setup. You can see more playroom plans here.
You can read more about how to organize Lego bricks below:
Lego storage systems that work
Color-Coded Labels For Lego Storage
Top 10 Best Lego Storage Ideas
What I Would Change With The Toy Storage Benches
So looking back, would I do the toy storage bench again? I have to say absolutely! But I would make sure that the bench was wrapped in more durable fabric. The fabric I chose was fine, but I would have gone with something that more easier to clean.
Using the mattress topper was a great way to keep the cushioning in the bench seat. After all that time, it still felt comfortable to sit on.
If you are looking for an easy toy storage bench, I would highly recommend following this tutorial to recreate it in your room!

")


I would love to know where did you get the black bins for the cube storage?
They are from Target!!
Hi. Lovely room! What’s the gray paint you use? Looks like a greige