

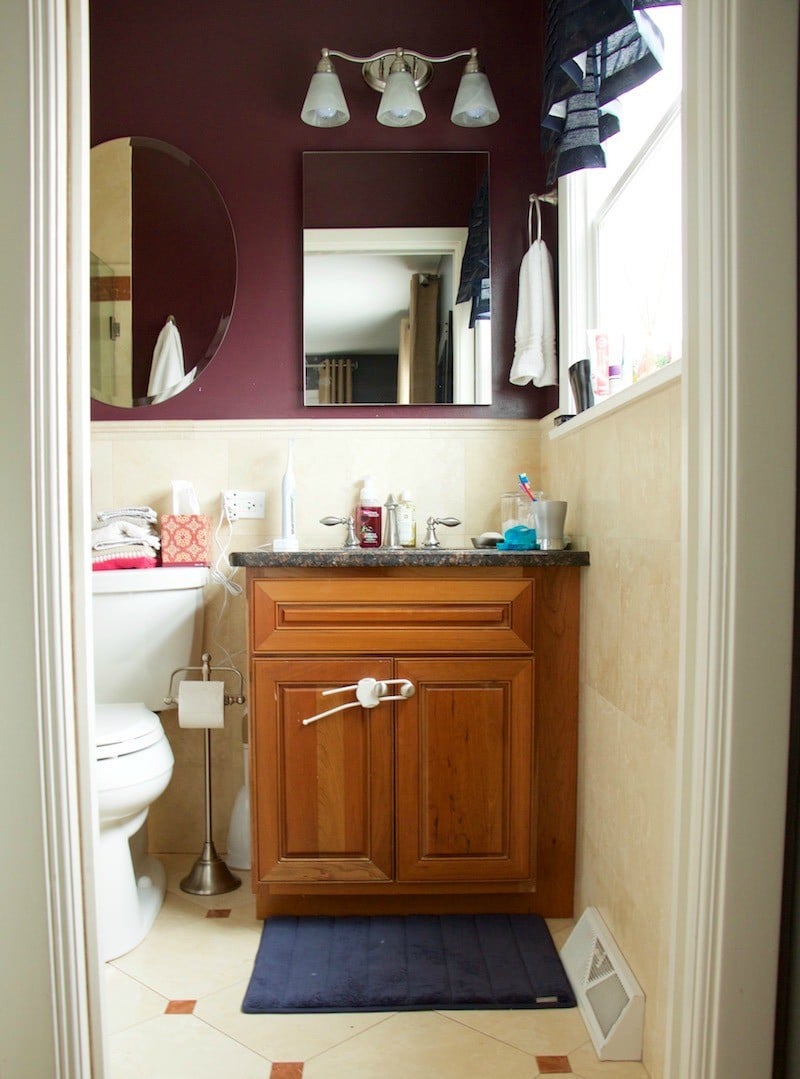
Our master bathroom is tiny. Like, seriously, it is almost comical when the entire family is in that one, small space. (And, yes, the entire family, including the dog, tend to gravitate into that one space when both my husband and myself are trying to get ready.)
It is almost like all the clowns getting out of the clown car. You always wonder where they all came from, but somehow they all fit. Well, that is our master bath. And no time in the near future will we be able to remodel to make a bigger master bath, so for now, this is what we are working with.
But I am incredibly grateful that we actually have a master bath, because when we were house shopping, we saw a ton of houses without a master bath. So we just need to add a ton of function into our master bath.
When we moved in, we painted our bathroom a brown-ish color. That got old quickly. So we painted it a maroon-ish color. That worked for a while. But we got sick of that as well. So it was time for some major painting projects in our bathroom.
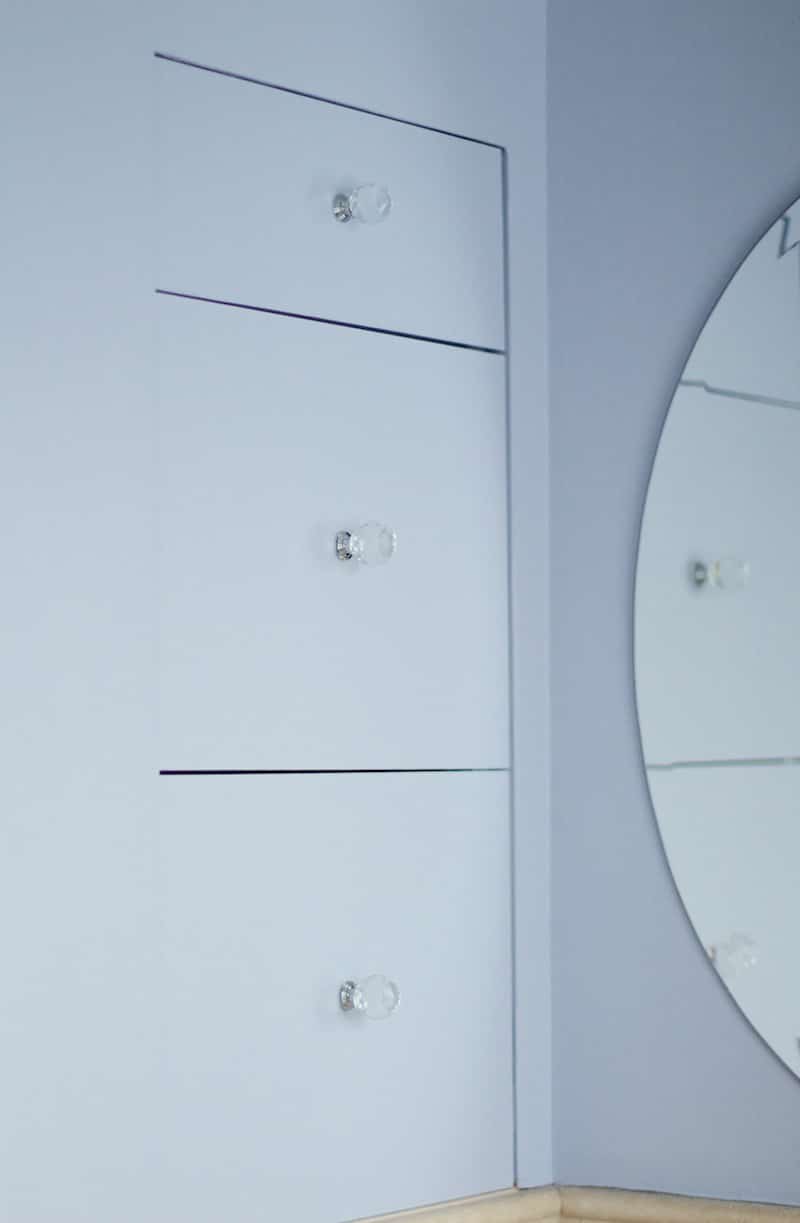
We decided to lighten up the entire room with the hope that it will appear larger. In order to do that, we would have to paint the cabinets white and pick a light color for the walls. Misty Lilac was the color we choose for the walls, because it worked with the dark accent tile that was already in the bathroom when we moved in. And we went with a pure white for the cabinets, which we Ben painted like he did when he painted the cabinets in the kids’ bathroom. We also went with the mildew-resistant in the Advance Waterbourne paint, since we are painting in a bathroom.
Starting with the walls, we removed all the mirrors, light fixtures, and built-in drawers. Yes, we have built-in drawers which are totally amazing since they are the only drawers we have in the bathroom. And, come to think of it, in this house! For some reason we have very few drawers in our entire house. We have two in the kitchen, two in the kids’ bathroom, and the three built-in drawers in our bathroom. Totally random, but just realized that.
Back to the process…Ben took off all the cabinet doors and we cleared out everything under the sink, and removed the built-in drawers from the wall. Then, he primed the entire bathroom; walls and cabinets. Because everything was so dark, we needed to make sure the true, light colors would be as vibrant as we wanted, so priming everything would help tone down the dark undertones.

He ended up doing two thick coats of paint on the walls. In between the coats of paint, he worked on the cabinets. Using a roller brush, he covered the base of the cabinets in white paint. Then, the cabinet doors were rather tricky, due to the detailing they had. So we got creative, and used some of my thin painting brushes, we brushed the white paint into the nooks and crannies of the two doors and part of the cabinet. This was probably the hardest part of the entire process, because of how intricate everything was.
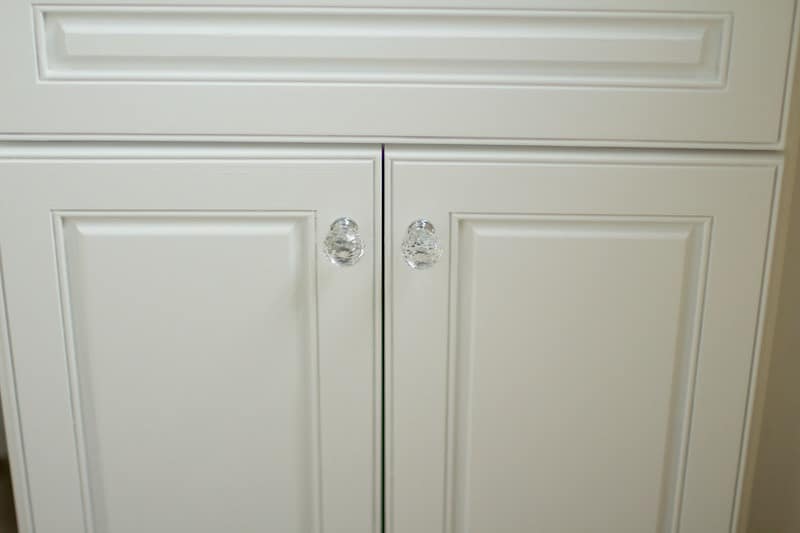
Once everything was dry, we changed out the knobs with glass-ball cabinet knobs from Home Depot. I love how sparkly they are and how easily they added some glamour to the room. We hung up the light fixtures, and an additional mirror. Functionally, we need two mirrors in this tiny bathroom, so we can both get ready at the same time. Decor wise, it does look goofy, and maybe, we can add an additional light fixture over the second mirror so it balances things out, but for now, we have two mirrors.
Then, before we put the drawers back into the built-in wall unit, I organized everything in all three drawers. The top drawer only has Ben’s travel toiletry bag, since it is so high. The middle drawer is Ben’s drawer, and the bottom drawer is mine.

I removed everything from Ben’s drawer and threw away a ton of old or expired products. With the remaining items, I used mesh drawer organizers to store his stuff, along with lining his drawer using a drawer liner. I followed these tips to keeping everything organized in a bathroom.
Then I got to cleaning out my drawer. I started with wiping down the entire drawer and make-up caddie. I lined the drawer using some pretty wrapping paper. Then, I organized my make-up and hair products to ensure they were easy for me to get to, since I only have a limited amount of time to get ready in the morning. I shared some make-up organizing tips here.
Once all the drawers were organized, they went back into the built-in unit. I made sure that both of us could access everything we had in the drawers before I moved onto under the bathroom sink. Because it is just the worst when you get things organized, only to find out you either put things away backwards or in a difficult-to-get-to location!

Then, I got to organizing under the bathroom sink. I lined the bottom of the cabinet using wrapping paper and clear contact paper. I stored my blow-dryer and curling iron on a mesh stackable organizer. I put the rest of the products away using clear bins and labels. I followed some of these organizing tips to get things organized under the bathroom sink.

And, while I was at it, I decided to clean up the medicine cabinet. I cleared everything out and wiped everything down. It is crazy how dirty a medicine cabinet can get over a couple of weeks! I typically clean the medicine cabinet one to two times a month, but it just gets super dirty super quickly. In hopes that it won’t get so dirty so quickly, I found an unused cup to store some smaller items that are stored in the medicine cabinet, such as clippers and tweezers.
I found white bath mats to cover the tile, because I was so over the brown decorative tile that was added. I had to measure and remeasure to make sure that I found the perfect rug size for this space. It was not easy, and after five attempts, I think these work well.
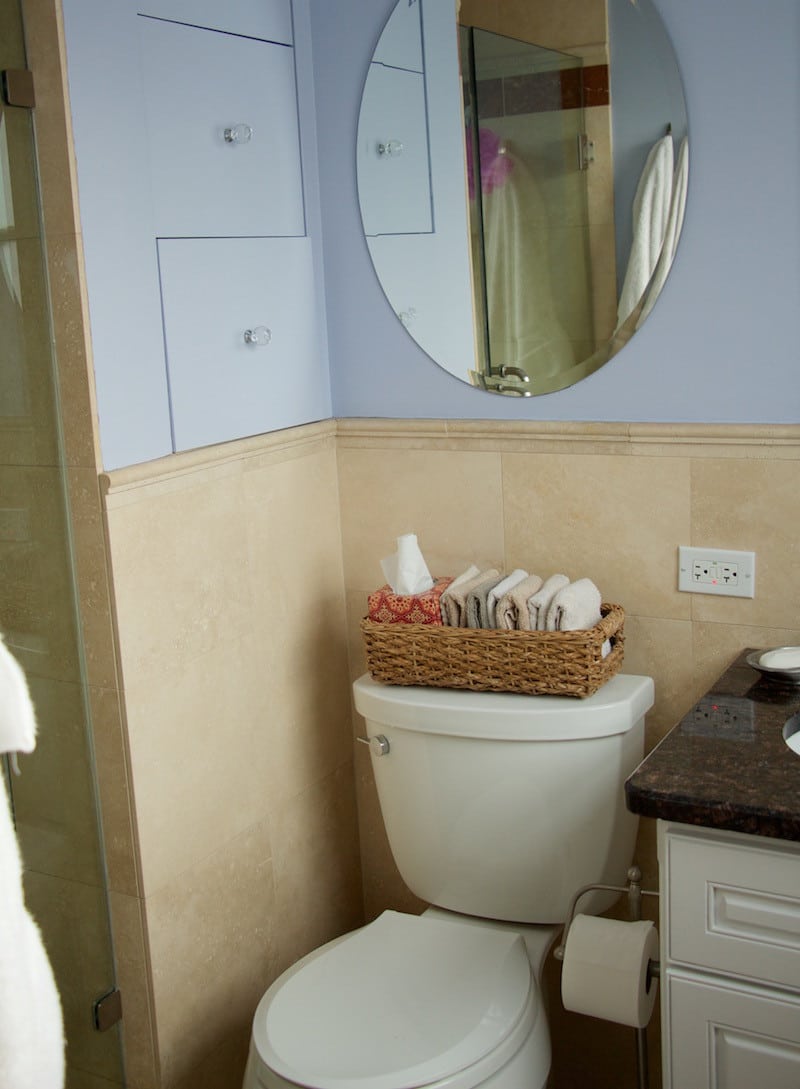
Lastly, I found a basket similar to this one to hold my wash clothes and Kleenex. I use one wash cloth per face wash, as I have really sensitive skin. But, stacking the wash clothes up on top of each other on the toilet was getting rather annoying, so I decided to try using a basket to hold the wash clothes.
I am truly beyond happy with how the space turned out. I love the light colors, which do make the room feel much larger. I love the knobs and the sparkle they give off as the sun shines in through the window. I love how organized and functional the space has become. And I love that this entire project was completed in one weekend! Priming and painting were completed on Saturday, and finishing painting and organizing was completed on Sunday. My advice for totally completing this project on the weekend is to get all the supplies on Friday, so you can start bright and early on Saturday morning!


")


Comments are closed.