
We Tried the Scandinavian Sleep Method—Here’s What Happened
Here’s a crazy thought, what if each individual in a bed has their own blanket that was just for them. No sharing with their partner. No tugging or tossing during…
Professional organizer is sharing her tips for easy ways to enhance kids’ dresser drawers by using drawer liners to line the drawers and more!!
Are you looking to add new life to an old dresser? Are your kids’ dresser drawers in need of a refresh? I am sharing my tips for easy ways to enhance kids’ dresser drawers by using drawer liners to line the drawers, plus how to add some color to the outside of the drawers using the same drawer liner!

This post is sponsored by ShurTech Brands. I received compensation to complete this project for using ShutTech products. All opinions, projects and ideas are based on my own experience. Some links may contain affiliates. For more, please see my disclaimer.

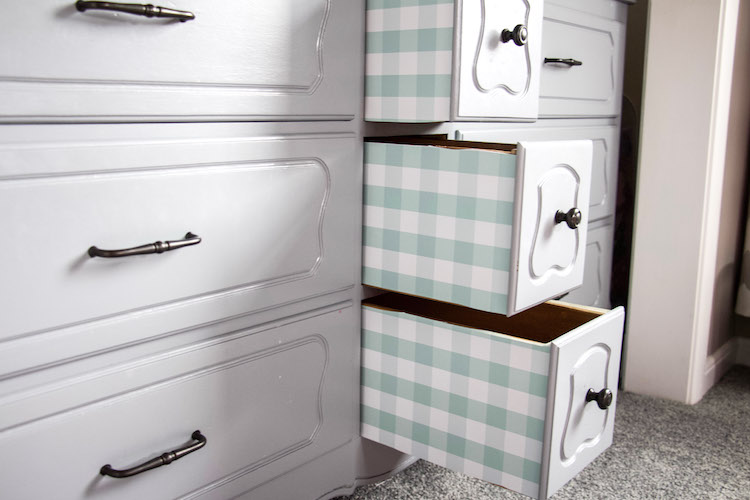
1. To start adding color to your kiddo’s dresser drawer, get some decorative drawer liner. I am using Duck Brand Easy Liner in Gingham. I love the print for my daughter’s room because it fits right in with her pink, purple, and teal decor.
2. Measure the size of your drawer. Then cut the liner to that size. I had to do a mixture of using the lining on the back the using the gingham pattern on the front to cut the drawer liners to the correct size. Since my drawers were measuring at an odd size, I had to go with where the pattern landed when I measured for cutting. You can also use a measuring stick to cut a straight line as well. I didn’t have one, so I just used the grid on the back and the pattern on the front to get my straight lines.
3. Adhere the liner to the inside of the drawer by slowly removing the backing and smoothing it out as you go. I started by removing the top part of the liner. Then I adhered the liner to the drawer. As I peeled the backing off, I simultaneously smoothed out the front with my other hand. Once the liner was in the drawer, I made sure to get out any extra bubbles using my forearm to smooth the drawer liner.
4. Add Duck Brand drawer liner to the outsides of your drawers as well to give some color! Simply measure, cut, and adhere to the outsides of each drawer. I held my drawer liner to the outside of the drawer and folded it over on a corner to see where I needed to cut. Then I looked at the pattern on the front of the grid on the back to determine where to cut the drawer liner. I adhered the liner the same way I did when I placed the drawer liner inside the drawers. I peeled the backing off one side then smoothed the liner from the front while pulling the backing off.

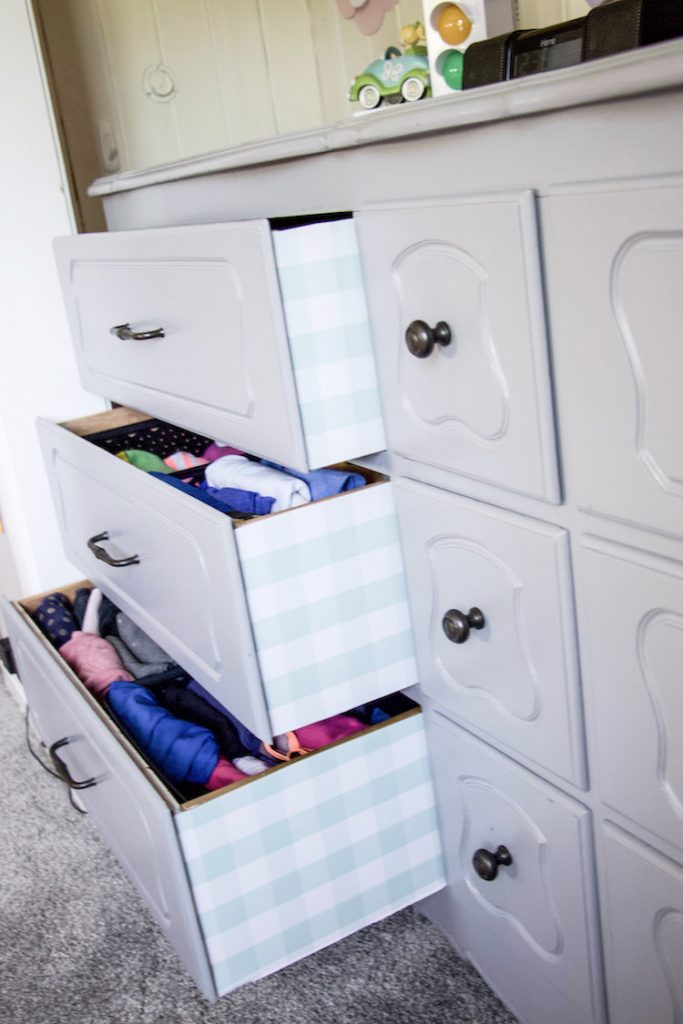
5. Once your drawer is lined, add the clothing back in. But don’t just throw them in! File fold the clothing to fit inside containers or use drawer dividers to keep them from sliding.
6. If the container you use to organize the kids’ clothing slides around, add an adhesive bottom to the container to hold it in place. The adhesive will stick perfectly to the drawer liner and won’t ruin your drawers! Plus all the clothing will stay contained!
Now your kid’s drawers are lined so when you open them, they look beautiful and are totally organized because they are lined on the inside and outside with shelf liner to enhance their dresser drawers. You made sure to file fold their clothing so they can see the prints on their t-shirts. Keep the items standing up by using a container or drawer dividers. To ensure that your kiddos keep up with the organizational system you put into place, check out this post about how I get my kids’ to put away their own laundry.


