
We Tried the Scandinavian Sleep Method—Here’s What Happened
Here’s a crazy thought, what if each individual in a bed has their own blanket that was just for them. No sharing with their partner. No tugging or tossing during…
I am obsessed with labels. I think they help with organizing everything. And there are many ways to label things in your home. One tool I use to label is a Cricut Joy. The Cricut Joy is a machine that cuts labels using different materials like vinyl, paper, and iron-on material. I am breaking down […]

I am obsessed with labels. I think they help with organizing everything. And there are many ways to label things in your home.
One tool I use to label is a Cricut Joy. The Cricut Joy is a machine that cuts labels using different materials like vinyl, paper, and iron-on material.
I am breaking down how to use the Cricut Joy to label everything!

This post is sponsored by Cricut. Some links may contain affiliates. All thoughts and opinions are my own.
So you just got the Cricut Joy! But where do you start?
Plug in your Cricut Joy. While the machine is warming up, download Cricut Design Space in the app store on your phone.
Once you are logged in, click on the hamburger icon in the top left corner. You will see your profile along with a space to connect your machine to your app.
Click on “machine selection”. Then select the Cricut Joy.
Then we can get to creating your label project! Click on the plus sign in the Cricut Design Space app to get started.

Labeling The Pantry With My Cricut Joy
How To Make Labels For Organizing
How To Make Labels Work For You
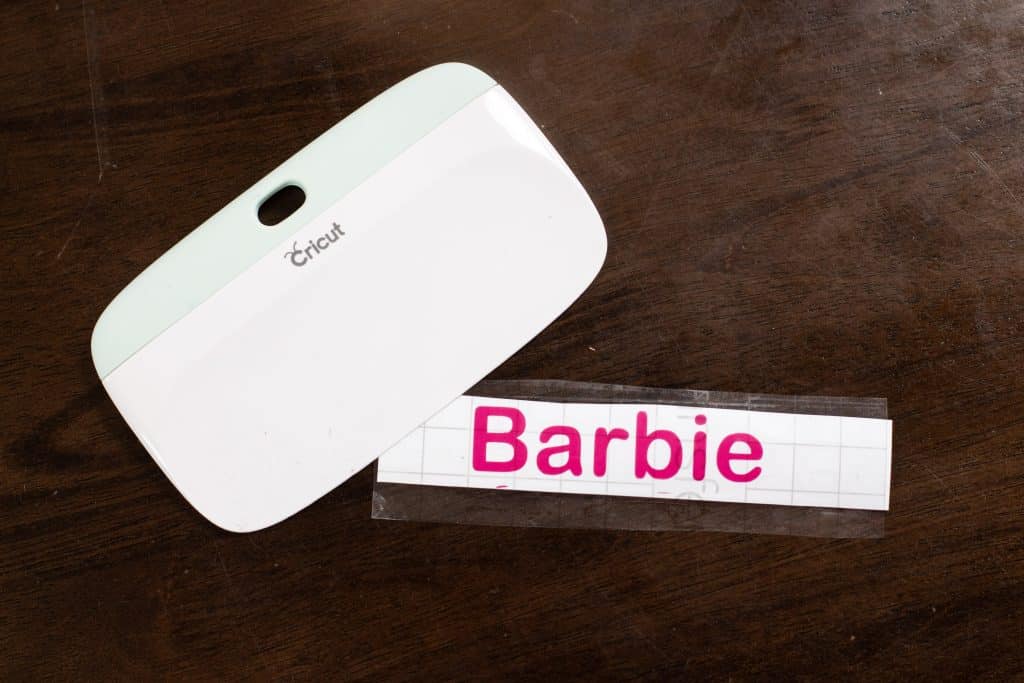
Removable labels are the perfect option for labeling areas of your home that may need to change. These could be on bin clips, drawers, shelving, or containers.
I choose to use removable vinyl on bins that I plan to swap out once my kids grow out of a toy, or on bin clips.
To create vinyl labels using the Cricut Joy, open the Cricut Design Space app. Click on the plus sign at the bottom of the app.
Since we are making labels, you will want to go to the TEXT icon at the bottom of the Design Studio.
Type in the text label you want to create.
You can change the font, style, size, and spacing once you type in the text you want to use.
Once you have created the text labels, click the “make it” button in the top right corner of the app.
Removable vinyl does not need a mat to cut, so you will click on the “without mat” option that pops up. Then click “confirm”.
You will see a preview of how the vinyl will cut your labels. If it looks good to you, click the “next” button.
The select your accessory screen will pop up. Click on your Cricut Joy.
If you don’t see the machine pop up, make sure it is plugged in. You may need to make sure the machine is connected and selected back on the home screen.
After you select your accessory, the machine will prompt you to select material you are using. This is where you will click on “smart vinyl- removable”.
A screen will come up that asks you to load tools and materials. You will need to place the material into the machine before it starts moving. Make sure you have enough of the vinyl to go through the machine.
Then it will check to ensure you have enough material to cut.
Once it checks, you will need to press the green “G” button on the bottom right corner of the app.
The machine will do the rest!
Once the material is cut, you can click the “ok” button to unload the material.
Cut the labels out first. I use the Cricut paper cutter.
Then remove the backing around the labels. Use the weeding tool to get the middle of the letters removed.
The transfer tape will help you place the vinyl labels onto the bins, clips, or whatever you are labeling. Use the scraper tool to smooth out any bumps in the vinyl.
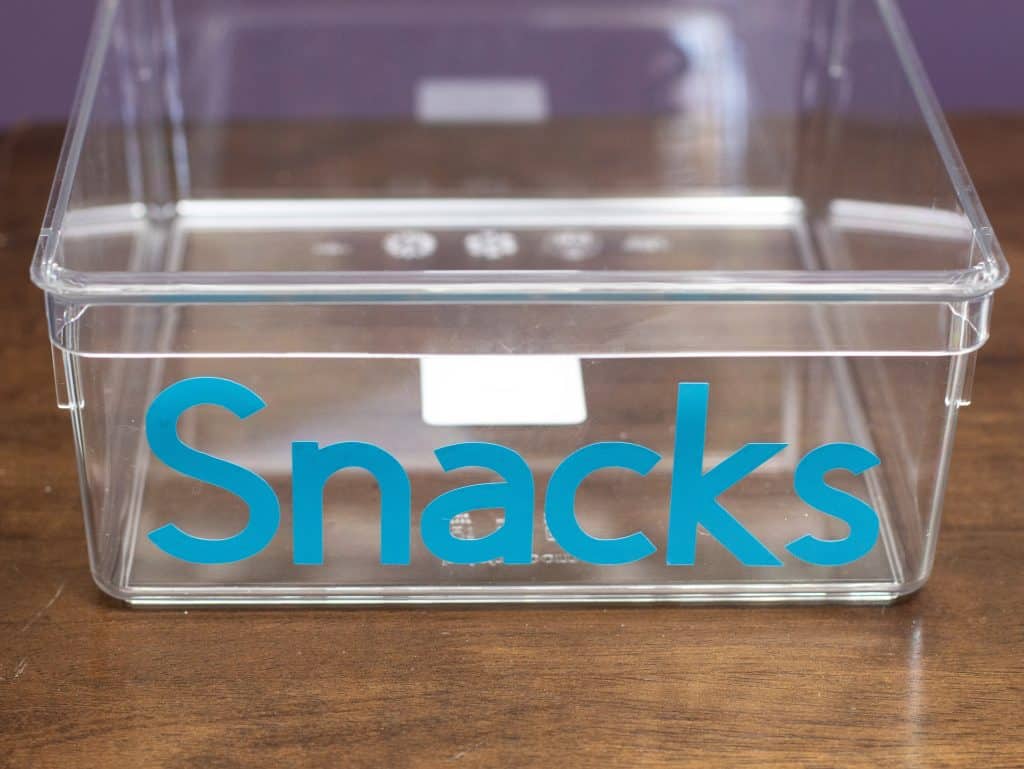
Permanent vinyl is a great option for things that you may need to be water-resistant. Which is why these are perfect for bins in your kitchen! You can wash the container you labeled with the permanent vinyl and not have to worry about the vinyl coming off or bubbling.
To create the permanent vinyl labels, open the Cricut Design Space app.
Click the plus sign at the bottom of the app and create a new project.
Since we are making labels, click on the TEXT button to create labels.
Type in the text label you want to create.
You can change the font, style, size, and spacing once you type in the text you want to use.
Once you have created the text labels, click the “make it” button in the top right corner of the app.
Permanent vinyl does not need a mat to cut, so you will click on the “without mat” option that pops up. Then click “confirm”.
You will see a preview of how the vinyl will cut your labels. If it looks good to you, click the “next” button.
The select your accessory screen will pop up. Click on your Cricut Joy.
If you don’t see the machine pop up, make sure it is plugged in. You may need to make sure the machine is connected and selected back on the home screen.
After you select your accessory, the machine will prompt you to select material you are using. This is where you will click on “smart vinyl- permanent”.
A screen will come up that asks you to load tools and materials. You will need to place the material into the machine before it starts moving. Make sure you have enough of the vinyl to go through the machine.
Then it will check to ensure you have enough material to cut.
Once it checks, you will need to press the green “G” button on the bottom right corner of the app.
The machine will do the rest!
Once the material is cut, you can click the “ok” button to unload the material.
Cut the labels out first. I use the Cricut paper cutter.
Then remove the backing around the labels. Use the weeding tool to get the middle of the letters removed.
The transfer tape will help you place the vinyl labels onto the bins, clips, or whatever you are labeling. Use the scraper tool to smooth out any bumps in the vinyl.
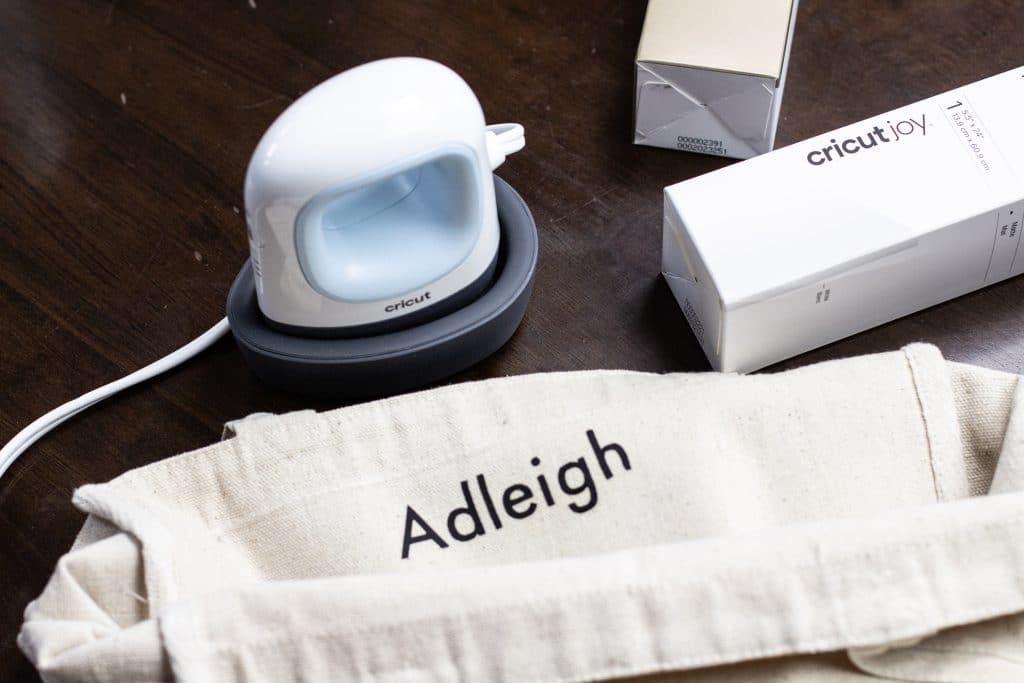
Iron-on material is a great option for things like fabric bins, bags, clothing, or any fabric-type of material. I have created labels using the iron-on material for fabric bins using both text and image so the kids can grow into the organizational system we created for their toys!
To create the iron-on labels, open the Cricut Design Space app.
Click the plus sign at the bottom of the app and create a new project.
You can either select text to create the iron-on labels, or select an image design to use. There are so many images to choose from. You can search or you can filter options.
Add the image or text you want to make as an iron-on label.
Once you have created the labels, click the “make it” button in the top right corner of the app.
The iron-on materials do not need a mat to cut, so you will click on the “without mat” option that pops up. Then click “confirm”.
You will see a preview of how the vinyl will cut your labels. Since this is iron-on, you will need to mirror the image. In the top left corner, there is a mat image. Click that image and another screen will open.
At the bottom of that screen, switch the toggle next to the word “mirror” and it will turn green. Then click close. Your image will be flipped. Then you can click the “next” button.
The select your accessory screen will pop up. Click on your Cricut Joy.
If you don’t see the machine pop up, make sure it is plugged in. You may need to make sure the machine is connected and selected back on the home screen.
After you select your accessory, the machine will prompt you to select material you are using. This is where you will click on “smart iron on”.
A screen will come up that asks you to load tools and materials. You will need to place the material into the machine before it starts moving. Make sure you have enough of the material to go through the machine.
If you are unsure which side should go up, pull a tiny corner apart. You will see a clear side and the iron-on material side. Place the iron-on material side facing up.
Then it will check to ensure you have enough material to cut.
Once it checks, you will need to press the green “G” button on the bottom right corner of the app.
The machine will do the rest!
Once the material is cut, you can click the “ok” button to unload the material.
Use the weeding tool to remove the outside edge and any inside material you don’t want to iron.
Grab your material and lay it flat. Using the Cricut EasyPress, iron on the material. Remove the clear background from the iron-on material. Let the material cool before using.
I get it. Creating labels can take a long time.
You can also download my printable labels bundle. Use your Cricut machine to cut each label out. And have beautiful labels without the stress!


