We Tried the Scandinavian Sleep Method—Here’s What Happened
Here’s a crazy thought, what if each individual in a bed has their own blanket that was just for them. No sharing with their partner. No tugging or tossing during…
When we moved into our house, we were so excited to have a walk-in closet! Coming from a small closet, this was such an upgrade. Finally we wouldn’t have to triple-up clothing items on hangers. And our dresser totally fit in the closet. But over the past three years, the closet started to show signs […]
When we moved into our house, we were so excited to have a walk-in closet! Coming from a small closet, this was such an upgrade. Finally we wouldn’t have to triple-up clothing items on hangers. And our dresser totally fit in the closet.
But over the past three years, the closet started to show signs of not being functional for our needs.
The previous owners added an entire shelving system for their shoes. We don’t keep our shoes in our closet, so these shelves started to collect junk. They weren’t deep enough for folding clothing to fit on them nicely. So I had to make up a way to fold. Which meant I had to fold my husbands’ sweaters every time he wore them.
Our dresser was great, but because of its size, we couldn’t use a decent part of our bottom hanging rods.
So one day, after my dresser drawer wouldn’t close because it was stuck on a hanger rod, I decided I needed to do something to make our walk-in closet more functional for us.
I knew I didn’t want to completely redo the entire closet because that would be really costly. So I found effective ways to update a walk-in closet on a budget.
This post is sponsored by Lowes‘. All thoughts and opinions are my own. Some links contain affiliates. See disclosure for more information.
Our walk-in closet isn’t just a rectangle or square. It has five walls. Because our closet is more like a hexagon, the previous owners got creative with their storage solutions.
So I needed to figure out what was working in our closet and what wasn’t.
We have a wall of double hanging rods. This was working as it gave us tons of space to hang our clothing.
The shelving unit for shoes wasn’t working. So that could go.
And our dresser needed to be moved or removed. And since none of the other walls were long enough for the dresser, we had to remove it.
But moving the dresser meant we needed drawers for storage.
Action Steps For Updating Walk-In Closet On A Budget:
So if you are going to update your closet on a budget, start with assessing what is working and what isn’t. What are the things that can be replaced with another type of closet addition.
Use a piece of paper and fold it in half. One one side, write all the things that are working. And on the other, write all the things that aren’t working.
Decide if anything doesn’t need to stay in your closet. And if you need to replace that thing or if you can live without it in your closet.

Once we knew what was working and what wasn’t, we could measure the areas we wanted to update.
These areas were the wall with the shoe shelves, and where the long hanging section was.
We measured those walls to get specific dimensions so we could start planning what we needed to add to our closet.
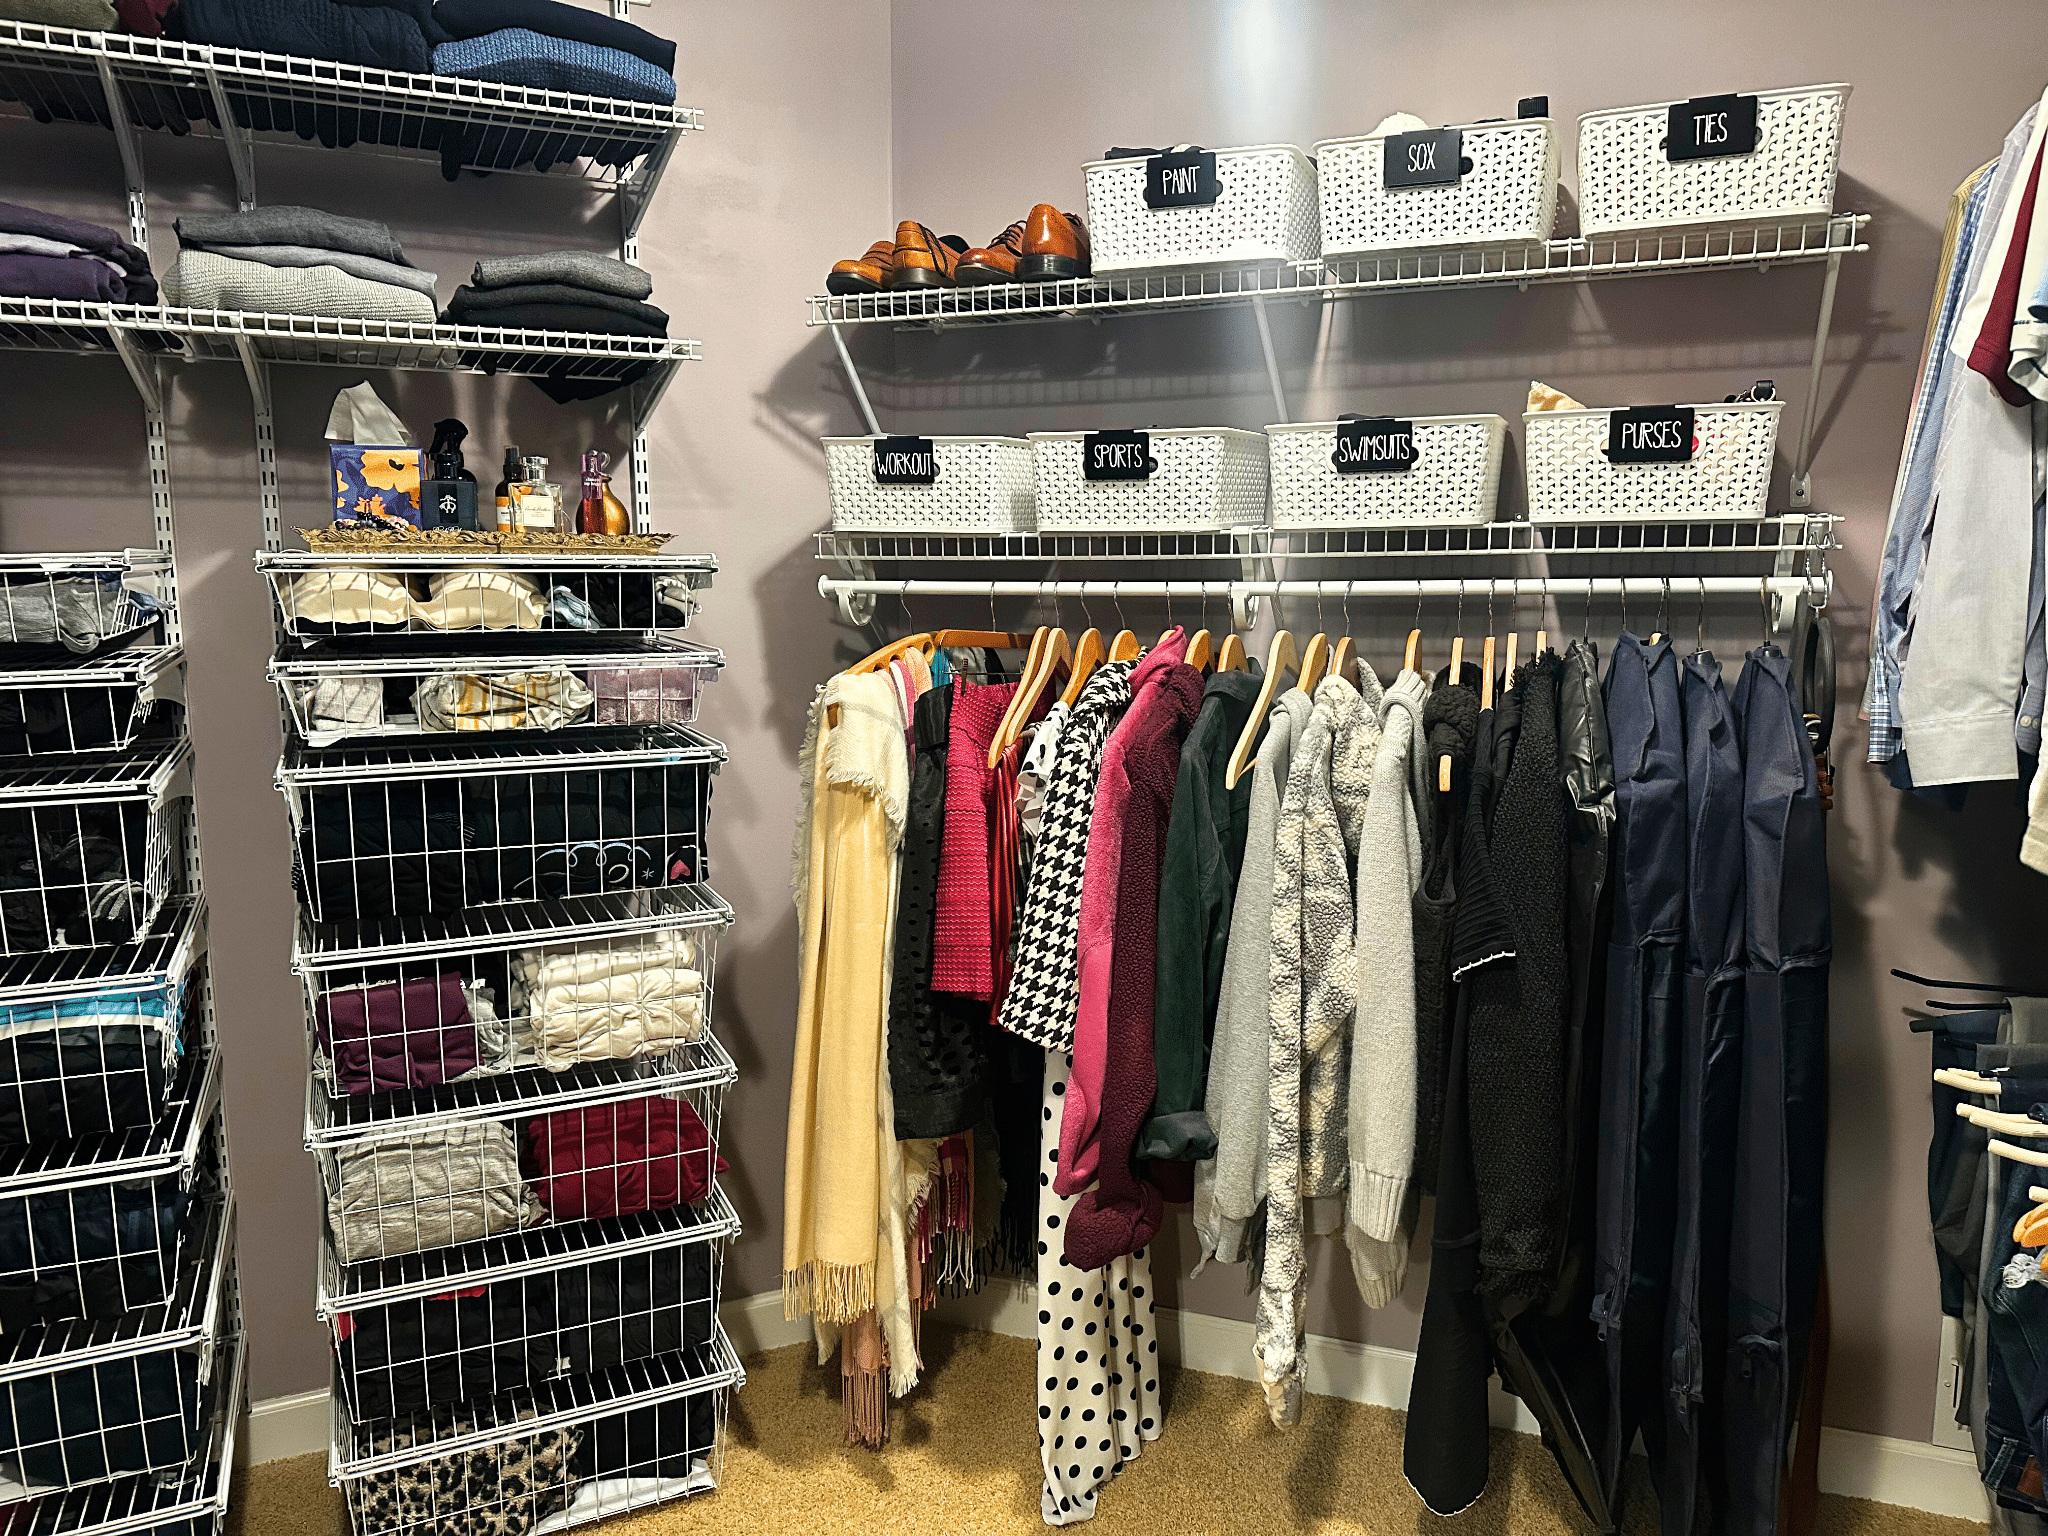
Based on measuring the two walls we would remove the current wire shelving and hanging sections, we decided the wall with the shoe shelves would be drawers for the clothing we stored in the dresser.
We would move the long hanging section to under the shelving that was above the dresser.
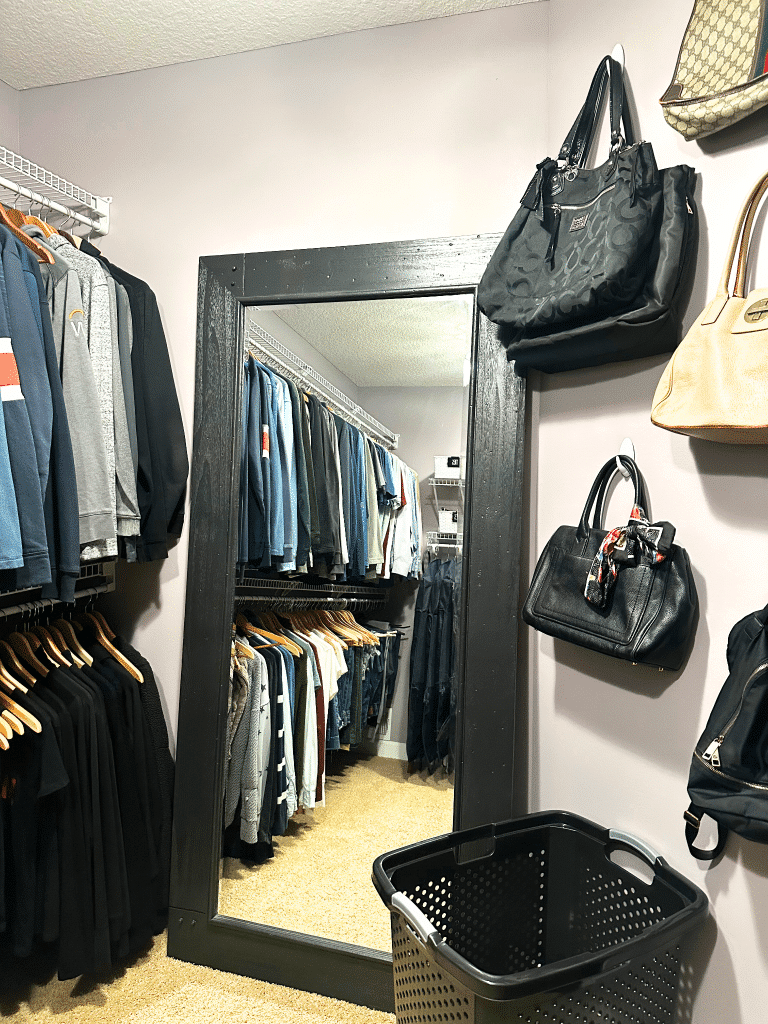
And where the previous long hanging section was, we would put in our tall mirror.
Action Steps:
Looking at your list of things that aren’t working, decide what you would need to update those areas.
Measure those areas so you know the dimensions.
Then create a plan for how you are going to use those walls in your walk-in closet. Maybe you want more long hanging sections. Or you need to add drawers to your closet. Use the measurements to help you design a plan to add to your closet instead of redoing the entire space.
We had our plan, so it was time to find the items we are going to add to make our walk-in closet functional for us.
Since we were removing the dresser, we needed to get drawers to hold our items we didn’t want to hang.
After looking closely at our current closet system, I found it was ClosetMaid. So we decided to keep it all in the same brand, and found the ClosetMaid Wire Drawer Unit.
This is the ShelfTrack system, which uses brackets to hold shelves and drawers on the wall instead of using nails and clips.
Plus, with the ShelfTrack system, you can add or remove shelving and change up things easier because it is on a bracket system.
When purchasing the drawers and brackets, measure from ceiling to baseboard. The brackets need to be flat against the wall instead of to the floor.
You will need the wall mount that the upright standard steel hang on. The upright standard steel to hang the brackets. And then brackets and shelving or drawer unit or both!
We ordered everything online then went to pick up at the store.
Action Step:
After measuring, make a plan and order the items you need to install the parts of the closet system to work in your space.
I prefer the ClosetMaid ShelfTrack System because it is adjustable. Once you set it up, you can easily rearrange the closet to work for your space without the need to patch holes every time you change something!
We decided to do this entire project over the weekend, and we got it completely done by Sunday night.
Saturday morning we took everything out of the closet. Clothes, dresser, everything!
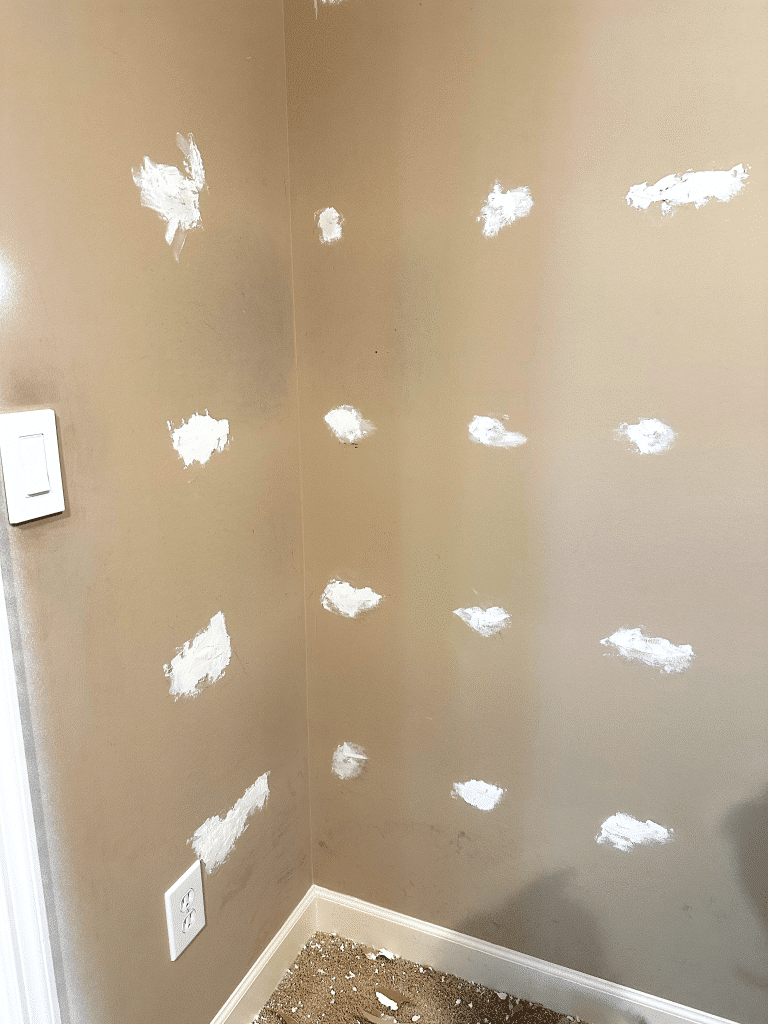
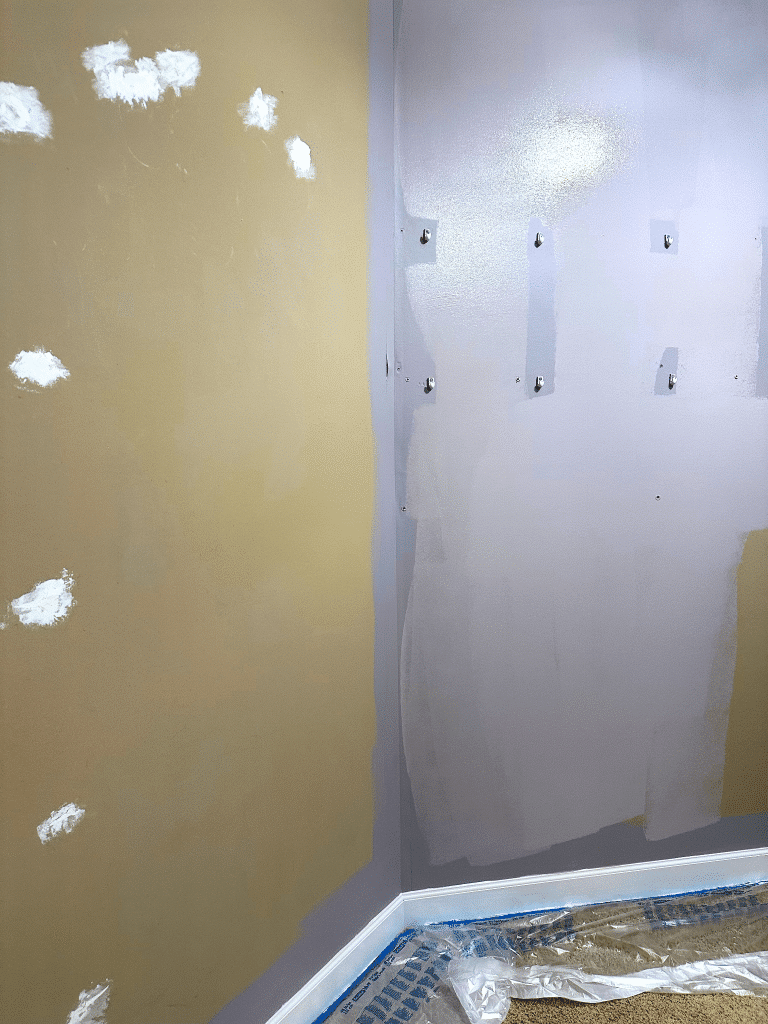
Then we removed the shelving we were replacing. And we had to patch all the holes. There were so many!
Because the wire system that was installed used so many screws and nails, we had a lot of them to patch.
We used drywall filler to fix all the holes.
While the filler was drying, we took down the shelving we were keeping to repaint the entire closet. We left the wire hooks in the wall as we knew the shelving was staying, but it was easier to remove the shelving and hanging brackets so we could paint quicker.
Once everything was off the walls and the drywall filler was dried and sanded, I washed the walls with my wall mop. This was really helpful for the painting to go quickly because the walls weren’t covered in dust.
Action Step For Updating Walk-In Closet On A Budget:
Because you are going to have to repair the walls from holes of the previous shelving systems, it is a good idea to think about touching up or repainting the closet.
After you remove all the shelving you are not keeping, repair the walls with drywall filler. Once the drywall filler is dry, sand the wall. This will allow for a smooth paint job, and the wall won’t look bumpy.
I know that paint can transform any space. Which is why I think changing paint colors is such an easy and relatively inexpensive way to transform a room.
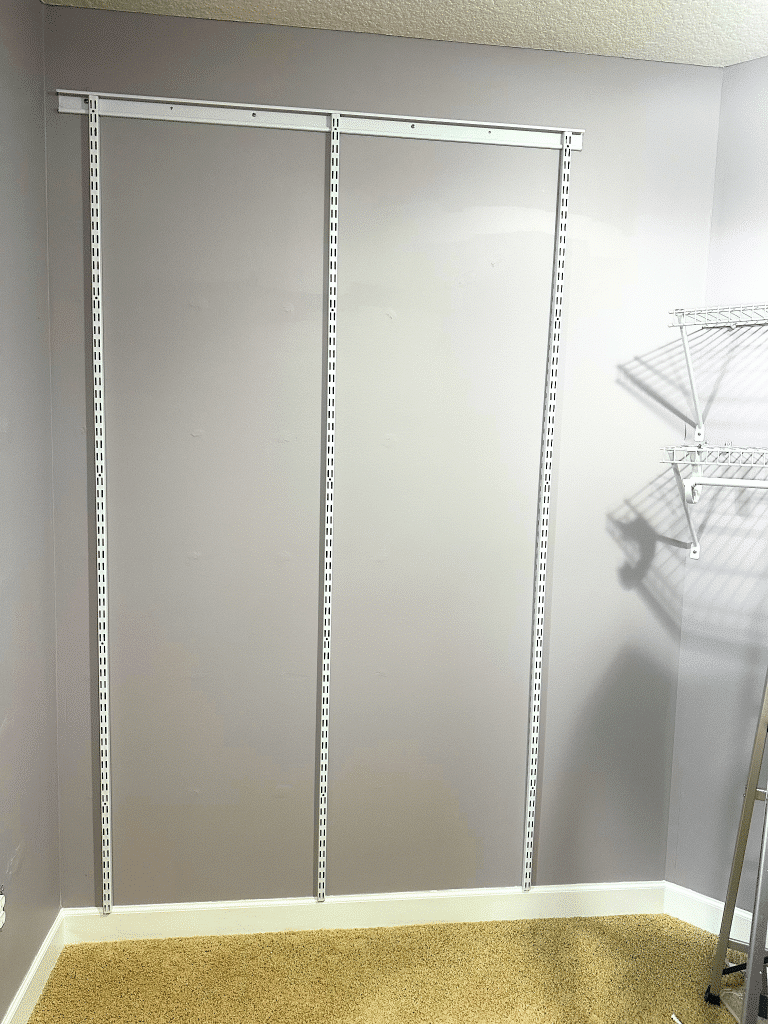
Our bedroom is Sherwin Williams Rhapsody Lilic so we used that same color for our closet.
We painted the walls two coats of the color because the previous wall color was a darker tan.
While we waiting for the paint to dry, we spent time cleaning all the wire shelving we were going to reinstall.
This way it would feel like a totally new closet!
Action Step:
If you don’t repaint the entire closet, still take time to clean your shelving you are keeping. It will probably be the only time you truly will be able to focus on removing old dust from the brackets and wire shelves.
Plus, you are already gross from removing things, sanding, and painting/touching up, so why not get a little dusty too?!

Once the paint was dry, we could reinstall the closet system shelving and hanging items we were keeping. And install the shelving system.
We started with the new system on the wall where the shoe shelves were.
Since this was a track system, it went rather quickly. Because we installed the wall mount first. Then you hang the upright standard steel rods. And then you put together the drawers.
Once the drawers were installed, we added the shelving above at a height we both felt was reachable for us.
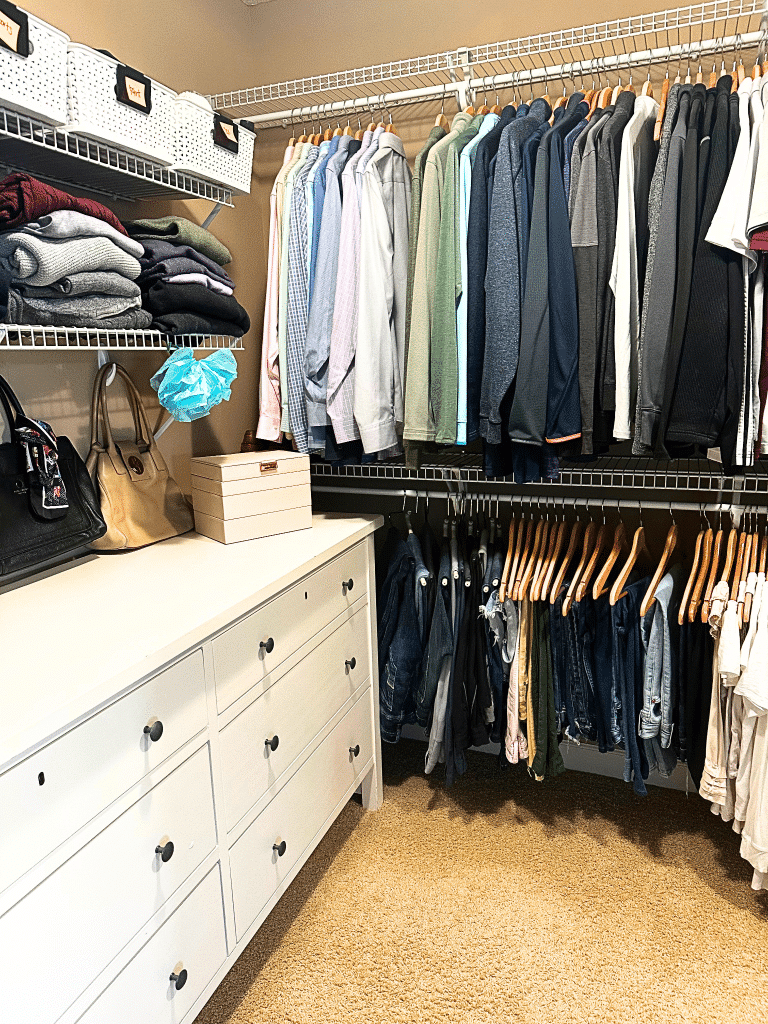
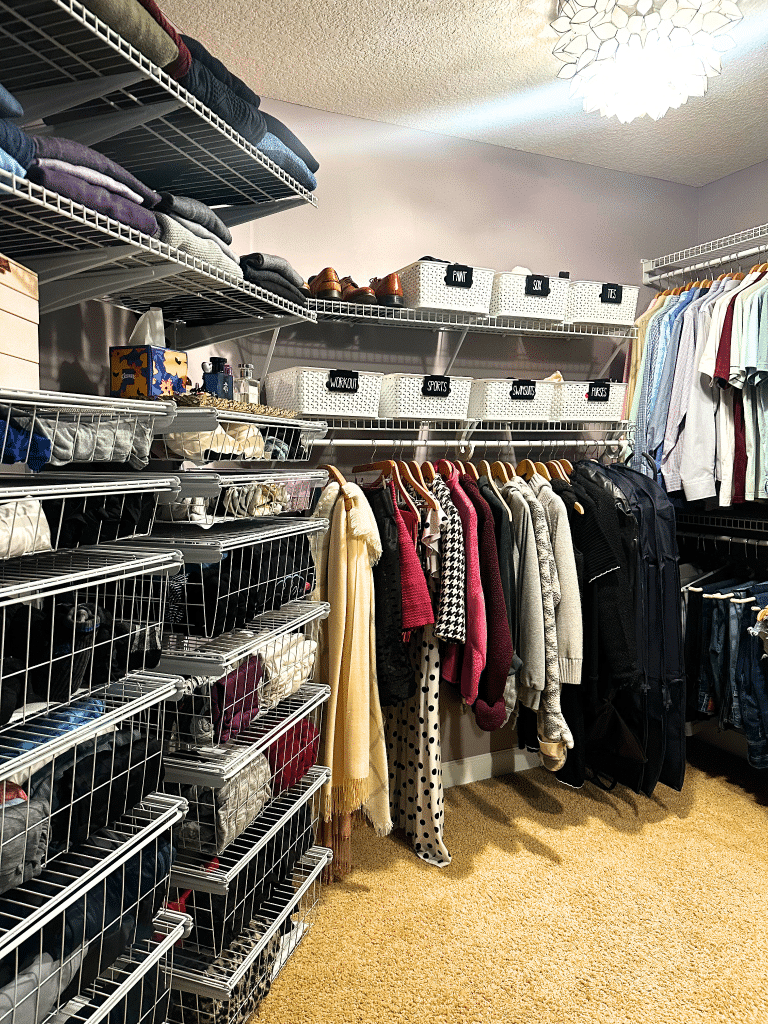
We reinstalled the long double hang section with newly cleaned shelves and brackets.
And we used the hanging bar from the previous location to underneath the shelving that was already on the wall. It isn’t as high as the previous long hang, but we only have one thing that is really long, so I am fine with the height.
We moved the mirror upstairs into the closet along the wall where the previous long hanging section was located.
And then we could add in all the clothing!
Action Step:
One thing we found when putting the previous shelving back, was making sure to line everything up in the proper place. Since our closet system is old, there was some wear and tear on some of the brackets. We were able to replace them, but just be warned to look for that.
Place the shelving and hanging back where you want. And install any new system you want to add to your closet.
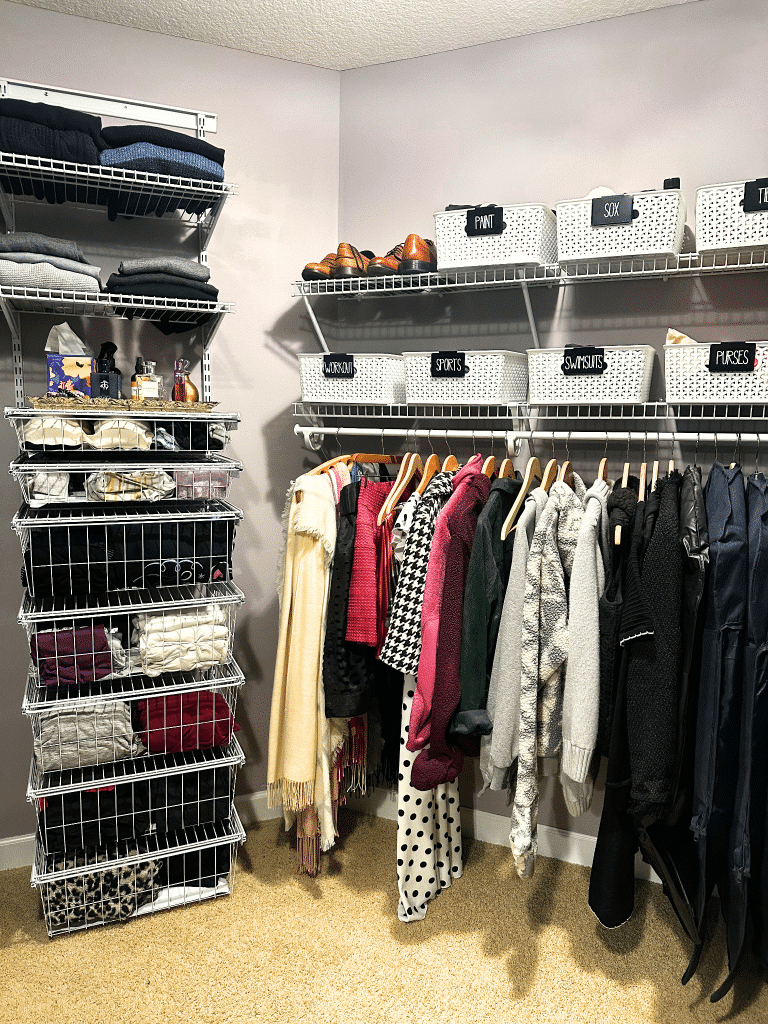
For me, this was the fun part…putting all the clothing back in the closet.
I started with all the items that were staying in their original locations, which included the two rows of double hang, and the long hanging items.
We had bins for clothing that we needed to sort through, so I took time to reorganize those bins.
Then it was time to reorganize the drawers. We started with six big drawers in the dresser for the two of use to share, and now we each have seven drawers. So I got to create a new way to organize our clothing.
Since the drawers are wire, I used EasyLiner to line each drawer.
I grouped items together by category. Then I put each category into a drawer.
One the shelves, I stored sweaters that I no longer have to fold a special way!

I have more resources on how to organize your closet below:
The Most Effective Way To Get A Color Coordinated Closet
Can You Really Organize A Closet Without Buying Anything?
32 Expert Tips On Organization Ideas For Closet Transformation

Action Step For Updating Walk-In Closet On A Budget:
Take time to set up an organizing system that works for you. Maybe you color-code your clothing. Maybe you hang clothing by outfits.
No matter what, take the time to set up a system that will last. You did all this work!
When it comes to updating a walk-in closet on a budget, you don’t have to remove all closet items you have installed.
Instead, you can tweak what you already have to make the space work for you.
Make a working and not working list. This should list all the things inside your closet… including your paint color!
Create a plan for how you are going to fix or tweak the not working list. Make sure to measure your space before you finalize your plan. Sometimes moving things around can help you rethink your closet.
Head to Lowes’ to get the closet items you are adding to your closet system. Bring your measurements so you grab everything you need without doubt.
Patch, paint, and put together your closet in a way that works for you. This includes cleaning all your shelving, brackets, and hooks. And reorganizing your clothing so they work in your new space. You don’t have to keep things the way they were after you spend time to reconfigure your closet.
You don’t need an expensive closet system. Instead, you can create a system on a budget by using what you already have and adding systems to your closet so it works for you!