
We Tried the Scandinavian Sleep Method—Here’s What Happened
Here’s a crazy thought, what if each individual in a bed has their own blanket that was just for them. No sharing with their partner. No tugging or tossing during…
Who likes to bake? I love baking, so my stash of supplies can get a little out of control. I have a wide variety of flours and sugars, along with all my supplies like cupcake liners. To tame the baking supplies, I partnered with Bob’s Red Mill to share how to quickly organize baking supplies! […]
Who likes to bake? I love baking, so my stash of supplies can get a little out of control.
I have a wide variety of flours and sugars, along with all my supplies like cupcake liners.
To tame the baking supplies, I partnered with Bob’s Red Mill to share how to quickly organize baking supplies!


I always start any organizing project by assessing what I currently have in my pantry.
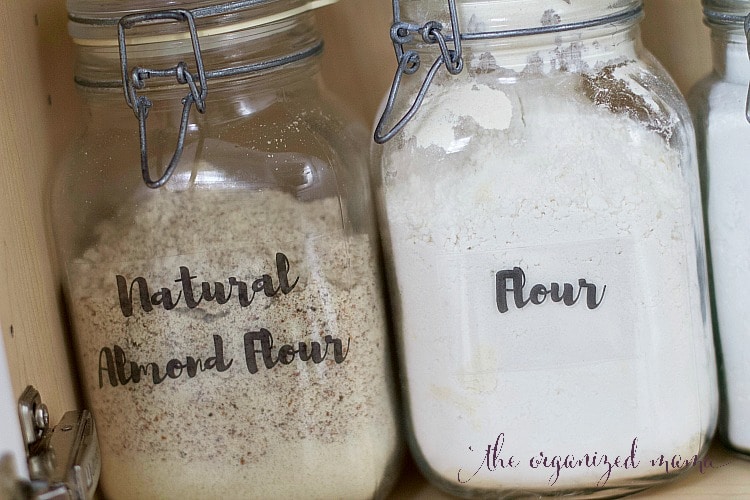
Since I love Bob’s Red Mill, I already had Coconut Flour, Gluten-Free Flour, Almond Flour, White Rice Flour, and Tapioca Flour; along with Gluten-Free Rolled Oats and Coconut Flakes.
But some of my flours were running low, so I knew it was time to grab more next grocery store run.
By keeping your baking supplies organized, you can easily add any baking product to your grocery list next time you go.
This helps prevent baking emergencies, like running out of almond flour for muffins… which has never happened to me! Ok, that’s not actually true.

While I love the packaging from Bob’s Red Mill, it doesn’t keep the flours fresh once you open them. And, just leaving them out means you get flour everywhere! And nobody likes that.
So I always transfer them into an air-tight container. There are many I use for clients, and myself.
My biggest piece of advice on selecting containers is to figure out the space FIRST! Where are you storing your baking supplies? In a drawer? Pantry? Cabinet?
Once you know location, you can figure out size of the containers to store and organize baking supplies!
Once the flours and other baking items are stored in air-tight containers, you have to label them!!
I typically use a wine pen or oil-based Sharpie to write any recipes from the packaging on the back of the container.
Since the wonderful creators at Bob’s Red Mill tested recipes, I know they have to be delish, so I make sure to write them on the back.
I also write any cooking or baking instructions that might be on there.
Now when it comes to labeling the actual flour, I love adding a special touch–hand lettering. Because who doesn’t love a pretty label?!

I created amazing printables for you to add to your baking supplies!
All of these labels go along with one of Bob’s Red Mill products.
To create the printable, follow these instructions:

I love using a variety of products to keep my baking supplies fresh, and always start with air-tight containers.
After I add some hand-lettered labels, I make sure to write down any of the recipes or instructions on the back of the containers.
So grab all those Bob’s Red Mill flours and store in air-tight containers. Label with the free printable labels using sticker paper and a printer.
Then write recipes or directions on the back of the container using a wine pen or oil-based Sharpie marker.
Now organize baking supplies by putting them away and enjoying your beautiful supplies!
Kitchen and Pantry: Organizing Strategies For The Spaces You Eat


