

Who has a ton of pictures (like the printed out pictures we use to get back in the day) lying around the basement, attic, and junk drawer? What are you doing with those special keepsake artwork pieces the kids bring home? Where are important documents and special memory items stored in your home? Don’t have a spot?? No worries!! I am going to break down my tricks for how to organize photos by sorting through, and storing photos, artwork and more!
How To Organize And Store Photos And Artwork For The Entire Family
This post is sponsored by Joann Stores. All thoughts, opinions, and ideas are my own. Some links may contain affiliates.

Collect
So you have photos…and artwork, and memory items. But are they all stored together? My guess is they are not. So the very first thing you have to do is round up all those items you need to sort through. Collect everything you want to store together. For us, all of our photos and memories were in a memory box for each family member, which included the photos. Since some of the pictures were getting bent edges, I knew I needed to separate the two.
I started by going through each of the kids memory boxes and took out pictures, artwork, stories, and other smaller items that I didn’t want to get lost or broken. This way I could organize photos and artwork without worrying about things getting crumpled or bent.
Then I had old photos in the attic from both my husband and my childhood. There were other types of memory boxes that were in the attic as well. The goal of this project is to keep everything in 1 place, making it easier for you to put away if you get more photos, pictures, artwork, or small memory items.
Sort
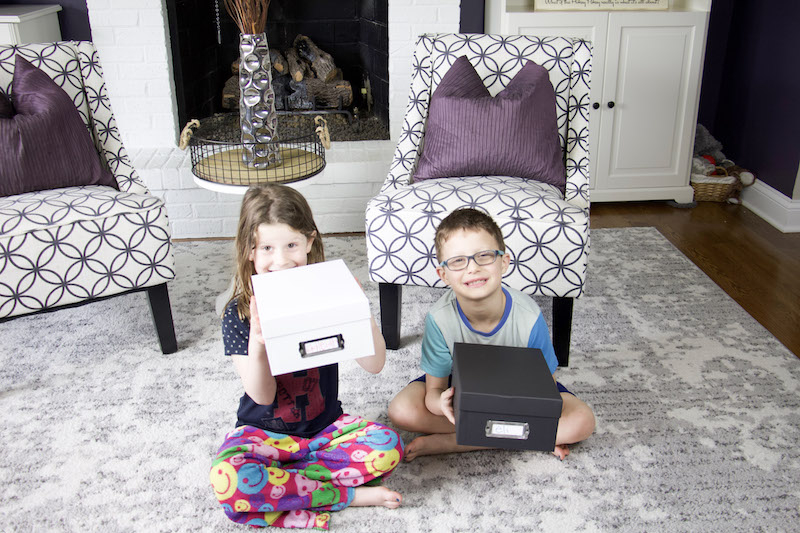
Once you have collected all the papers, artwork, and photos, sort the items into different photo boxes. I love the ones from Joann Stores because they don’t have any of the dividers inside, making it perfect for holding all different types of momentos. This will help with items getting bent or ruined by being stored in a large bin.
For our project, the girls got white photo boxes and the boys got black photo boxes.
I laid out each box along with all the photos and memories that were not already sorted. Then I grabbed a pile of photos and started sorting. The reason why I recommend only taking a handful is because the photos can easily pile up and give you a sense of overwhelm. Instead of getting overwhelmed, you are giving yourself a specific amount to sort. Then you can take a break. The task seems less daunting when broken up into handfuls!
Continue to sort until all the piles are gone, because then you don’t have to think about it again!
Store
The final piece for how to organize photos is to find a place to store that is both accessible and dark. Photos do not do well in bright sunlight. So storing your old pictures in places that get little natural light is actually better. Weird, huh! So you want to keep them stored in a place that doesn’t get natural light but is climate controlled. If you have a well insulated storage space, keeping pictures in pictures boxes may be a great idea.
You want the picture boxes to be easily accessible because when you get new photos or artwork or tiny memory items, you will want to put them away right away. That way they won’t collect dust or a pile or get lost.
For us, I keep each family member’s memory box and photo box together in our basement storage room. It is climate controlled so I don’t have to worry about the room getting too muggy or too dry. And I can store the pictures in the box simply by popping open the lid and dropping a picture inside. I don’t stack the photo boxes because I don’t want to make it difficult to put things away, so each box is on top of each members memory box.
Try to keep things as simple as you can when it comes to the photo box situation so that it is easy to keep up with!!
More Posts You May Enjoy
How To Organize Computer Files By Eliminating Digital Clutter
How To Make An Easy Baby Memory Book
Easy Systems For Organizing School Papers
Now it is your turn to start sorting through old pictures and artwork. Spread out space to collect and sort the items. Only do a handful at a time. Then store where you can easily put things away, because you don’t want to have to do a big photo sort again!

")


Comments are closed.