How to Make a Room Divider: DIY Ideas to Transform Your Space on a Budget
DecoratingDIY Projects
October 11th, 2025
Sometimes, all it takes is a little creativity to turn a room into a more functional, organized, and stylish space. Learning how to make a room divider is one of the easiest ways to do just that. Whether you want to separate a home office from your living area, create a cozy reading nook, or […]
Sometimes, all it takes is a little creativity to turn a room into a more functional, organized, and stylish space. Learning how to make a room divider is one of the easiest ways to do just that.
Whether you want to separate a home office from your living area, create a cozy reading nook, or just add a decorative element to a room, a DIY divider is an affordable and flexible solution.
The beauty of a room divider is that it’s not permanent.
Unlike walls, dividers can be moved, adjusted, or refreshed whenever your space or style changes.
Plus, they can double as storage, display, or even a creative focal point. Let’s dive into simple ways to make your own room divider at home.
Materials You’ll Need
Depending on the type of divider you want, your materials may vary:
Folding Screen Divider: Wooden panels or frames, hinges, fabric or paint, staple gun or fabric glue, saw, drill, and screwdriver.
Hanging Divider: Fabric, macrame cord, or beads, plus ceiling hooks, tension rods, or curtain rods. Sewing machine or fabric glue for finishing edges.
Bookshelf Divider: Wooden planks, screws, metal brackets, optional casters, sandpaper, paint or stain, drill.
Pick materials that suit your space, your style, and your budget.
Even thrifted or repurposed items can make a stunning DIY divider.
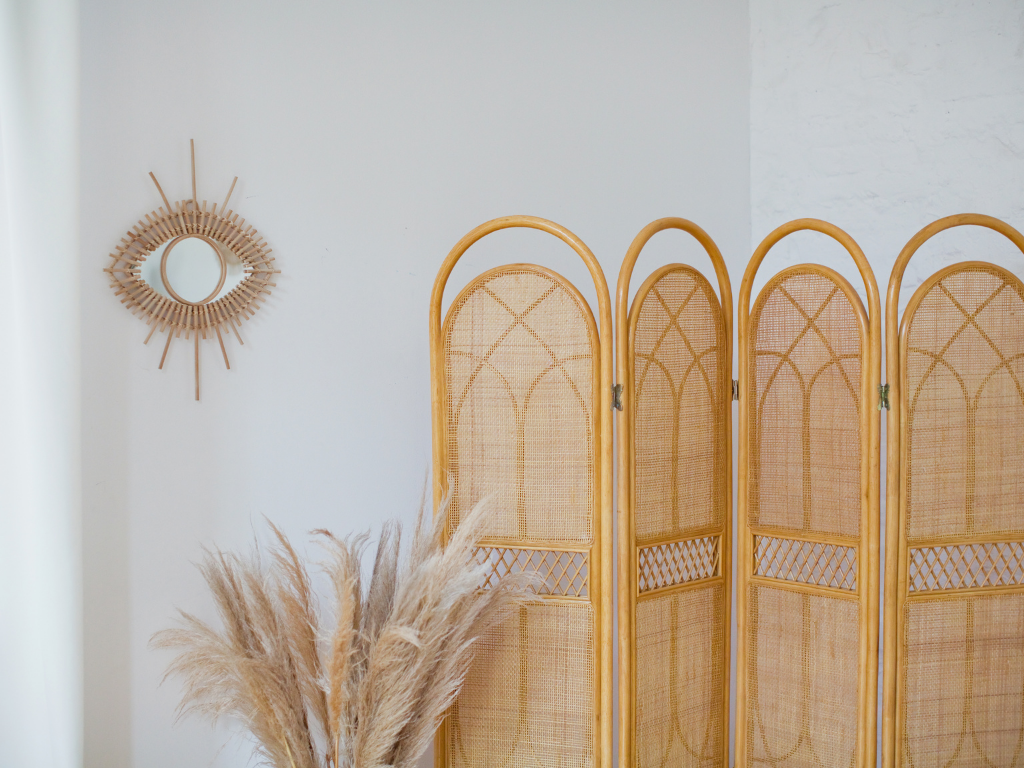
How to Make a Folding Screen Divider: Step-by-Step
Materials You’ll Need
3–4 wooden panels (plywood or MDF, 1/4–1/2 inch thick, roughly 24” wide × 60” tall)
2–3 sets of continuous piano hinges (or standard 3–4” hinges per panel connection)
Wood screws (1”–1.5”)
Sandpaper (120 and 220 grit)
Fabric (enough to cover each panel with 2–3” extra on all sides)
Staple gun and staples (or fabric glue if preferred)
Saw (hand saw, circular saw, or table saw)
Drill with screwdriver bit
Measuring tape
Pencil
Optional: paint, stencils, or fabric trim for decoration
Step 1: Measure and Cut Your Panels
Measure the height you want your divider to be—standard is 60”.
Decide how many panels you want (3–4 panels works well for flexibility).
Use your saw to cut plywood or MDF to size: each panel should be the same width (about 24”) and height (60”).
Label each panel lightly with a pencil so you know the order for assembly.
Tip: Lighter plywood (1/4”) is easier to move, especially for renters or small spaces.
Step 2: Sand the Edges
Use 120-grit sandpaper to smooth all cut edges.
Follow up with 220-grit sandpaper for a polished finish.
Wipe panels with a damp cloth to remove sawdust.
Tip: Sanding carefully prevents splinters and makes painting or covering with fabric easier.
Step 3: Attach the Hinges
Lay panels flat on the floor in the order you want them to connect.
Place a hinge along the side where two panels meet. Leave a 1/4” gap between panels so they can fold easily.
Mark screw holes with a pencil.
Pre-drill small pilot holes to prevent wood from splitting.
Attach hinges with screws, making sure they’re aligned and the panels can fold smoothly.
Repeat for all panels.
Tip: Continuous piano hinges are easier for beginners because they ensure perfect alignment along the entire panel edge.
Step 4: Cover Panels with Fabric
Lay your fabric face down on a flat surface.
Place each panel face down on the fabric, leaving 2–3” extra on all sides.
Fold fabric edges over the panel and secure with a staple gun along the back, starting in the center and working outward to prevent wrinkles.
For corners, fold neatly like wrapping a present and staple securely.
Optional: Add trim or paint on the front for a finished, polished look.
Tip: Cotton or linen works best; avoid heavy fabrics unless your panels are reinforced with thicker wood.
Step 5: Set Up Your Divider
Stand your finished folding screen in the location you want to divide.
Adjust the angle between panels for stability—slightly zig-zagged works best.
Ensure the divider doesn’t wobble. If needed, place small rubber pads or felt under the panels for extra grip on hardwood floors.
Tip: Folding screens are flexible—move them around until you find the most functional placement for your space.
How to Make a Hanging Room Divider: Step-by-Step
Materials You’ll Need
Fabric (cotton, linen, or canvas recommended; 1.5× the width of the area you want to cover for fullness)
Ceiling hooks or a tension rod/curtain rod
Wooden dowel or curtain rod (length = width of the space)
Measuring tape
Pencil or fabric chalk
Sewing machine or fabric glue for hemming
Scissors
Curtain rings with clips (optional, for easier hanging)
Step stool or ladder
Optional: macrame cord, beads, or decorative trim
Step 1: Measure Your Space
Measure the width of the area you want to divide. For example, if your divider is separating a small office corner in your living room, measure from one wall/edge to the other.
Measure the height from ceiling to floor. Subtract 1–2” so the divider doesn’t drag on the floor.
Tip: If your divider is going above a couch or desk, make sure it hangs far enough down to provide privacy without interfering with furniture.
Step 2: Cut and Prepare the Fabric
Cut the fabric to your measured height, plus an extra 2–3” at the top for folding over the rod or dowel, and 1–2” on the sides for hemming.
Hem the sides using a sewing machine or fabric glue to prevent fraying:
Fold edges over 1” and press with an iron.
Stitch or glue the fold.
Hem the bottom edge by folding 1–2” up and securing, creating a neat finish.
For the top, fold over 2–3” to create a pocket for the rod or dowel. Stitch or glue the fold securely.
Tip: If you want extra texture or movement, you can add pleats or gather the fabric slightly before stitching the top hem.
Step 3: Attach Fabric to Rod or Dowel
Slide the rod or dowel through the top pocket of your fabric.
If using curtain rings with clips: attach clips to the top edge of the fabric and hook them onto the rod instead.
Check that the fabric hangs evenly and straight.
Tip: For heavy fabric, use a strong wooden dowel or sturdy metal rod to prevent sagging.
Step 4: Install Ceiling Hooks or Rod Brackets
Mark the ceiling where you want the divider to hang. Ideally, the hooks should be spaced slightly wider than the width of your rod for stability.
Drill pilot holes if using screws, then install the ceiling hooks or rod brackets securely.
If you’re using a tension rod, extend it to fit snugly between the walls or window frame.
Tip: Double-check that your rod is level before fully tightening hooks or brackets.
Step 5: Hang Your Divider
Lift the rod/dowel with the fabric attached and place it into the hooks or brackets.
Adjust the fabric so it hangs evenly and covers the space fully.
Angle or fold the fabric slightly if you want a zig-zag shape for extra stability.
Tip: If using macrame or beaded cords, space them evenly and tie securely to the dowel. For added privacy, layer fabric panels or overlap multiple hanging dividers.
Step 6: Finishing Touches
Smooth out wrinkles and folds in the fabric.
Add decorative touches like trim, pom-poms, or a curtain tieback for style.
Step back and adjust for maximum privacy and light flow.
Pro Tip: Hanging dividers are great for small apartments or multi-use rooms because they can be easily removed, folded, or swapped seasonally.
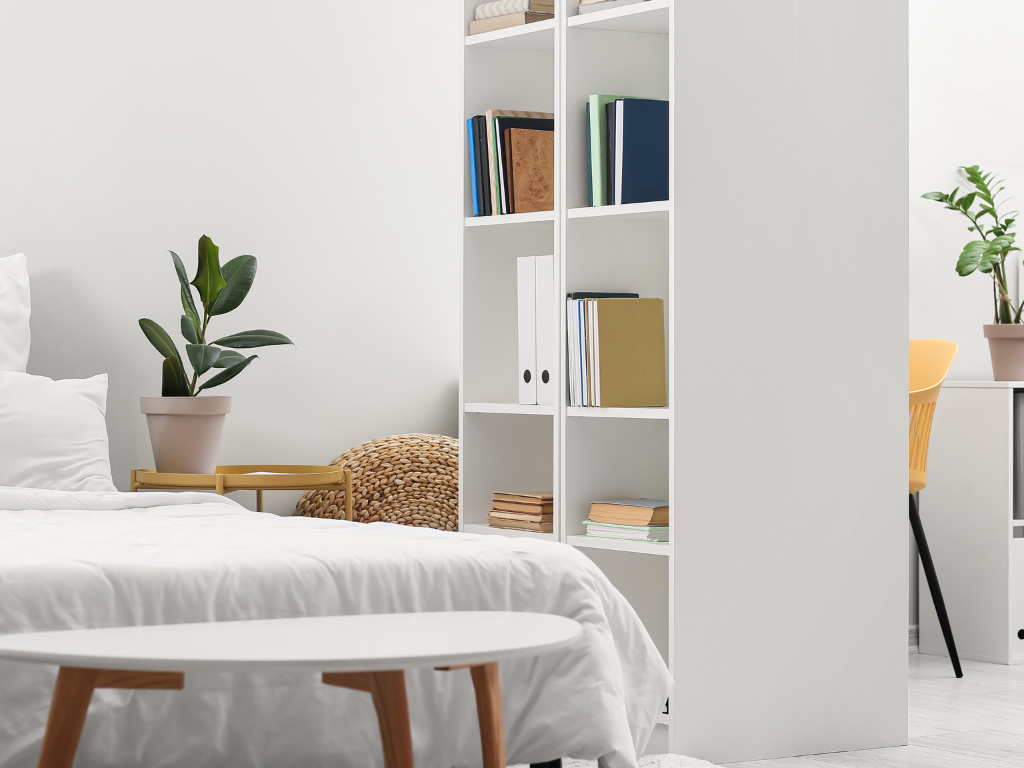
How to Make a Room Divider Using an IKEA Kallax
The IKEA Kallax is one of the easiest and most versatile ways to create a stylish room divider without building anything from scratch. With its sturdy cubby design, it provides storage, display space, and visual separation in any room. Here’s a step-by-step guide on how to make it work as a divider.
Materials You’ll Need
1–2 IKEA Kallax units (depending on your space; 2×4 or 4×4 cubes work well)
Furniture anchor kit (to secure the unit for safety)
Optional: casters (IKEA Råskog casters or similar)
Optional: fabric, baskets, or decorative boxes to hide clutter
Decide where you want the divider. For example, between a living room and dining area or to separate a home office from a bedroom corner.
Measure the width and height of the area to ensure your Kallax fits comfortably.
Leave at least 1–2” of clearance on each side for stability and airflow.
Tip: Two Kallax units stacked create a taller divider (roughly 70–80” high with 2×4 units stacked).
Step 2: Prepare the Kallax Unit
Assemble the Kallax according to IKEA instructions if it isn’t pre-assembled.
Sand any rough edges if needed, especially if you plan to paint or stain.
Decide if you want to stack units vertically. If yes, make sure both units are level and aligned.
Tip: Stacking units doubles your storage but requires anchoring to the wall for safety.
Step 3: Add Mobility (Optional)
Attach casters to the bottom of the unit if you want the divider to be movable.
Make sure casters are locking types to prevent unwanted rolling.
Test movement and ensure the unit is stable when stationary.
Step 4: Anchor for Safety
Use a furniture anchor kit to secure the Kallax to the floor or wall (especially important if stacking units or if children are in the home).
Follow the instructions included with the anchor kit carefully.
Check that the unit is level and stable before styling.
Tip: If your divider is in the middle of a room and not against a wall, you can anchor it by attaching L-brackets to the back and securing them to the floor. Place the brackets at the top corners and ensure they are level. This keeps the unit stable without needing wall access.
Step 5: Style Your Divider
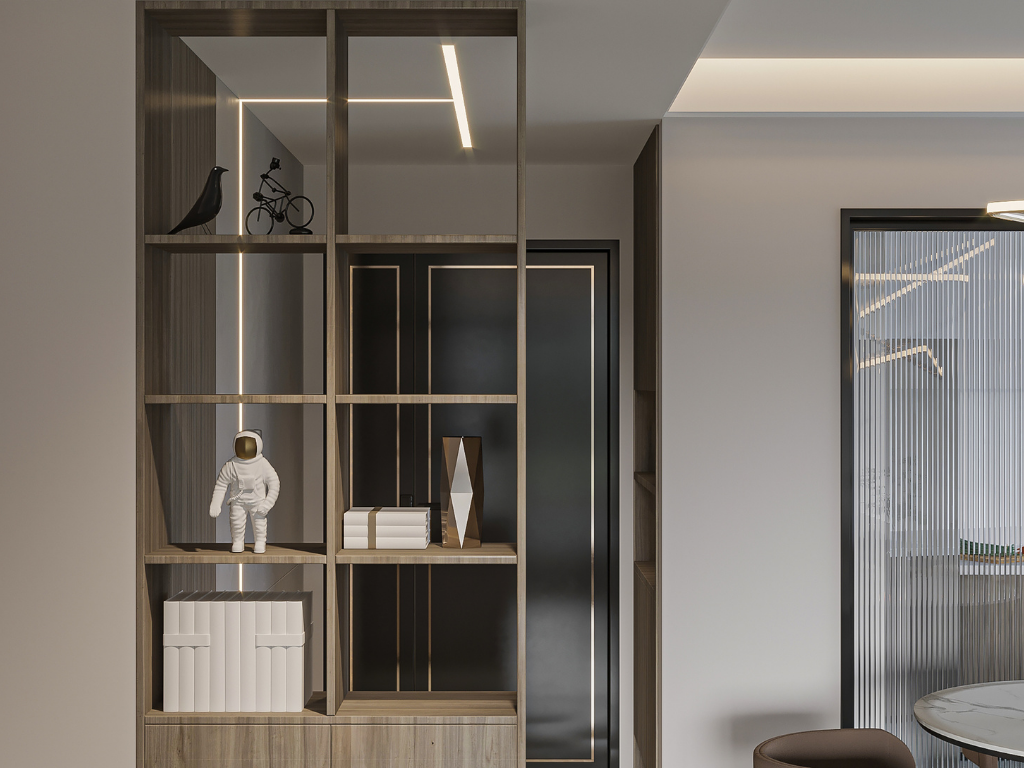
Fill the cubbies with a mix of functional and decorative items:
Storage baskets for clutter or supplies
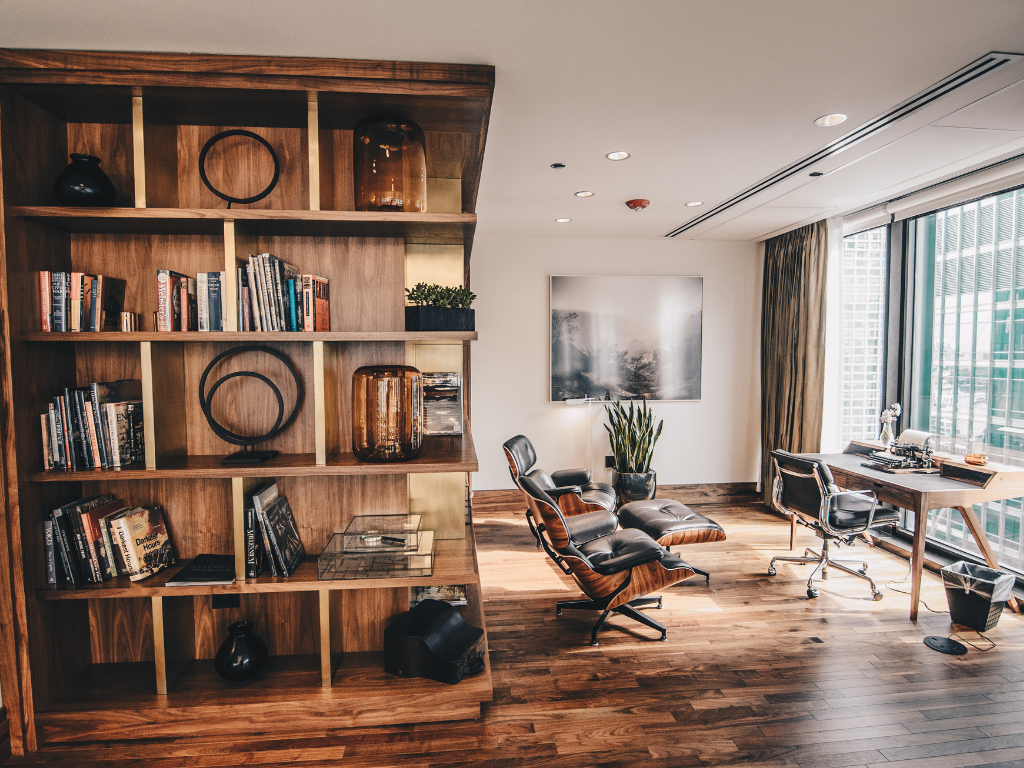
Books for a classic divider look
Plants to add greenery and soften the divider
Decorative objects like picture frames, candles, or sculptures
For a cleaner look, hide unsightly items in baskets or fabric bins.
Rotate or change decor seasonally to refresh the divider without extra construction.
Tip: Use baskets that fit snugly in Kallax cubes for a cohesive and organized look.
Step 6: Position Your Divider
Place the Kallax in the space where you want it to divide the room.
Angle slightly in a zig-zag if you need extra stability for taller stacks.
Step back and ensure it visually separates the area while maintaining flow and light.
Optional Customizations
Paint or stain: Update the Kallax with chalk paint, spray paint, or wood stain to match your decor.
Add fabric panels: For extra privacy, attach fabric to the back of the unit using velcro or small nails.
Stack with different heights: Use a 2×2 unit on top of a 2×4 unit for an interesting staggered look.
Creative Ideas for Your Divider
Making your divider functional is important, but adding personality makes it truly yours:
Photo Display: Attach photos to a folding screen for a personal touch.
Plant Divider: Use vertical planters or hanging pots for a living green wall.
Repurposed Materials: Old doors, windows, or shutters can be transformed into a unique divider with paint, fabric, or mirrors.
Even small touches like string lights, garlands, or seasonal decor can make your DIY divider feel intentional and styled.
Budget-Friendly Tips
Repurpose old doors, shutters, or pallets instead of buying new materials.
Use fabric remnants or discounted textiles from craft stores.
Borrow tools from friends, family, or a local tool library to avoid extra expense.
With a little creativity, your divider can be beautiful, functional, and affordable.
Maintaining Your Divider
Wood Dividers: Dust and touch up paint as needed; apply protective finish if necessary.
Fabric Dividers: Spot clean or machine wash; reattach carefully once dry.
Plant Dividers: Water, prune, and rotate plants for even growth.
Proper care keeps your DIY room divider looking fresh and functional for years.
How To Make A Room Divider
Learning how to make a room divider is all about balancing function and style.
Folding screens, hanging dividers, bookshelf partitions, and repurposed materials all give you the ability to define your space, add privacy, and express your creativity.
With the right materials, a little effort, and some imagination, you can transform your room into a more organized, stylish, and personalized space.
Your DIY divider can be as simple or elaborate as you like—it’s all about what works for your home and lifestyle.
Hey, I’m Jessica! Welcome to The Organized Mama—where organizing is made ADHD-friendly, doable, and totally overwhelm-free. As a former in-home organizer (and mom!), I’m here to help you simplify your home with easy-to-follow systems that actually work with your brain, not against it. Whether you're organizing with kids, figuring out where to start, or just feeling buried in stuff, you'll find real-life tips and support right here.
Here’s a crazy thought, what if each individual in a bed has their own blanket that was just for them. No sharing with their partner. No tugging or tossing during…
I am obsessed with labels. I think they help with organizing everything. And there are many ways to label things in your home. One tool I use to label is…